DVDs may be great to watch but it’s too hard finding the one you want and then having to put it into the DVD player. Copying it to a hard drive makes it easier to use and protects it from being damaged too.
Why Store a DVD on a Hard Drive?
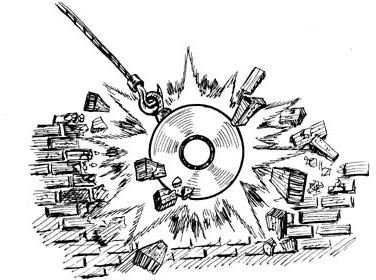
Everyone knows how to use a DVD. And storing them is easy because the case they come in is lightweight. But after you’ve gotten a few dozen (or hundred) DVDs on a shelf, it’s not that easy to find the one you want. Plus it’s a fact that a DVD can be easily damaged if you’re not careful - fingerprints, an accident with the DVD player or that young niece stepping on it are all possibilities that can occur.
There’s nothing wrong with having DVDs, but why not make them easier to use and more versatile? Copy them to your computer’s hard drive and you’ll have even faster access to them. Plus it’s really, really hard to get peanut butter on them (the keyboard, maybe so). Besides the fact that there’s no disc to be damaged, it also now becomes possible to view the DVD through your home network and on mobile devices connected to the network as well. All of which wasn’t possible before.
The Copying Process
Copying a DVD to the computer’s hard drive is fairly simple, and similar in execution whether you’ve a PC or Macintosh computer. At its most basic, you put the DVD to copy in your computer’s DVD drive and run a copy program designed to “rip” the DVD. The end result being a Video_TS folder which contains all of the elements that made that DVD. Then you just access the Video_TS folder using a DVD program on the computer and watch it normally - operating the controls on the DVD program to execute the same results that the remote of the stand-alone DVD player would do.
You’re not restricted to copying the entire DVD either. Some programs will let you copy just the movie part of the DVD, leaving out the extras and bonus features if you should so choose. There are even programs that can be run after the DVD has been copied to leave just the movie.
Examples of Copying
So an example on a Macintosh. Put in the DVD and run Mac the Ripper which is a free program. Leave the controls as they are and it will copy the entire DVD. Or segment the DVD and just copy the movie or parts of the DVD that you want. Either way, after indicating where the copy should go to - just start ’er up and in a little while it’s finished. The Video-TS folder that results can now be filed into a special folder for DVDs if you like or placed wherever you want. To watch it, just launch the Apple DVD player and have it select a Media File to play - which in this case will be the Video_TS folder. Hit the play button on the DVD program and proceed as normal. To store just the movie, running a program like Turbo.264 HD will let you toss away all but the movie and then save it in a format for easy viewing - say those wanting to use their AppleTV.
Of course there are other programs available for the Macintosh for ripping DVDs, some costing money and some with more complexity. The basic procedure is simple, as you can see, and one that pretty much anyone can do.
It is just as easy for PC users who are looking for a solution for ripping DVDs . A number of programs are available for use that basically do the same thing as on the Apple side. One example being DVDFab Decrypter which not only rips the DVD but can convert it to a format for viewing on other devices if desired (such as a PSP, iPod, etc.).
What About Copyright Laws?
Of course I’d be remiss not to note that there are serious copyright issues at play here when it comes to copying a DVD. These must be taken into consideration, but as I’m not the thought/copyright police, it’s up to you to decide what specific laws apply to you. I do know that many people copy DVDs to their hard drive for archival and other purposes.
The Last Word
Copying a DVD to a hard drive makes for an elegant solution to the problems that DVDs are prone to. As your collection grows it might seem that there are too many to deal with - so I suggest you get started right away.


