Whether it’s an issue of lack of room, decor or esthetics, mounting a DVD player on the wall is a solution worth trying.
Too little space
Has anyone here had to deal with too much home theater and too little space? That was my problem when I lived in the typically small New York apartment. So I ended up using the only space I could to hold my home theater equipment- the walls. Years of dealing with mounts for TVs, followed by projection screens taught me to fear a poor job of mounting more than a rent increase. And I’d never think to mount something as small and electronically delicate as a DVD player. But having had some serious back pains recently, I have to admit that there is something appealing about having the disc tray at a level height so I don’t have to bend down to a table or rack to pick up or insert a disc….
So I’ve decided to give mounting a DVD player a shot - two actually, because I’m going to mount my Blu-ray as well.
Choosing a mount
There’s a lot of mounts out there, but my criteria is to find a mount large enough to hold a DVD player, while not being too massive. And even more important is that it needs to have some way of keeping the DVD player in position - gravity alone can’t cut it when you live in quake-ridden California, as I do now.
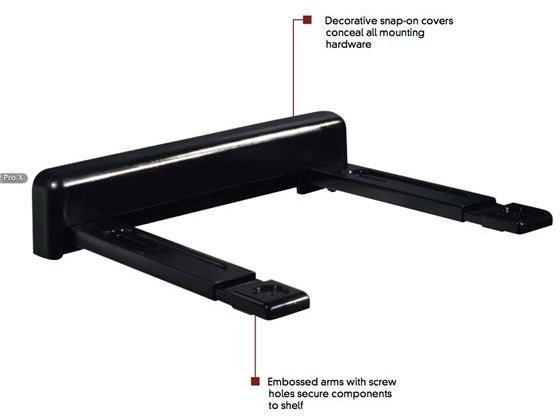
I was able to find two good choices for doing this - both including all the hardware needed. Peerless’ Paramount Component Shelf will work well for the Blu-ray player as it uses two embossed arms, rather than a shelf, that screw into the bottom of the player to hold it into position. The width (up to 18”) and depth (15-23”) are adjustable and there’s a leveling feature to make it all correct. Even a snap-on cover to conceal the mounting hardware. It’s a nice glossy black too.
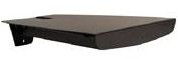
My other choice, Chief Manufacturing’s black PAC101B Accessory Shelf, has a nice compact design that makes for unobtrusiveness and is fine for my smaller DVD player. It differs from the Peerless in that there’s two steps: you’ll be screwing in the shelf base to the wall, and then aligning and securing the shelf to the shelf base before plopping the DVD player down onto it.
Basics of wall mounting
With both of these mounts, securing them to the wall properly is paramount. Since it’s a drywall that I’m using, I have to insure that the mounts will line up against the wood studs inside (the Peerless requires two studs, while the Chief only one). I’m making holes to correspond to the studs placement holding up the mounts, then screwing them into place using an electric drill.
As it’s all being done at below eye-level anyway, no need for a stepladder. But besides catching the shreds of the drywall while drilling, I did also lay down some newspaper to catch any dust that might be falling. Had I been dealing with a concrete/cinder block wall and metal studs, of course my entire process would have been different.
Both mounts easily were positioned in place, and I liked the fact that the Peerless includes a safety belt to wrap around the back of the DVD player just in case (Chief also has a safety strap, but while it’s optional I do recommend it as otherwise you’re just counting on gravity alone to hold the DVD player to the shelf).
Of course now that I’m done, I hear from Samsung who points out that I could have avoided all of this and had Blu-ray playing capabilities as well as DVD by getting their BD-P4600. So okay it is very thin and lightweight which makes good sense for doing something like this - as does the fact that it loads in discs from the side. But the main attraction is that its compact design has been specially created for wall mounting. Which means no shelf because the player goes onto the wall on its lonesome. Just wall mount the included bracket to the wall as you would conventionally do (using studs with a drywall as is the case here) and then slide the BD player into the bracket’s corresponding slots. That’s it.
Dealing with wires
Now no matter how you get that player up on the wall, there’s still going to be the issues of trailing A/V cables for picture and sound. And even if you knock them down to a single one by using an HDMI cable, there’s still going to be the power cord hanging there as well. Not owning my apartment means I can get away with screws, but no way I can make holes in the wall - nor am I willing to take the chance of meeting electricity by not being a certified electrician.
That doesn’t mean there aren’t solutions for these problems either: in my case I just placed the shelf holding the DVD player so that my front right speaker covered the wires and power cord snaking down from casual line-of-sight (I knew I’d be doing this - a little pre-planning taking this into account). But the important thing is that now my back continues to thank me every time I go to watch a movie.
Resources
Peerless Paramount Component Shelf
Samsung BD-P4600 Blu-ray Disc Player


