If you are researching how to build an electronic toy car, you need not go beyond the level of high school science projects. It is as simple as taking a brushed DC motor to rotate a pipe that acts as the rear axle, and powering an electromagnet to a permanent magnet for movement.
The Motor
The basic component of a simple electric toy car is the motor. Most toys that operate with batteries use the brushed DC electric motor that works by attracting an electromagnet toward a permanent magnet. Reversing the polarity of the current through the electromagnet when the electromagnet and the permanent magnet come close repels the permanent magnet and moves the object attached to the motor.
The major components of a basic brushed DC electric motor are:
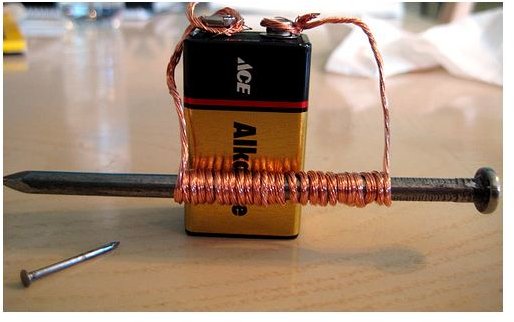
- An electromagnet. Use an iron rod and speaker wire to coil the electromagnet.
- A permanent magnet, to push and pull the electromagnet. A common refrigerator magnet suffices.
- A commutator to pass and reverse the current to the electromagnet. Use a copper pipe cut into two as the commutator.
- A shaft or a bar that holds the electromagnet and commutator and turns on applying current. A good option is a wooden skewer enclosed in an aluminum pipe, with a cap to hold it in place.
- Brushes, made with screw with a flat top and thick wire, to conduct electricity from the battery to the commutator.
- A switch, which requires sheet copper and an adhesive rubber button.
- A base, which may be a plastic tray, cardboard, plywood, or any flat, hard surface about 4 x 6 inches.
- A 9V battery, nested in a battery connector, and wires
Making the car requires four tight angle brackets, four round buttons or bottle caps for wheels, cardboard or plywood for the chassis, super glue, wires, and electric tape. The tools required are a power drill, and a glue gun.
How to Assemble
The procedure to make the motor is as follows:
- Make the electromagnet by coiling the speaker wire around the iron rod. For best results, use a power drill to make about 500 turns for each coil.
- Take the base and fit two right angle brackets near two ends.
- The shaft acts as the rear axle of the car. Pass the shaft through the protruding sides of the right angle brackets and secure it on both ends. Each side of the shaft should protrude from the base by a tiny amount - less than a tenth of an inch.
- Attach wheels at either end of the shaft.
- Attach the electromagnet to the shaft with super glue.
- Glue the commutator to the shaft using a glue gun.
- Tape the ends of the speaker wire of the electromagnet to the commutator with electric tape.
- Make brushes wrapping tick wire around screw. Bend the ends of the wire so that it touches the commutator just enough to transmit electricity but not enough to slow the motor. Ensure that the brushes do not touch the commutator plates and cause a short-circuit.
- Attach the brushes to the 9V battery at the other end. Nest the battery in a battery connector, and connect using wires.
- Fix the permanent magnet directly aligned to the electromagnet.
- Make a switch by joining two pieces of bent sheet copper with an adhesive rubber button, and connect the battery connector to the switch.
- Fix two additional right-angle brackets at the opposite ends of the base. Pass another shaft, and attach wheels at either end.
Those looking at a quicker and easier method of how to build an electronic toy car can simply buy a Super Speed 9-18V DC Hobby Motor, available at most places for under $6; directly connect the shaft and batteries to it.
Now all that remains is to give it the appearance of a car by mounting a suitable chassis atop the base containing the motor.
Cut the plywood or cardboard to the desired shape, making sure the measurement aligns with the size of the base. A simple method that eliminates such work, handy if the car does not require proper appearance, is taking an old candy tin and slicing it vertically. Fix the chassis to the base. Read this Bright Hub article on innovative ways to make a toy car chassis. Paint the chassis, or paste stickers as desired.
How It Works

When the current passes through, the electromagnet ’s North Pole attracts the South Pole of the permanent magnet, and the electromagnet’s South Pole attracts to the permanent magnet’s North Pole. When the electromagnet’s North Pole comes close to the permanent magnet’s South Pole and the electromagnet’s South Pole comes close to the permanent magnet’s North Pole, the commutator reverses the current inside the electromagnet, reversing the North and South Poles of the electromagnet. The magnets now repel and the sides of the electromagnet attract to the opposite sides of the permanent magnet, and the motor continues to turn. The shaft turns and the object moves.
While the basic method is easy, making a good car requires careful work to ensure that the wheels remain in alignment, the layout of the motor and battery fit the base and the chassis, and the chassis is cut to proportion.
Reference
- Lienhard, John H. “Electric Toy Making.” https://www.uh.edu/engines/epi1936.htm . Retrieved July 15, 2011.
- “Building an Electric Motor.” https://www.evilmadscientist.com/article.php/ElectricMotor . Retrieved July 15, 2011.
Image Credit:


