Holga cameras have been around for years given photographers the chance to create unique effects that no two Holga cameras can reproduce. Learning to use one can help you give your photos the create flare you are looking for. The point and shoot feature makes using a Holga camera simple.
History
Several decades ago in 1969, a businessman in China named T.M. Lee decided to try himself in the electronics business and started a company named “Universal Electronics Industries” which was specific for the manufacture of flash units. With the changes in the
electronics industry, cameras were beginning to be designed with built-in cameras. In 1981, Lee designed the first Holga camera. The design consisted of an inexpensive camera comprised of a 120 roll film in black and white. Using a Holga camera was less challenging than other cameras, which is exactly what Lee wanted to achieve.
However, with the adoption of the 35mm film format in foreign cameras, the Holga camera began to be distributed outside of mainland China. Many artists and photographers began using a Holga camera and the Holga became well known for its surrealistic, impressionistic scenes. The camera is famous for its lack of precision, inexpensive quality and light leaks, as well as edge distortion features.
Various artists and everyday people commonly use the Holga nowadays across the world due to its simplicity. The artist can focus on the subject or meaning of the image being taken rather than be distracted by technology. It is generally known as the Holga toy camera and has been updated to various versions including the 120 models and series. The many models in the series are based on the 120S and 120N.
Formats: 120N, 120S and Others
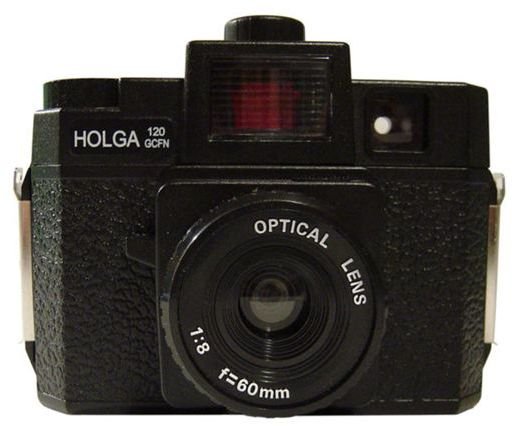
The Holga 120 series is the most commonly known series of the camera. Many cameras in the 120 series are based on both the 120N and 120S. Although the two cameras are similar, there are a few slight differences between these two common models.
The 120S was the original Holga camera and is currently discontinued. This camera has a fixed shutter speed of 1/125th of a second, as well as an adjustable focus and plastic 60mm f/8 meniscus lens. The 120N camera is an updated version of the 120S using the same lens. This camera includes a tripod and bulb exposure mode. Some of the cameras have an f/11 aperture, along with the f/8, which can be used when it is sunny or for bright light situations. The f/8 aperture can be useful in a cloudy setting.
Although the original 120S and 120N did not have a flash, many of the newer versions include a built-in flash. The main difference between the two cameras is that the 120S uses a 6x4.5 centimeter film mask and the 120N uses an additional 6x6 centimeter film mask. The vignette effect can be more successfully achieve with a 6x6 mask. While the two masks are similar, with the 6x4.5 format, you will get 16 exposures and the 6x6 format will give you 12 exposures.
The 120N and 120S are the most common Holga camera formats in the 120 series. However, other series include the 110 series, which is panoramic and micro. The series that includes the 35mm film is the 24x36mm series. The main difference between the series is that the latter has advanced functions. This series includes the 135 formats, which create the vignette effect and have infrared focus.
Usage Information
Using a Holga camera is simple because it is a point and shoot camera that requires little photographic experience to use. The primary advantage of these cameras is that they are all very similar. Once you learn how use one of the cameras, you can transfer the knowledge to the other cameras. The most important part of using the Holga camera is knowing how to insert the film correctly. Once the film is inserted, you simply have to point and shoot at your subject.
How to Use a Holga Camera:
Step 1: Open the back of the camera by sliding the knobs on either side of the camera to prop open the back.
Step 2: Open the film that corresponds to your Holga camera. Pull out the lead that will go into the spool and insert the film into the left side compartment of the camera. Secure the film in the roll in chamber by sliding the lock pin.
Step 3: Tuck the tapered end of the lead into the slot on the take-up spool. Wind the spool a small amount to secure the film.
Step 4: Shut the back of the camera by reattaching the back cover and sliding the knobs into their position.
Step 5: Wind the film to set the film advance counter. Generally, you should see a number “1” at the back of the camera. The film is now set for its first exposure.
Step 6: Focus the camera by using the lens marks on the lens barrel. Rotate the barrel to choose one of the four focus mark settings. You can choose your own setting by rotating the barrel to anywhere in between the four settings.
Step 7: Point at your subject with the camera and press the button to take the image. Wind the camera between shots.
Note: The camera is generally used with 120 mm film. You may also have to tape the back of the Holga to hold the film in place and for extra security. Cover the metal clips or knobs to hold the camera in place.
Shooting Tips
Holga cameras are known for their light leaks and the creative look they can achieve with their photos. There are a few tips for using a
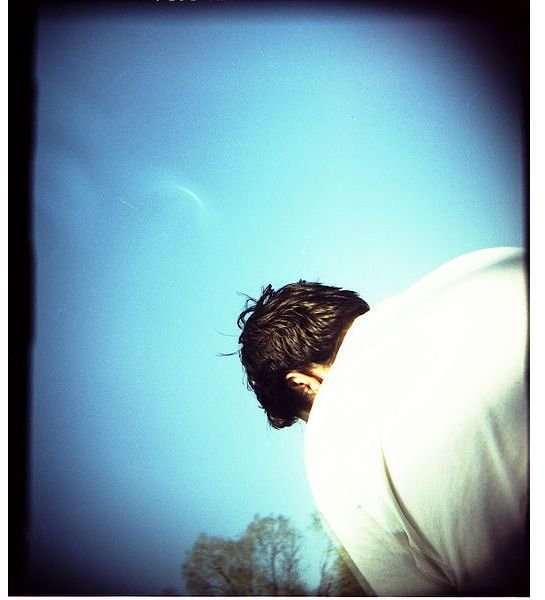
Holga camera, which can help maximize the effects the photos will have.
- Electrical tape can be used to add security, but also minimize light leaks. Tape the seams of the camera with black electrical tape to minimize light leaks.
- Painting the inside of the camera with a matte black can cut down on reflections in the camera. Generally, the camera is a semi-shiny lustrous black.
- Holga cameras require a lot of light for some shots. You will have to use the flash for shots that are not in bright sunlight.
- The switch at the bottom of the camera should be set to the Normal (N) setting. The Bulb (B) setting can be used at night for long exposures. However, you should return to the Normal setting to avoid blurring and overexposure.
- If you want the effect light leaks can give you, simply open up the back of the camera very slightly with the film still inside.
- Holga cameras allow the user to add a black and white vignette effect on their photos. This effect can be achieved by removing the film mask before inserting the film. The film mask is a large plastic square that is placed over the lens. Remove the film mask by carefully pulling it out before you change or insert the film in the camera.
References
Image Credits:
Wikimedia Commons/Mark Wheeler
Wikimedia Commons/CIngre
References:
Freestyle Photographic Supplies. “Holga Camera Manual”, https://www.freestylephoto.biz/pdf/holga-manual.pdf
Holga Direct. “The History of Holga”, https://www.holgadirect.com/holgadirect-history-of-holga-camera/
PR Log. “Tips on How to Use Your Holga Camera”, https://www.prlog.org/10201016-tips-on-how-to-use-your-holga-camera-from-giftlabcouk-and-elliot-muir.html


