Puzzled by a lack of memory in Windows 7? 64-bit users can use MSCONFIG to resolve this issue.
32-bit vs 64-bit Windows 7 Memory
Under 32-bit Windows 7 a maximum of 4GB of RAM is available to the operating system – yet many users find that this amount of memory is unavailable, with figures from 3.25Gb to 3GB being made available by the operating system when 4GB is installed in the motherboard. This is obviously of concern to some users who are finding that as much as 1GB of RAM is missing.
However in 64-bit Windows 7, certain versions make much more RAM available – as much as 192GB. This depends on your Windows 7 version as well as how your BIOS and operating system are setup.
Some alterations to a PC system can be made in order to make more use of the installed RAM. One change is available in the BIOS; another is to alter your Windows 7 maximum memory in MSCONFIG.
Identifying RAM Usage in Windows 7
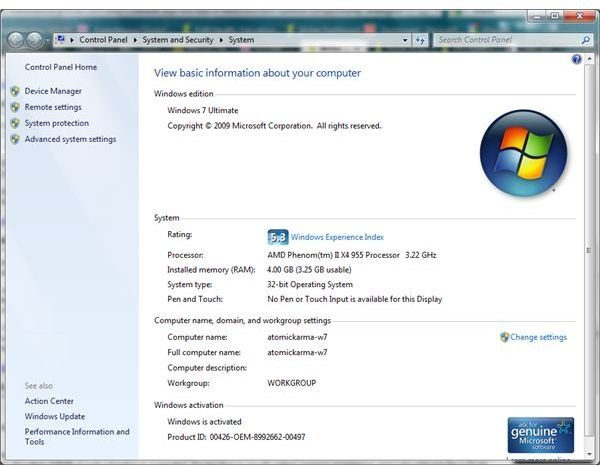
To find out what your current RAM usage is, go to Start, right-click Computer and select Properties. On the System screen under the section labelled System: you will see your Installed memory (RAM): value listed.
Windows 7 users with a 32-bit system with the full 4GB installed will possibly notice that in brackets a value is displayed, such as (3.25GB usable). If this is the case, then the 4GB is being fully utilised – but a portion of it is reserved. This might be for your video memory, for instance, depending on the type of graphics card you have installed.
A 32-bit Windows 7 user might be able to squeeze some extra RAM out of their system by updating the way RAM is allocated in the system BIOS; meanwhile 64-bit users will be able to alter the way RAM is allocated and reserved by using MSCONFIG (see below), depending on their Windows 7 version. 64-bit Windows 7 Home Basic allows up to 8GB of RAM, whereas Windows 7 Home Premium 64-bit version will allow users to go up to 192GB.
Updating RAM use in the BIOS
(For 32-bit users)
To change RAM usage in the system BIOS , reboot your PC and lookout for the POST screen which will flash up around the same time as the case speaker goes “beep”.
Tap the required key to enter the BIOS and input the password as required to proceed. What you need to do now is look for the relevant setting concerning your motherboard’s allocation of RAM, if such a function is supported. The function is usually called “memory remapping” and is the only way for a 32-bit user to access the full 4GB of RAM to Windows 7.
Getting lost in the BIOS is easy – the best way to find what you’re looking for is to consult the motherboard manual, or check on the web for an online copy.
Change Windows 7 Maximum Memory in MSCONFIG
(For 64-bit users)
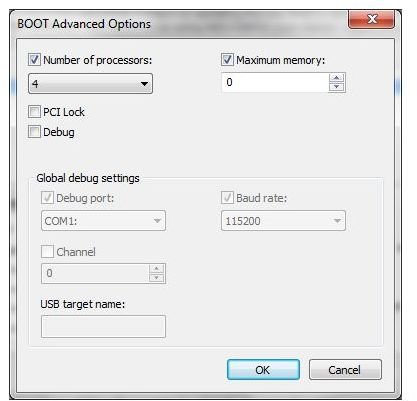
Windows 7 users with 64-bit hardware can also access MSCONFIG to increase their maximum memory allocation. This is very easy to do.
Go to Start and enter MSCONFIG in the Search box. You should see msconfig.exe listed – click this to open the utility.
On the Boot tab, go to Advanced to access the BOOT Advanced Options. Under the Maximum Memory setting, allocate the maximum amount of RAM available and click Apply. You will then need to reboot your PC to continue, and the full allocation of RAM should be available to the operating system when you reboot!


