“Access Denied” errors are a common problem for Administrators in Windows 7. Here’s a simple tutorial with three different tips and methods to eliminate these errors.
Windows 7 and Vista Security
If you have been using Windows 7 or Vista for any amount of time, chances are that you’ve encountered some of Microsoft’s security features (usually in the form of an access denied message or user account control pop-up). A good portion of Windows 7’s and Windows Vista’s security is built on the principle of restricting the access of the user. In some cases this can be a good idea, but chances are, you will need to bypass these restrictions at some point. And if you’re anything like me, you simply don’t like the idea of your computer telling you what you can and cannot do.
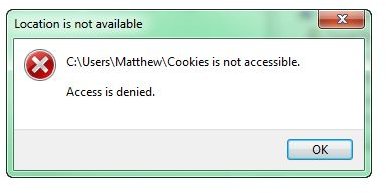
In Windows 7 and Vista, you are generally expected to use a preselected number of folders. If you stray outside of bounds, you will probably run into a message like this:
This is a common annoyance in Vista and Windows 7. There are a few different ways to take care of access issues, but you’ll need to be an administrator to do anything about them. Now let’s take care of “Access Denied”.
Dealing with Access Denied
Here are three ways to deal with an “Access Denied” message. If you’re comfortable with downloading something to help you work through these problems, skip to method three.
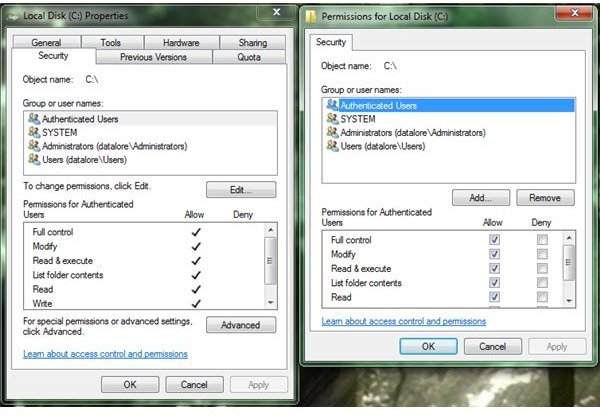
1. Right click on the file or folder you want to access and click on properties. Go to the security tab and click on edit. In the new window, make sure “Full Control” is checked. Click OK, click Apply, and you’re done.
If that didn’t work, or if you were prompted by even more access denied messages in the process, it’s time to move onto the next step.
2. Again, right click the folder or file you want to access and click on properties. Once again, go to the security tab, but this time, click on Advanced. Go to the Owner tab and click Edit.
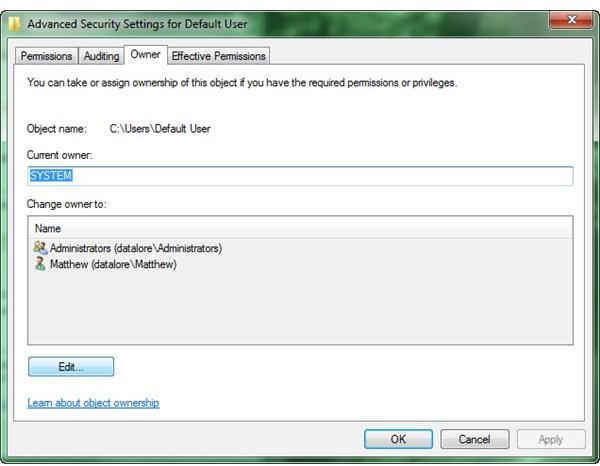
In the new window, highlight your group. You’ll probably be in the Administrators group. Be sure to check “Replace owner on subcontainers and objects” and click OK.
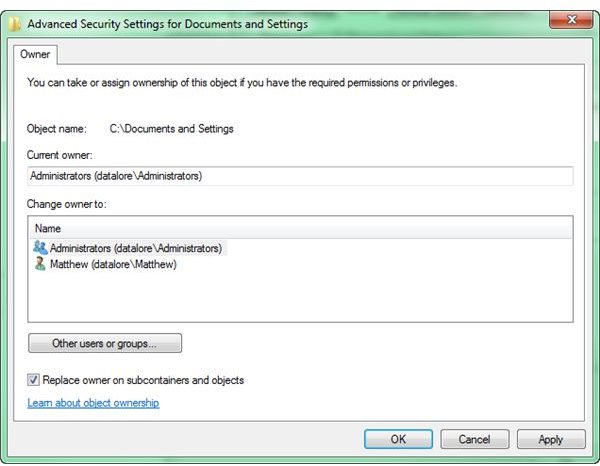
Click OK on any prompts that come up. You should now have access. If this didn’t work, move on to method three.
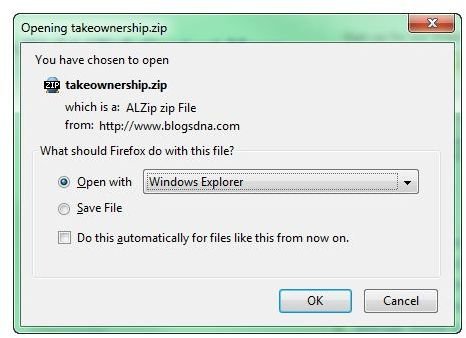
3. In my opinion, this is the simplest solution for these issues. The downside is that it’s an external method and you’ll have to download this file . You can go ahead and open the zip file in Windows Explorer.
Summing Up
Once the zip file is downloaded and open, you can simply double-click on InstallTakeOwnership.reg. This file will create changes to your system registry. This allows the file to easily give you full access to any file, but any change you make to your registry is potentially dangerous.
The installation should be automatic (it will open using registry editor) and add a “Take Ownership” option when you right click on a file or folder. Once it’s done installing (the command prompt will finish up), all you have to do is right click on the file or folder you want to own and click on “Take Ownership”. Unfortunately, this method enables any other account on your computer to do the same thing. However, you could always take ownership of the files you want and then disable your new “Take Ownership” option by opening RemoveTakeOwnership.reg that comes in the zip file.
There you have it. The security on Windows 7 and Vista can be pretty restrictive, but now you can finally take ownership of all your files, whether your system wants you to or not.


