Although Expression Web does walk you through the steps of the saving action for a frames page, it’s a good idea to know what to expect before this process begins.
Web Pages with Frames
So, why do we need a special section of this series to talk about saving a frames page? All you have to do is click Save, right?
A frames page actually contains several components since it is pulling in information from multiple web pages. Because of this, it’s important to make sure that each of these components is updated and saved properly along with the frames page template. When saving a frames page, Expression Web walks you through several steps to verify that all of this has been done.
Saving the Frames Page
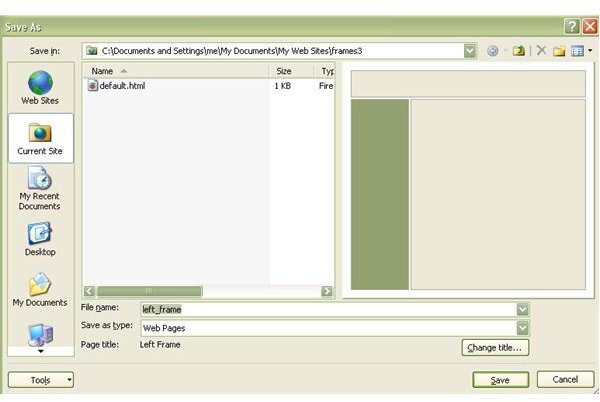
To save the frames page, begin as you normally would and choose Save As from the File menu. The first thing Expression Web will do is bring up a Save As window for each individual frame. Choose a name and directory for these individual frame pages, clicking Save after each one.
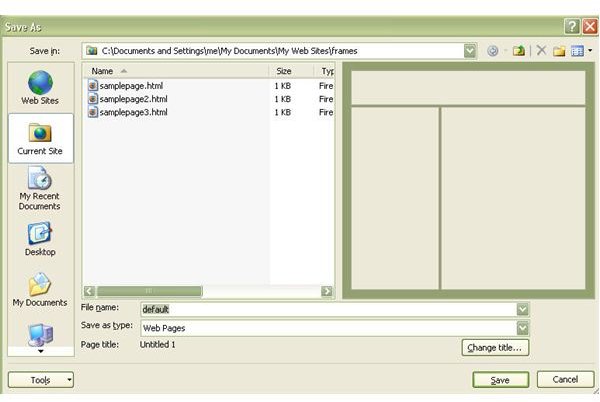
After cycling through all of the frames, Expression Web will finally ask for a name and directory in which to store your main frames page. After you’ve entered your choices here, click Save one last time to complete the process.
This action of cycling through all of the frames that make up your frames page will only be done the first time you save the information. After that, you can save a frames page the way you would any other web page. In fact, if all of your frames were pointing to existing web pages rather than newly created ones, you can bypass this process altogether.
Saving a Frame as a Separate Page
There may be times when you want to go ahead and save a frame as a separate web page while you’re still working on it, but before you’re ready to save the entire frames page. In fact, this is quite common when you’re designing a frames page with many components.
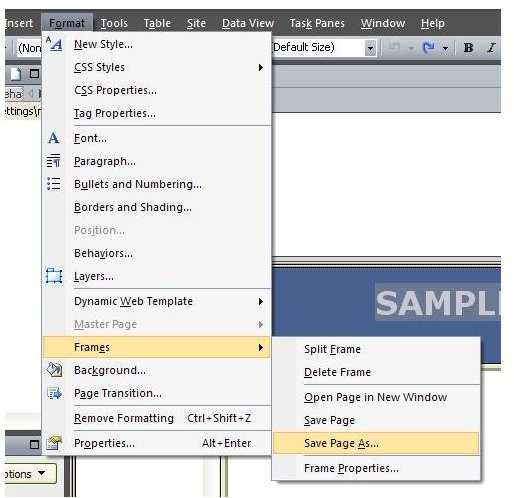
In order to do this, first click on the frame that you want to save. Then from the Format menu on Expression Web’s main tool bar, select Frames and choose the Save Page As option. After that, continue the saving process as you normally would.
For more tips and tricks, be sure to check out the other Microsoft Expression Web tutorials and user guides found here at Bright Hub.
This post is part of the series: Frames in Expression Web
This series starts out with a general overview of frames in Expression Web and continues with several tips and tricks you can use to incorporate the use of frames in your web site design.


