Backing up your files ensures that, should you have a hardware failure or experience a user error, you will not lose your important documents or other files. Take advantage of the Windows 7 automatic backup features and never worry about losing files again.
Overview
Knowing how to backup and restore your computer files is vital. Even if your computer is in top condition and you are not concerned about system errors, consider how easily you or another user could accidentally delete the wrong file or save incorrect changes to a document. Using Windows 7 automatic backup, you don’t have to worry, as you can quickly restore missing or corrupt files.
Set Up Automatic Backup
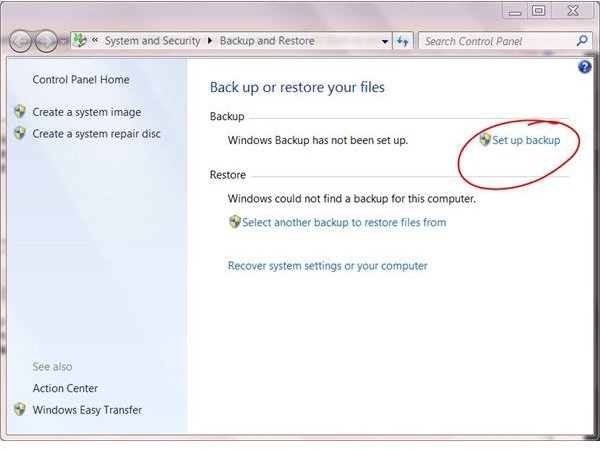
To set up your Windows 7 automatic backup schedule, click the Start button and type backup into the Search box at the bottom of the menu. Select Backup and Restore from the results list. The Backup and Restore window opens. As you have never set up Windows 7 automatic backup, it will say Windows Backup Has Not Been Set Up. Click Set Up Backup to the right and wait while it starts.
Choose the location where you want to save your automatic backups, such as an external hard drive, CD or DVD drive, USB flash drive or network location. Click Next. Select Let Windows Choose if you want to Windows to determine what files to include in the Windows 7 automatic backup. If you want to select the files yourself, click Let Me Choose. Click Next. If you select the second option, a window opens allowing you to select the files to back up. It is important to note that Windows 7 automatic backup will not back up program files, files in the Recycle Bin or temporary files on drives smaller than 1GB.
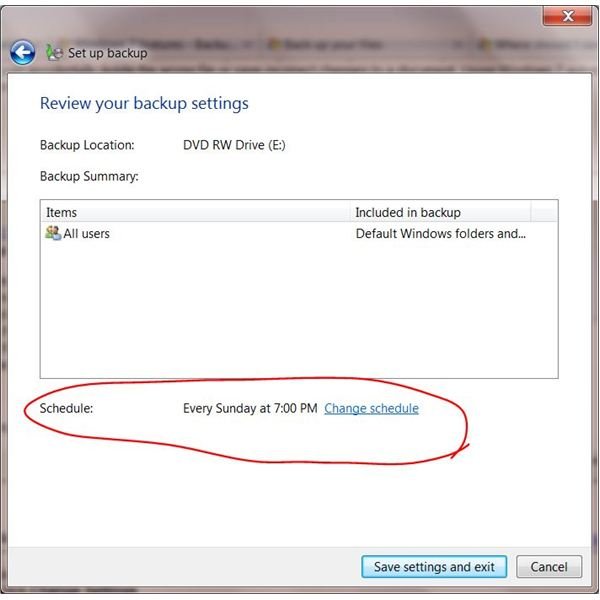
Review your backup settings. The default schedule appears at the bottom of the window. If you want to change the settings for your Windows 7 automatic backup, click Change Schedule. Choose whether you want the backup to run every day, week or month. Select the day of the week and time of day. Click OK.
Click Save Settings and Run Backup.
Change Automatic Backup
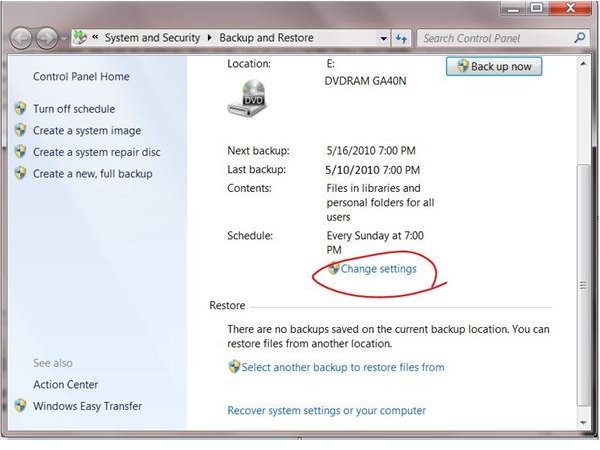
If you ever want to change any of the settings for your Windows 7 automatic backup, click the Start button and type backup into the Search box at the bottom of the menu. Select Backup and Restore from the results list. Click on Change Settings to go to the Set Up Backup window. Select a different location in which to save Windows 7 automatic backups if desired and click Next. Change whether Windows determines the files to backup or select them yourself and click Next again. Click Change Schedule and choose whether you want the backup to run every day, week or month. Select the day of the week and time of day. Click OK.
Click the Save Settings and Exit button to apply the changes and close Windows 7 automatic backup.


