
The automated bibliography creation process in Word 2007 allows for a quick and easy way to create a reference list in any Word document. Read on to find out how.
Creating a Bibliography in Word 2007
A nice feature in Word 2007 is the ability to add references and insert citations for these same sources as you’re creating your Word document. For details on how to do this, see the article Adding Citations in Word 2007 . Then, when your document is complete, you can easily compile these references into a bibliography without having to retype them over and over again.
How to Create a Bibliography
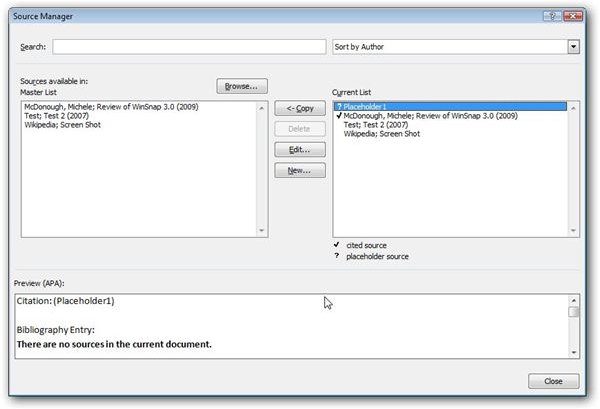
Step 1: The first thing to do before creating the actual bibliography is to make sure that all of the citations in your document have been completely filled out. To do this, go to the References tab on the Word ribbon and click Manage Sources in the Citations and Bibliography section. (Click any image for a larger view.)
Step 2: Update the information for any Placeholder citations (these are prefaced with a question mark in the Current List box in the Source Manager window) by selecting that source and clicking the Edit button.
This will bring up the Edit Source window in which you can fill in any and all missing information.
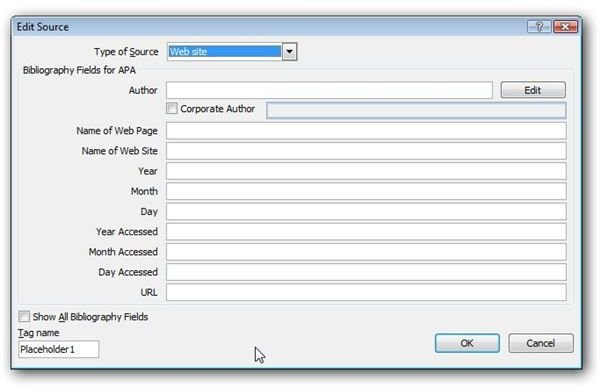
Repeat this step for any other references in the Source Manager that are missing information.
Step 3: While still in the Source Manager, remove any of the items from the Current List that are not referenced in the current document by selecting the item and clicking the Delete button.
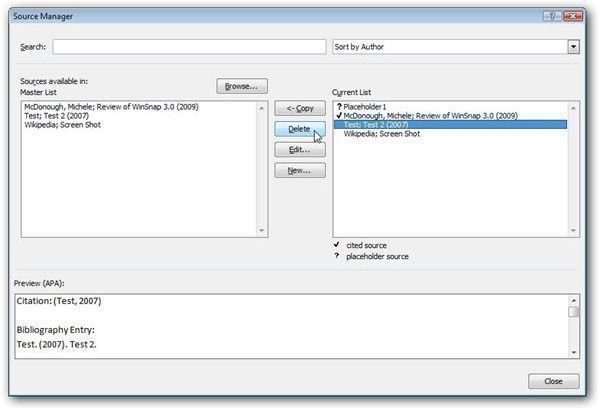
Word makes it easy to spot these sources if you’ve done a good job of entering your initial citations. Any reference material that has been specifically cited in the document will have a check mark in front of it. You still may wish to keep some of the unchecked items in your bibliography if you are including general references for your readers – just make sure that none of the checked sources are deleted.
Step 4: Return to the original document by clicking the Close button in the Source Manager.
Step 5: Place your cursor at the point in your document where you want to insert the bibliography. This point could be at the end of a section, chapter, or the complete document. You may also choose to start the bibliography immediately following the text of the document or you can insert a page break so as to begin the list at the beginning of a new page.
Step 6: On the References tab, select the Style that you want to use for the bibliography.
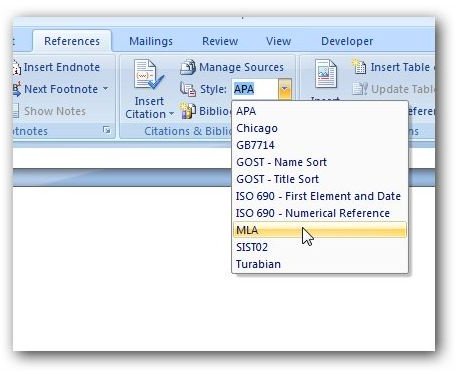
Step 7: Click on Bibliography and choose the format you wish to use for your document. Note that the styles shown are related to the general style preferences chosen for the entire Word document. If you’re not satisfied with the appearance, you can make modifications to the base style .

Now that the bibliography has been created, any changes or additions that you make to sources in your document will automatically be updated in this section, so you don’t have to worry about recreating it again in the future. However, if many changes are made, you may want to review the Source Manager (steps 2 and 3) again to make sure that only pertinent material is being included in the bibliography.
If you’re looking for more guides, be sure to browse through the other items in Bright Hub’s collection of Microsoft Word tutorials .


