Read on to learn how to use Windows Vista’s Complete PC Backup and Restore utility to backup your entire computer system, to enable you to restore your computer in the event of a system-wide failure.
Use Vista’s Complete PC Backup and Restore Utility
The Windows Vista operating system comes with a far more advanced, comprehensive back-up utility: the Windows Complete PC Backup and Restore. This utility allows you to create a complete back up copy of your computer system, which you can use to restore your computer if it crashes or fails. The complete utility is not available on Windows Home Basic, Premium or Starter. Their backup utilities only allow you to backup folders, not the entire disk. However, you can use the utility Acronis True Image 2009, also reviewed by Bright Hub to make a true back up of your system.
The Windows Complete PC Backup and Restore is superior to the back up utilities of all earlier Windows versions because it allows you restore your complete operating system and other critical system files, rather than just your data files.
The restore utility backs up your system by creating an image of the hard drive onto multiple DVDs. In the event that your PC fails, you can restore your system using the Windows Recovery Environment. This tutorial shows you how to use Vista’s Complete PC Backup and Restore Utility.
How to Use Vista’s Complete PC Backup and Restore Utility
1. Click on the Vista Start button to open the Start menu. Click on the All Programs menu option.
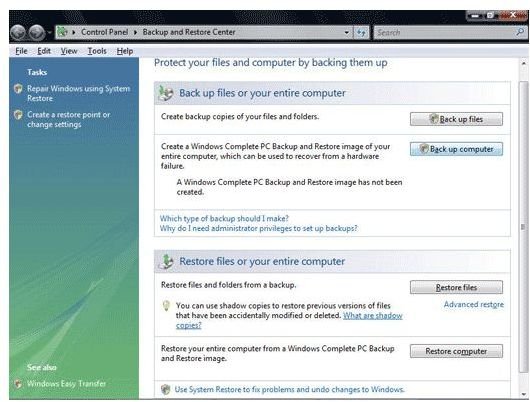
2. Select the Maintenance folder. Now, click the icon labeled Backup and Restore Center. This will open the Backup and Restore Center window.
3. Go to the section labeled Back up files or your entire computer and select the option labeled Backup Computer.
4. Click Continue if you are prompted by the User Account Control to indicate whether or not you want to proceed.
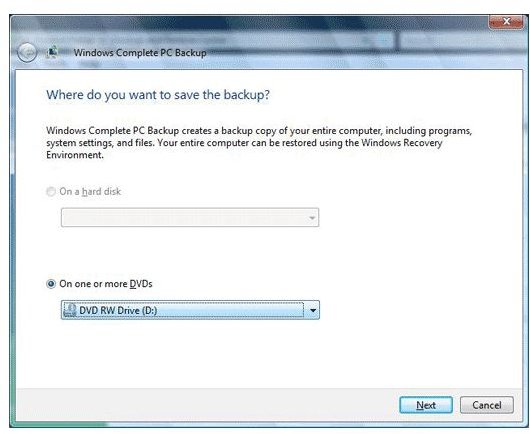
5. Select one of the two options on the next screen for saving your backup image: either save it to your hard drive or to one or more writable DVDs. You may also save it to an external hard drive.
Quick Tip: If you choose to save the backup image to your hard drive, if the drive fails you won’t be able to access the image. It is recommended that you perform your backup to a DVD or external hard drive.
6. Click Next to continue once you have selected a location. The next screen will indicate an estimate of the number of disks that will be required for the back up image.
7. Begin to backup by clicking on the Start Backup button. Windows will begin its initial preparation for the backup operation.
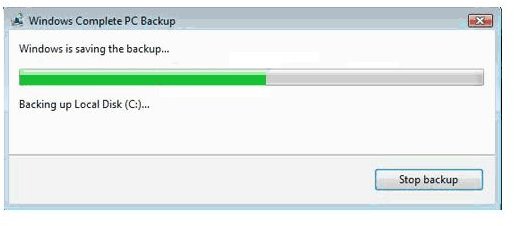
8. Insert a DVD disk into your DVD drive when you are prompted. Windows Vista will now begin the backup process and create an image on the DVD. If one DVD is insufficient, you will be prompted to replace the disk with a new one until the entire system has been backed up.
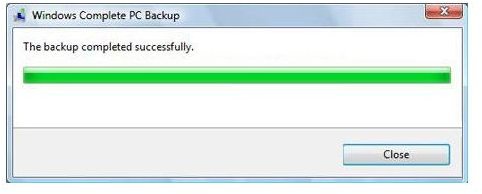
When the backup is done, you will receive a message stating the backup completed successfully.
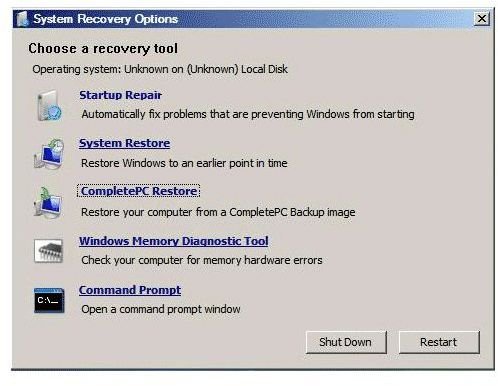
How to Restore an Image Back up
With your entire system backed up, you can now restore your computer at any time as the need arises. In this case, you will simply boot up your system from the backup DVD, and follow the on screen prompts.