If the options offered in the Form Wizard of Access 2007 are too limiting for the type of form that you want to create, it’s time to look into manually creating a new form in Access. Read on to find out how.
Forms with a More Customized Appearance
Although the Form Wizard described in Part 1 of this series allows for an easy way to create basic new forms in Access, there are several reasons why people may prefer this more traditional way of form creation. First off, manual form creation allows for greater control over the appearance and function of your final form. You can make the form as simple or complex as you desire. In addition, once you become accustomed to creating forms, you may find the manual method an even faster solution than using the Form Wizard, especially if the form you want to create is fairly simple in nature.
In the following steps, we’ll show exactly how to make a new form in Design View without using the Form Wizard in Access. We’ll use the same sample database as we did in Part 1 of this series to demonstrate these steps.
How to Create a Form Manually in Access 2007
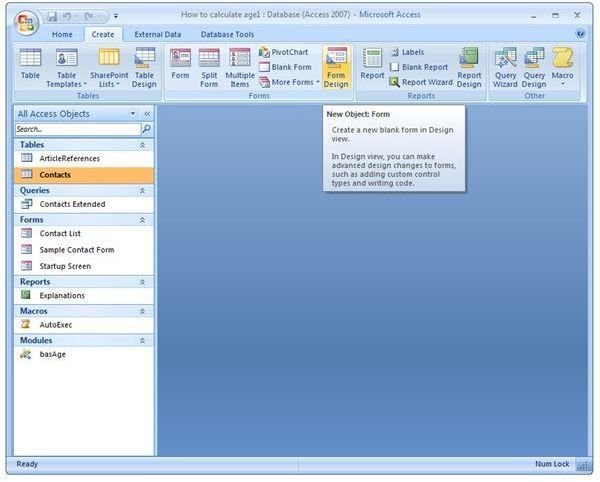
Step 1: After opening the database to which you would like to add a new form, select Form Design from the Create tab on the Access ribbon. (Click any image for a larger view.)
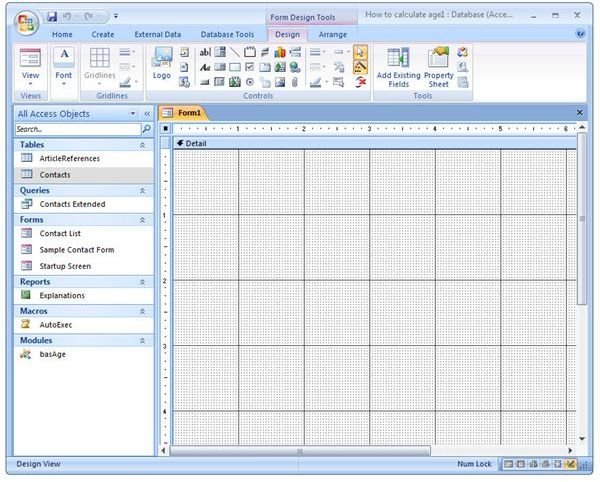
This will open a blank form in Design View as shown in the screenshot below.
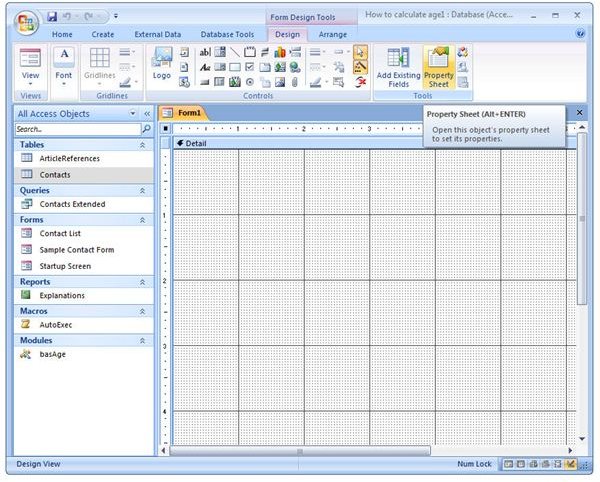
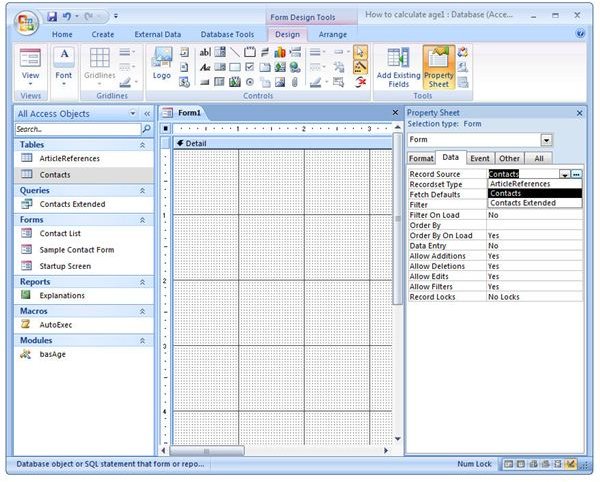
Step 2: Make sure that the Design tab under Form Design Tools is open on the Access ribbon. Click on Property Sheet.
This will open the Property Sheet panel as shown in the screenshot below.
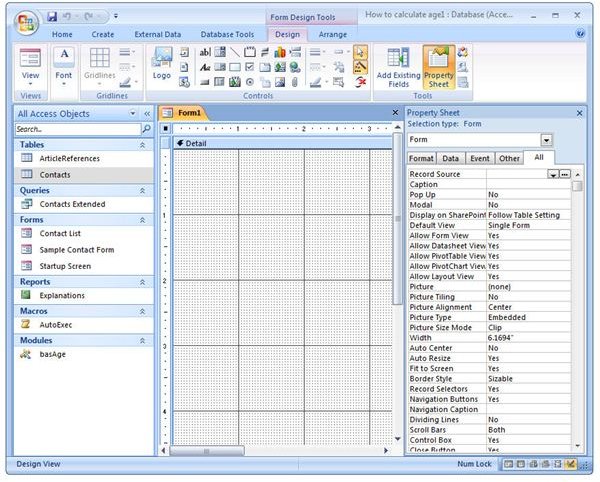
Step 3: In the Property Sheet window, click on the tab labeled Data. From the Record Source dropdown list, select the table that contains the fields you want to include in your form.
Step 4: After selecting a table, click on the Add Existing Fields button on the Access ribbon.
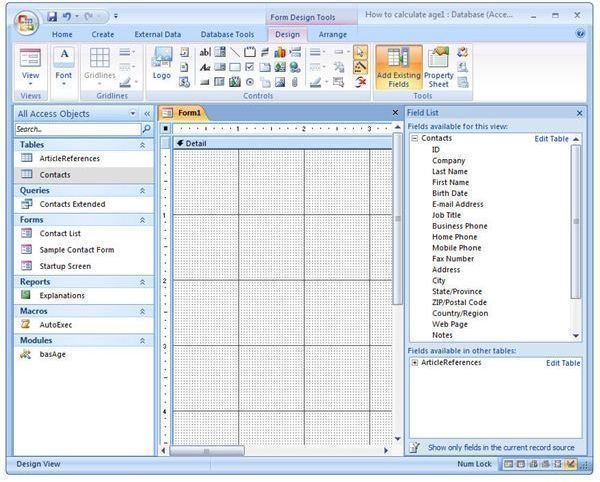
Now, in the right panel, you will see a list of all available fields from the table you chose in Step 3.
Step 5: Click on a field in the Field List panel that you want to add to the form. Hold down the mouse key and drag the field to the position on the form where you want it to be located.
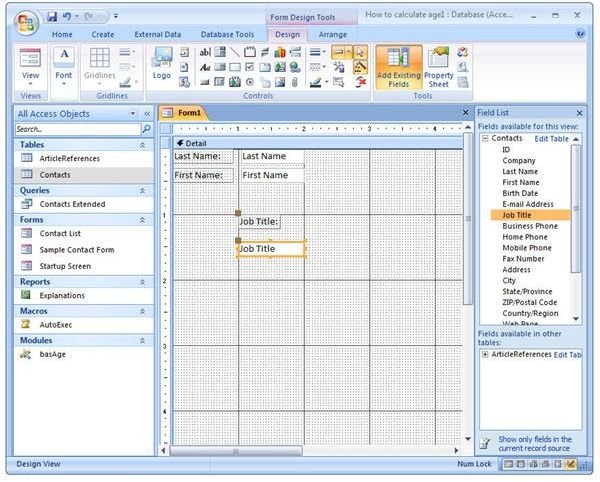
After placing the field, you can resize both the field label and content boxes by clicking and dragging the boundary boxes around the field name.
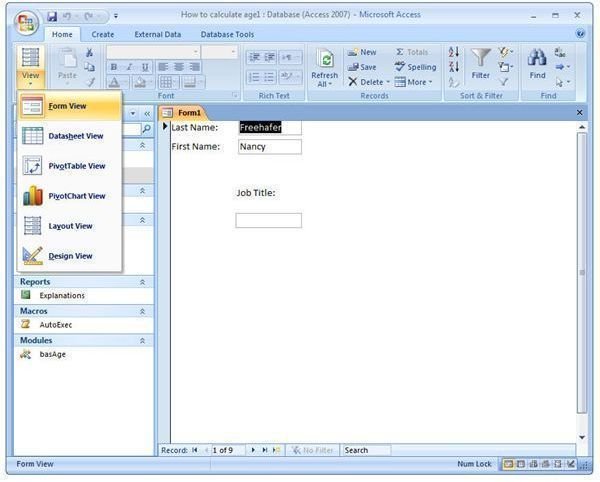
Continue this process for each field you want to add to the form. At any time during this process, if you want to get an idea of how the final form will look, click on the View button on the Access ribbon and select Form View. To return to your form design in order to make additional modifications, click View again and choose Design View.
Step 6: When finished designing the form, click the Save icon in the Quick Access Toolbar (or click the Office button and select Save). Enter a name for the form in the pop-up box that appears on the screen.
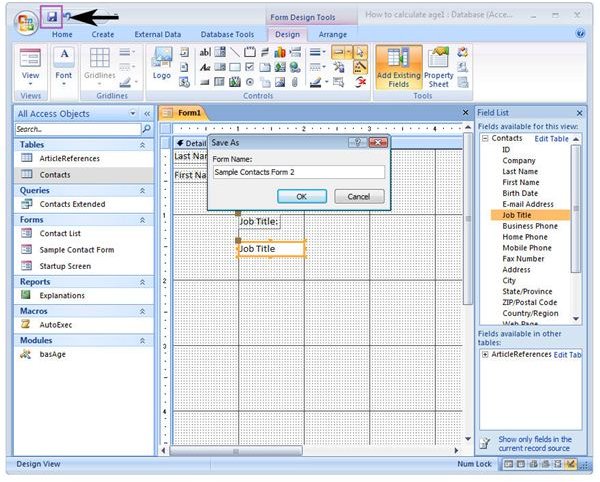
Click OK when done, and the new form will be visible in the Forms list.
This post is part of the series: Working with Forms in Microsoft Access 2007
In this series, we’ll take a look at the different ways you can create new forms and modify existing ones in Access 2007.


