
Adding images is a great way to liven up a Microsoft Word document, but if the text wrapping around the object isn’t formatted correctly, it can make the entire document look poorly-prepared and unprofessional. In this tutorial, we’ll show how to get the most out of Word’s text wrapping options.
One of the beauties of working with images in Microsoft Word 2007 is that you can add them to any position in your document. However, if you don’t select a proper text wrapping style, this can make your document look worse rather than better.
How to Wrap Text around an Image
Step 1: Locate the point in the Word document where you want to add the picture, and insert it in the same manner described in Part 1 of this series (this part also contains information about resizing pictures). If you want to resize the picture, it’s a good idea to do so now. This way, you’ll be able to tell how the image will look when we apply the text wrapping in later steps. You can always resize again later on, if needed.
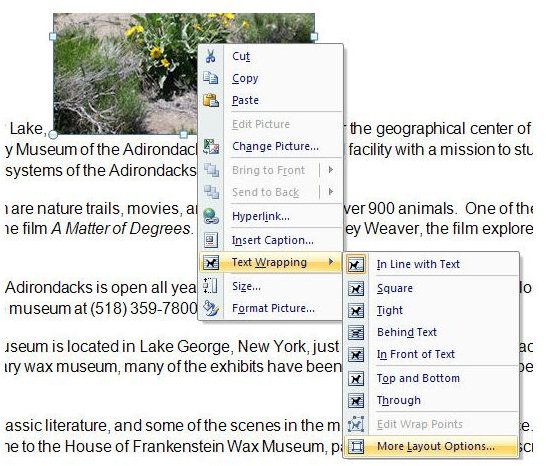
Step 2: Right-click on the image, select Text Wrapping, and then choose More Layout Options.
In the Advanced Layout window that appears on your screen, make sure you are on the Text Wrapping tab.
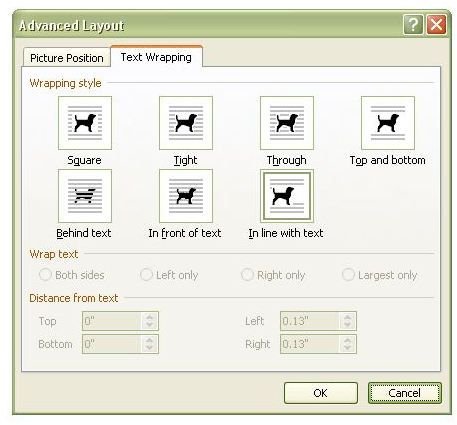
Step 3: The first thing to do in this window is to select a Wrapping style. Depending on the style you choose, certain other options in the window will become available. You can use the small thumbprints to get an idea of how each style will appear, but if you’re still unsure, try a couple out. If you don’t like them, you can always Undo the action and start afresh from Step 2 of this process.
Step 4: Next, if applicable to the style you chose in Step 3, pick an option from the Wrap text list. If the style you chose does not support this option, all choices will be grayed out. Just as in Step 3, if you’re not certain about which option to choose, test one or two out and see if you like how each one appears in your document.
Step 5: The final items to look at in this window are the Distance from text options, if applicable. Most of the time, the default measurements in these fields will be fine, but you may want to tweak them a bit based on your own personal preferences. The numbers entered here will be used to determine how much of a buffer is placed between the text and the image.

This post is part of the series: Working with Images in Microsoft Word 2007
Need some tips, tricks, and pointers for handling images in Microsoft Word 2007? In this series, we’ll start with the basics and work our way up.


