With the ability to add spreadsheets, tables, and images, Microsoft Word 2007 is far more than just a standard word processor. Here, we’ll take a look at how to insert and resize a picture in a Word document.
There are many types of objects that can be inserted into a Microsoft Word document, including tables , Excel spreadsheets , and images. In this segment, we’ll focus on adding pictures, but that’s just one of the many forms of images that Word can handle. Later in this series, we’ll take a look at other varieties.
Inserting the Picture
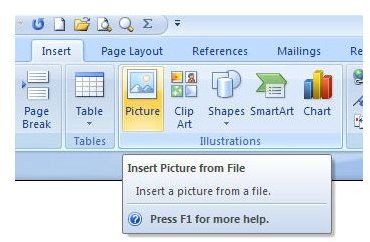
Step 1: Position the cursor at the point in the document where you want to add the picture.
Step 2: Open the Insert tab on the PowerPoint ribbon, and click on Picture as shown in the screenshot below. (Click the image for a larger view.)
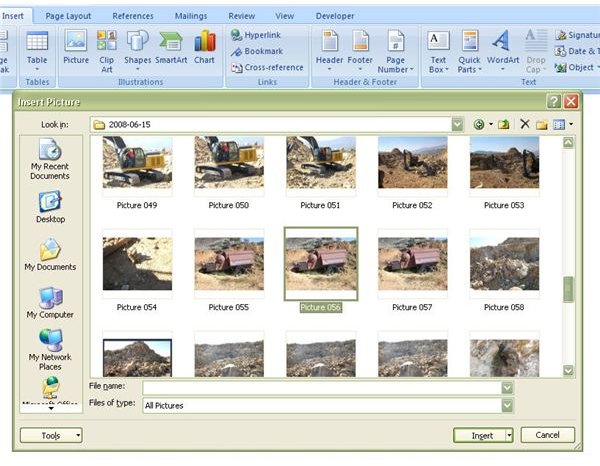
Step 3: Navigate to the directory that contains the picture you want to add to the document. Select the picture and click Insert.
The picture will now be visible in your Word document, but chances are that you’ll want to make some modifications to the image.
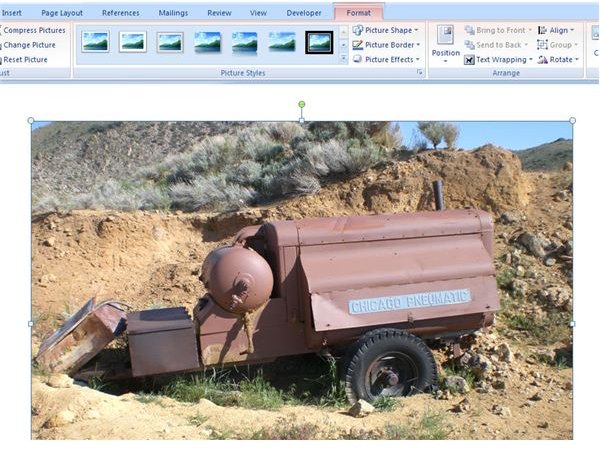
For one thing, Word will import the image to a default size that depends on the original dimensions of the picture. If the picture is small enough to fit within the boundaries of a single document page, Word will keep the original dimensions of the image. If not, Word will resize the image so that it can be contained within a single page.
Resizing the Picture
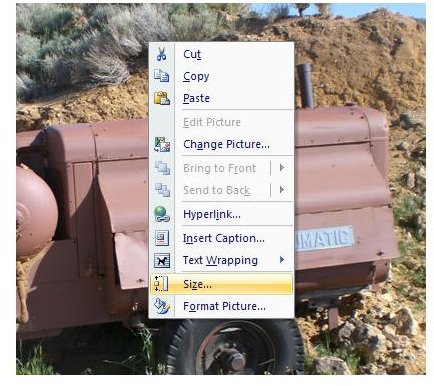
Step 1: To resize the picture, right-click anywhere on the image and select Size.
Step 2: When the Size window appears on your screen, there will be two different methods you can choose from to resize the picture: Size and rotate or Scale. If you choose to use the first option, Size and rotate, you can put in the exact dimension measurements that you want the image to have.
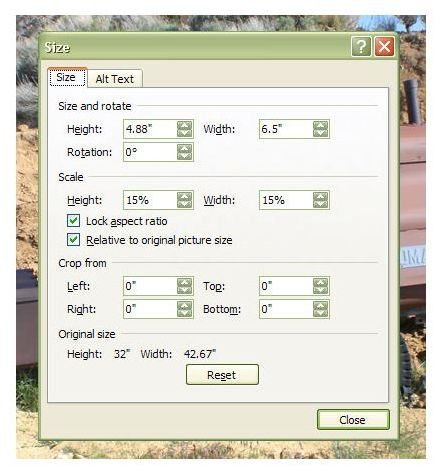
Alternatively, if you don’t want to calculate the new dimensions and you simply want the image to be reduced to one-quarter or half of its current size, you can use the Scale option instead. The size of the picture can be increased rather than reduced by entering a value greater than 100%, but make sure to preview the result if you choose this option. While reducing the image in size will not affect the quality of the image, increasing its dimensions may have adverse effects.
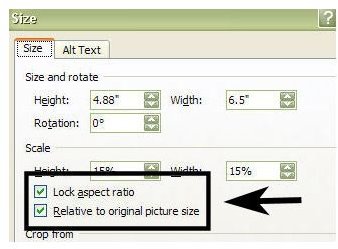
Another important item to pay attention to in the Size window is the Lock Aspect Ratio option. If the box next to this option is checked, you only need to adjust the size for the height or width of the picture. The remaining measurement will be calculated using the same ratio of change as the modified aspect. This option is selected by default in Microsoft Word, and the only time you should change it is when you intentionally want to distort the image.
If you make several changes to the picture and realize that you hate the resulting image, you can begin your modifications anew by clicking on the Reset button at the bottom of the Size window. This will return the picture to its original unmodified state.
This post is part of the series: Working with Images in Microsoft Word 2007
Need some tips, tricks, and pointers for handling images in Microsoft Word 2007? In this series, we’ll start with the basics and work our way up.


