Take a look at this step by step guide on how to capture videos off YouTube and then put them through a DVD authoring process.
YouTube has become one of the largest library of videos, mostly unique and homemade. This makes it easy to access from almost everywhere and even easier to share, but many people are still not computer centered and do not find this the best way to watch these videos. If you use a couple different services in concert you will be able to actually take one of those videos and put it onto a DVD that can then be watched on your home computer. Here is the step by step process on how to copy YouTube videos to DVD in a matter of minutes.
Download the YouTube Video
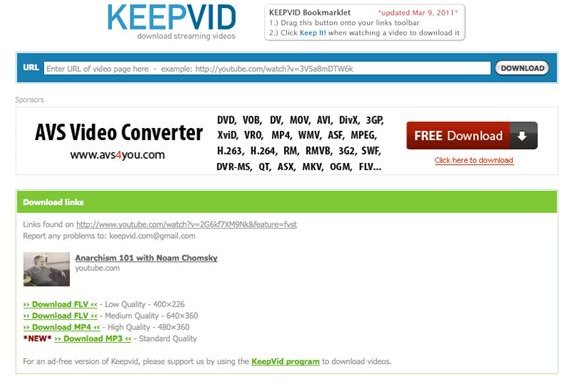
The first step of this process is to rip the video from YouTube . You cannot copy YouTube videos to DVD all in one swoop, and must begin by using a web service that recognizes the the YouTube video and allows you to download it as an independent video file. KeepVid.com is going to be one of the best website for this, and allows you to download the YouTube video strictly by entering the URL for the YouTube video. Once KeepVid.com recognizes that video it will give you a few download options. From here you want to choose a high quality MP4 option, which will usually be the last one before the MP3 option. This will initiate a download capture of the YouTube video and will then allow you to save the video onto your computer through the Downloads folder.
Converting the Video
The next step is to actually convert the video you downloaded from YouTube so you can later author it to a DVD. This requires you to use a full
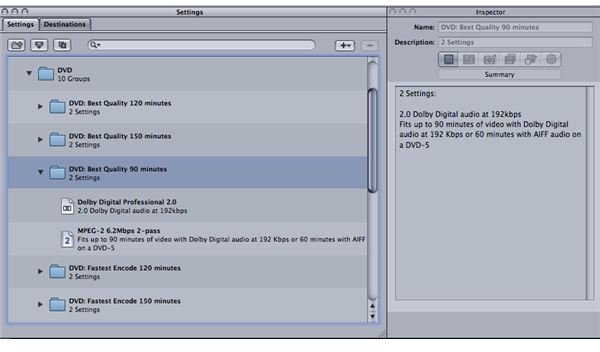
service video compression program. A great option is going to be Apple Compressor, mainly because it is part of the full post-production package Final Cut Studio and will work great in concert with DVD Studio Pro.
Here you will start by opening the video into Apple Compressor . Go into Target and then to Destination, which will open up a browser that will allow you to find a storage place where you want the converted video files to go to. You will then go down to the Settings panel, select the Apple folder, and then choose DVD. These will be codec options for DVD authoring, each one based on a specific preference. Choose the one you want and drag the entire folder into the upper project panel above it. This folder will include an option both for the video and audio as in the DVD authoring program you need them seperated for efficiency. Once you have dragged the options up here hit Submit and Compresser will begin converting your video files.
DVD Authoring
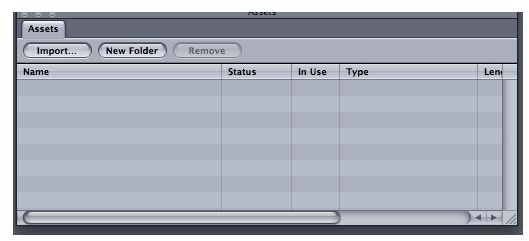
The final step is to import the files into a DVD authoring program and actually burn the DVD. If you are using Apple Compressor it will be easy to go over to DVD Studio Pro as they are built to work together. Open up DVD Studio Pro and begin a new project. Go into the Assets panel and hit the Import button. This will open up a browser that will allow you to search the available storage spaces so you can find your files. Once you do select them and allow them to import.
Go ahead and create a new Track, and possibly even a menu system to link to the track. On the track drag both the video and audio files so that they will match up with one another, just as you would in the Final Cut Pro Timeline. Once this is ready and you can play the video file correctly during the Simulation mode you will then be able to burn the disc, as long as you have an available DVD-R in the computer. Once you have finished you will have a fully workable DVD of the video you copied from YouTube.
References
Photos: Screenshots by Shane Burley.
Source: Author’s own experience.


