
In versions of iPhoto before iPhoto ‘11 you could start a project with a blank book and drop the photos you want to use into the book. iPhoto ‘11 removed that feature and you can no longer create a blank book. Here are a few work-around to that problem.
A New Way to Create an iPhoto Book
I regularly make photo books in iPhoto . For me, I find making a book in iPhoto is a lot easier and faster than making one through an online photo service site. I recently update to iPhoto ’11 and was disappointed in the new book system. While there are many new layout options for books, I could no longer create a new blank book. Any book I create now has to have at least one photo in it.
In the older versions of iPhoto (for as long as I can remember back), choosing to create a new book, calendar, or other photo project would give you a blank project (unless you had photos selected at the time which would then be added to the project). Now creating a new project, even with no photos selected, will not give you a blank project. Instead, you get a book with every photo in your library in it. I don’t know about you, but I don’t want to scroll through every photo in my library to find recent photos for my book.
There are a few work arounds to this new system of a new book being created.
First, if you have all of the photos you want in the book select the event or events with the photos in it and create a new book. This process will create a book that only contains the selected photos. You can always add more photos later. If your photos are scattered through multiple events you can create an album and gather all of them into one album. Now instead of creating the book with the event selected, create the new book with the album selected.
Second, if you are creating a book like I often do that is an ongoing project and constantly adding new photos to it try this method. Instead of selecting an album or event, just pick one photo. Create a new book with that photo selected and only that photo will be in the book, which you can delete and add again later as you see fit.
To add photos to your book projects you only have to drag and drop the photos from your iPhoto library to the book’s icon in the panel on the left. You can also select the photos you want in the book and click the “Share” button and choose “Books” and the bok you want to add the photos to.
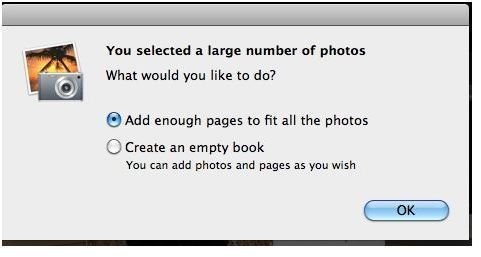
One other problem that I have with iPhoto 11 is how it autofills new book with the selected photos. If you are not presented with the option of not autofilling the book (this is based on how many photos are selected when you make a new book) you can quickly empty the book in the photos pane. Click the “Photos” button at the bottom of the screen while working on the book.Next click the “Empty Pages” button to make all of the pages blank and free for you to fill your way.

Hopefully, following these tips will help you get the most out of iPhoto ‘11 and the new book features. Once you (and I) get used to these new techniques book making will be come as easy as it was in the past.
References
Article based on author’s experiences.
iPhoto 11 screen shots taken by the author.


