Not all Dell Laptops are created equal, but with the images and general rules provided in this series of articles even a person with little technical experience can learn how to install a new motherboard in their Dell laptop. The Inspiron 1501 is used as an example.
Laptop Motherboards
The motherboard in a laptop connects to every single part of the computer. Because it houses a lot of components that would otherwise be separate in a desktop, the root of many problems will most often be the motherboard. Unfortunately repairing motherboard problems is all but impossible if you’re not a highly skilled electrical engineer, so most often the motherboard is going to have to be replaced.
This is no simple process. Motherboards are buried deep in the center of the laptop, held in place by dozens of screws, interconnected with everything - and worst of all, every brand and every model is completely different.
This guide uses a Dell Inspiron 1501 laptop as a reference. It has a simple design that is similar to many other models, but you must remember that it will never be exactly the same. We’ll make notes of common variations in design among Dell laptops as we discuss the process of replacing a motherboard in this particular Dell laptop model.
Preparation
Before you get started on any laptop work, you have to take the appropriate first steps to reduce the risk of damage to the machine or injury to yourself.
Use a non-conductive anti-static work surface. An anti-static mat is highly recommended, but if you don’t have one of those you’re going to have to be very careful. Don’t work on plastic, metal, or vinyl surfaces that can conduct electricity or build up an electric charge. If possible, cover the surface with anti-static bags like those that computer components are packaged in.
You’re also going to want to use an anti-static wrist strap. The clip end needs to be connected to an unpainted conductive metal in order to be effective. In the absence of a wrist strap, continually ground yourself out on an unpainted metal surface by touching it periodically.
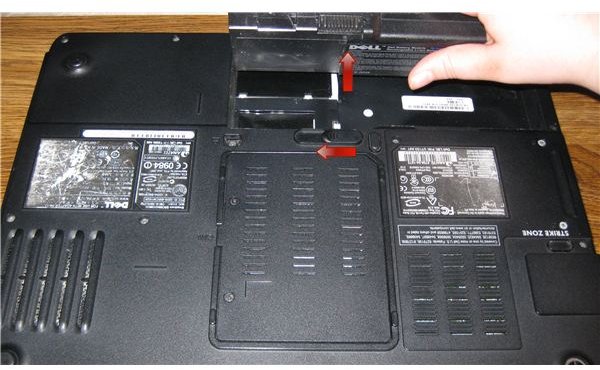
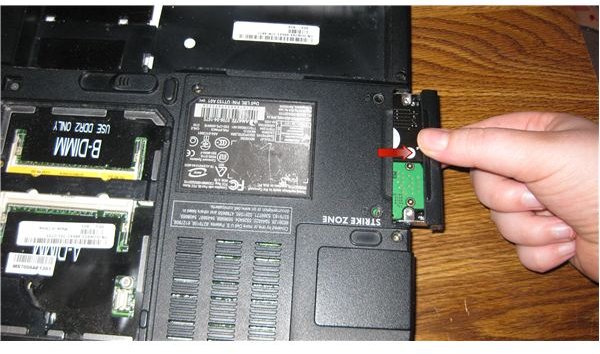
Finally, before you bust out the screwdriver and get to work, unplug the laptop from the power source and remove the battery. Batteries are usually connected with a slide latch, like the one pictured here.
Remove All the Bottom Panels
The first step in deconstructing any Dell laptop so as to replace the motherboard, is to remove all the “peripheral” components. Lots of parts are accessible under panels or in side slots. Start at the bottom: Flip the laptop over, unscrew and remove any panel. Most dell laptops have two panels: One labeled “C” and one labeled “M”. C stands for Communications and M stands for Memory. In this Inspiron 1501, there is a single large panel labeled “C/M” which houses both.
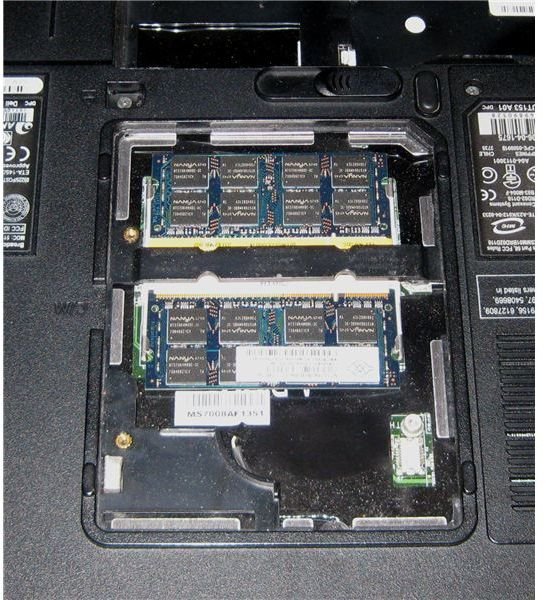
In this example, the only thing under the C/M access panel is two memory slots. Oftentimes there will also be a modem card, which is a roughly 1’‘x2’’ white card held in by one screw. In any motherboard replacement this card has to come out. Set it aside with its screw nearby. Under a typical “C” panel you will also often find the wireless card. In the 1501 the wireless card is located elsewhere, but in many models it is located here. To remove it, first disconnect the white and black wires by gently lifting them up. Release the card by pulling the holding tabs away from the card, then gently slide it out of the slot. To see a pictorial example of how cards are removed, see the next section on removing the memory modules.
Remove Memory Modules
To remove the memory modules in the Dell Inspiron 1501, and every other Dell laptop model I’ve ever seen, follow these instructions.
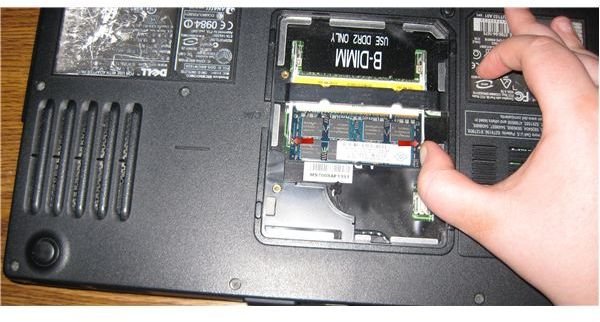
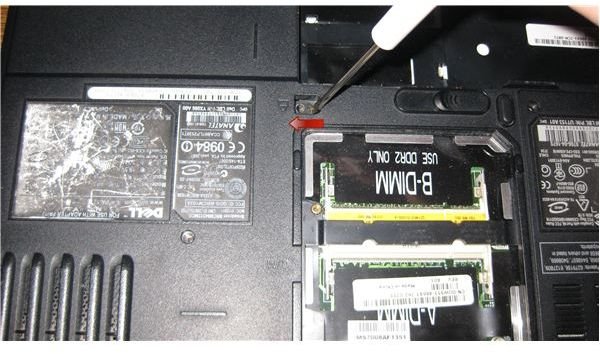
As pictured here, pull the tabs holding the modules in away from the card on each side. (This requires two hands, but I had to hold the camera too!) This will unseat the module, tilting it upwards. Gently slide the memory out of the slot, holding it by the edges. Place it on an anti-static surface.
Remove the Drives
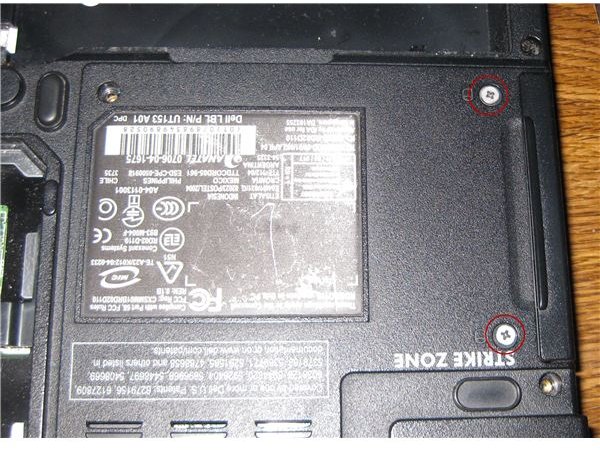
The next step is to remove the hard drive and CD-ROM. In most Dell laptop models, including the example model shown here, the hard drive is screwed in with two short screws on the bottom of the machine. Variations of this will have it screwed in with only one screw in the center. Remove these two screws and set
them away from any other screws. They have a distinctive length and width and you don’t want them mixed up. After it’s been unscrewed, simply slide the hard drive out and set it aside.
You also need to remove the CD-ROM drive. Sometimes these are held in place by a single screw, near the center of the bottom side of the laptop. This screw secures a tab, which keeps the CD-ROM from sliding out on its own. Remove this screw, which is just like every other in the base of the laptop (and therefore doesn’t need to be kept anywhere special).
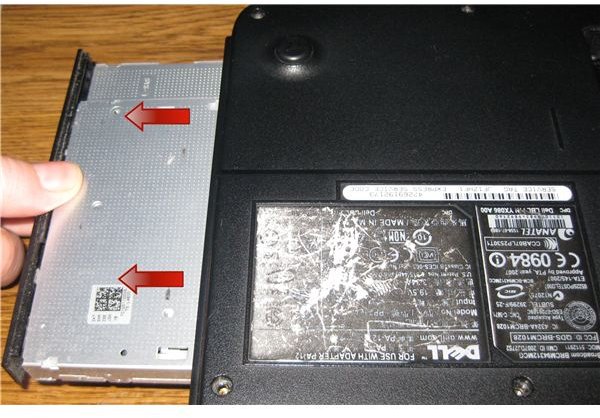
Use a small flathead screwdriver or similar tool to push the tab away from the center of the laptop, as pictured here. Once it has dislodged, you can grab the drive and pull it out.
Also during this step, be sure to remove any PC/Air Card devices or placeholders.
This post is part of the series: How to Install a New Motherboard in a Dell Laptop
In this series of articles we use a Dell Inspiron 1501 as an example model on how to replace the motherboard in a Dell Laptop. With extensive pictures and detailed directions, along with notes on common design variations, we make it possible for anyone to replace the motherboard in their Dell Laptop


