How to Format a Windows 7 External Hard Drive with NTFS
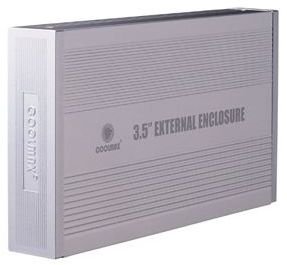
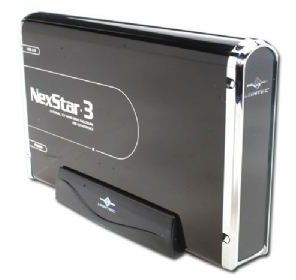
External hard drives have grown in popularity over the last decade or so as computer users accumulate more and more files they wish to permanently archive for future use. The rise of digital cameras and desktop video editing has made it that much more important to store and backup pictures, source files, and finished movies to a secure and convenient storage medium. An external hard drive solves the problem of the need for a large capacity, portable storage medium for not only safeguarding files from corruption but also for transporting files from computer to computer.
In the days before hard drives, some computer users may remember having to format removable media such as 1.44 floppy disks before using them. Formatting was an almost daily routine. Today, fixed hard drives are often formatted once when the operating system is installed for the first time, and then again only if the hard drive is erased and a new operating system is installed. Gone are the days of frequent formatting. The result is a generation of computer users who may not know of the need to format a hard drive before using it. One choice Microsoft Windows users have to make when formatting an external hard drive is which file system to use during installation of the operating system. Normally, users should format all hard drives, internal and external, with the NTFS file system.
What is the NTFS File System?
NTFS stands for NT File System. There is some ambiguity as to what the NT stands for. Some say it is from the Windows NT operating system which some believe stood for Windows New Technology. Microsoft’s official stance was that it stood for nothing special at all. Although a bit hard to swallow from the marketing giant that Microsoft is, the NT does not generally stand for anything.
Among other file system choices such as FAT16 and FAT32, the NTFS file system offers the most secure computing experience for Windows users. File Allocation Table (FAT) 16 and 32 are antiquated file systems that do run a bit more efficiently than their younger NTFS cousin does. FAT16 is the old file system of DOS (Disk Operating System), a command interface operating system popular throughout the 1980s. Today, only anachronistic 1.44 floppy disks must be formatted in FAT16. FAT32 was a popular file system when the Windows 95 family (98,98SE, ME) of operating systems were new in the mid to late 1990s. Starting with Windows XP, the NTFS file system became the standard for home as well as business users.
NTFS is the default file system for Windows 2000, XP, Vista, and Windows 7. As a security measure, NTFS regulates the permissions attached to files and folders in a way that secures them against unauthorized access, both reading and writing. Multiple user accounts are insured against access by unauthorized users of the same system because the NTFS file system has strict authentication rules that disallow access unless specific criteria are met.
One area that may make people shy away from NTFS is its compatibility with other operating systems. NTFS works wonderfully with the recent Windows family of operating systems but does not work so well with older versions of Windows (95, 98, etc.) and many open source operating systems such as several flavors of Linux. If you will be installing multiple operating systems on the same computer that must be able to access the same areas of the hard drive(s), you may be stuck having to format the drive(s) with the FAT32 file system.
How to Format an External Hard Drive with NTFS

External drives connect to a computer in several ways but the two most common connection types are USB and eSATA. The Universal Serial Bus (USB) is a fast and generally reliable technology allowing a variety of peripherals to be hot-swapped (plugging in and unplugging without restarting the computer). Although a newer standard, external Serial Advanced Technology Attachment (eSATA) uses the same technology that your internal hard drives use to connect to the computer. eSATA is faster and more reliable than USB but as a newer technology, not all computers support this connection.
To format your external hard drive simply connect it to your computer and check to make sure that the drive is recognized in My Computer. Click on My Computer and check that a new drive is present among your other drives. If the drive is unformatted, Windows may not know how to classify the drive and may show it as a “unknown device.” Normally, however, Windows will know that the new connection is a hard drive and place it among the other computer’s hard drives.
To format the drive in Windows XP, right click on My Computer and click on Manage. Under the Storage heading click on Disk Management. Locate your newly connected external hard drive here. Windows will have already assigned the new drive a letter designation. This designation is normally the next letter available in the alphabet not already assigned to another drive. Right click on the new external drive and select Format. Here you can choose a volume label to identify the drives contents, choose an NTFS format, and select the allocation unit size.
Normally, you should choose the default size. Larger sizes are faster but more wasteful with disk space. Smaller sizes are less wasteful but slower in reading and writing to the disk. Unless you have some expert knowledge on which unit size is right for you, choose the default setting. You can also choose whether to do a complete format or a quick format. A quick format does not remove the files on the drive but overwrites the part of the drive that specifies where the files are located. Technically, the files will remain on the drive until overwritten even though the drive will appear to be empty after formatting. Unless you are in a hurry, a full format is recommended. Be warned, however, that a 500 gigabyte hard drive can take anywhere from 45 to 90 minutes to format. Larger drives, of course, will take even longer.
To format the drive in Windows Vista and Windows 7, click Start>Control Panel>System and Maintenance>Administrative Tools>Computer Management. In the navigation pan, click on Storage and the Disk Management. Here the Disk Management area looks very similar to Windows XP and the directions above for Windows XP can be followed to format the drive with the NTFS file system.
Conclusion
Formatting an external hard drive with NTFS is not unlike formatting an internal hard drive except that you must first connect the drive to the computer and ensure that Windows has recognized the connection. NTFS is the default file format for all modern versions of Windows. Only under specific circumstances should you consider formatting an external hard drive with another format. Some people find that it is best to format the drive with FAT32 because it allows for more possibilities and compatibility. Unless you are sure you will be connecting your external drive to an older version of Windows (95, 98, 98SE, ME) or another operating system such as Linux, stick with NTFS.
