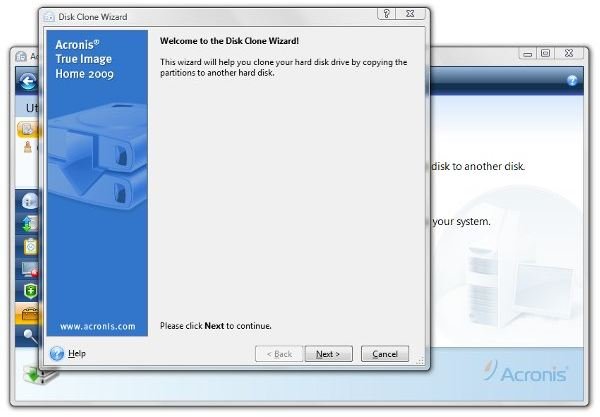
Hard drive filling up and declining hard drive prices getting your attention? If you’re ready to move up to a bigger hard drive for your laptop, this tutorial will show you step-by-step in pictures how it’s done in Acronis True Image Home 2009.
The objective of this tutorial is to go through all the steps involved in using Acronis True Image Home 2009 to copy and clone a notebook hard drive to a larger replacement drive.
First of all, you should already have the new, replacement hard drive mounted in either an external USB- or FireWire-connected enclosure, or mounted within the laptop itself (in something like a ThinkPad’s Ultrabay).
When cloning to another internal hard drive, the process can be done within Windows. However, when cloning to an external drive, you need to have prepared an emergency boot disk within True Image and to have booted the notebook from it.
Note that it’s not possible to create a bootable disk on an external drive in Windows because of a flag that Windows sets that identifies the drive as external. True image will not warn you about this, and the documentation is not clear, either. We had to learn this from tech support.
Ready to get started? In the main True Image window in the Windows version or the boot disk version, click Utilities in the left-hand lower menu.
Then click “Clone Disk.” This will start up the “Disk Clone Wizard.” (We found out earlier that wizards abound in True Image. )
True Image has two cloning modes – manual and automatic. The automatic mode proportionally applies the same ratio of the original partitions to the target drive. In other words, if the new drive has twice as much space as the old one, partitions will be created that are twice as large.
This can be wasteful on a laptop. For example, my ThinkPad has a 6.71 GB service partition that contains the Vista recovery files and the small program that runs for Rescue and Recovery, Lenovo’s own restoration utility. This partition does not need to get any bigger, but it does need to be copied to the new drive.
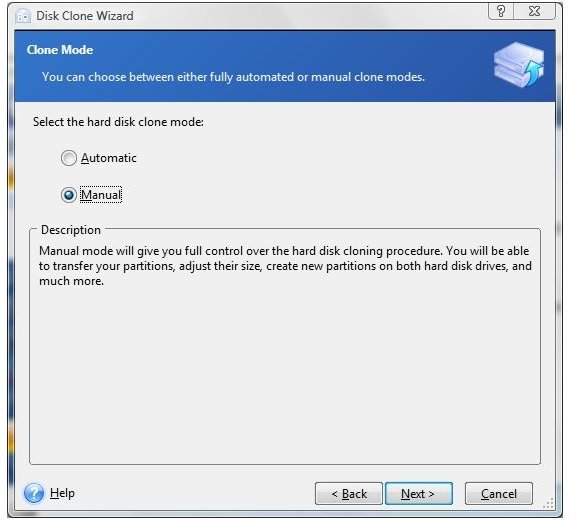
If you have a hard drive in your laptop that contains a service, recovery, or restore partition, you’ll want to select the manual mode.
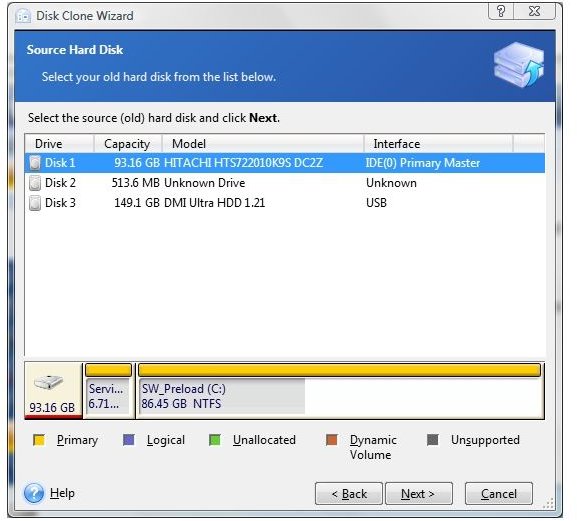
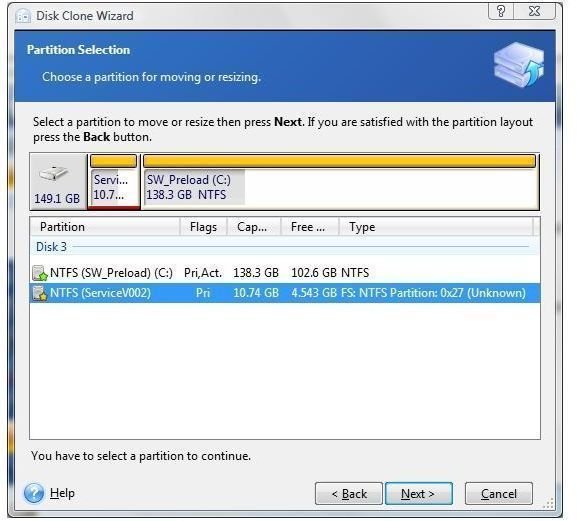
The next step is to select the source drive. In doing this, you’re actually selecting the entire drive, which can be a little confusing from the display.
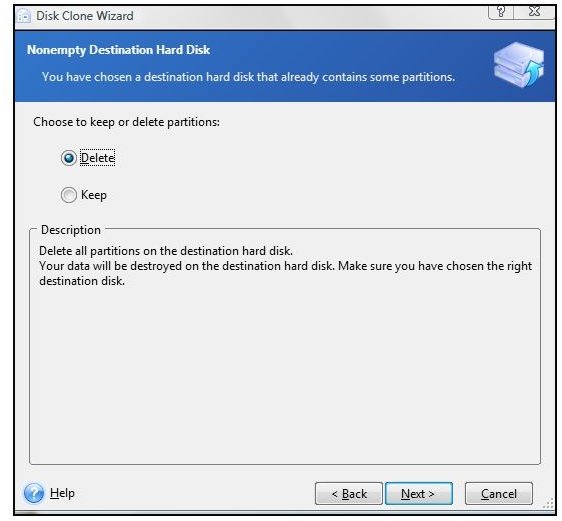
Then select the destination drive.

If the new hard drive is already formatted, it will contain at least one partition. At this point, it’s safe to tell True Image to delete any partitions on the destination drive.
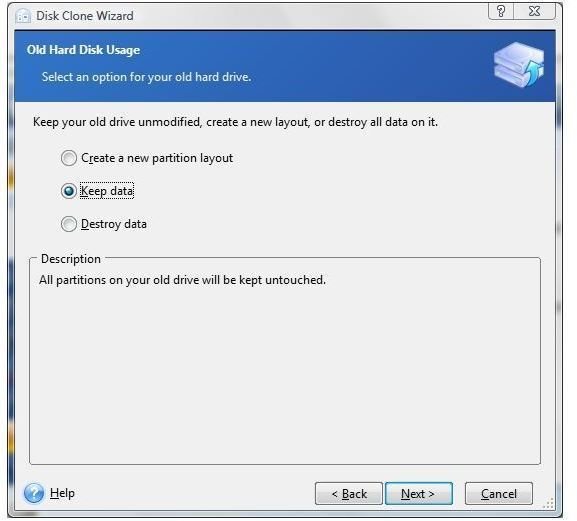
Then it asks the same question about the old hard drive. Do you want to delete the data, destroy the data, or select a new layout for the partitions on the drive? Here we elected to keep the data on the drive intact.
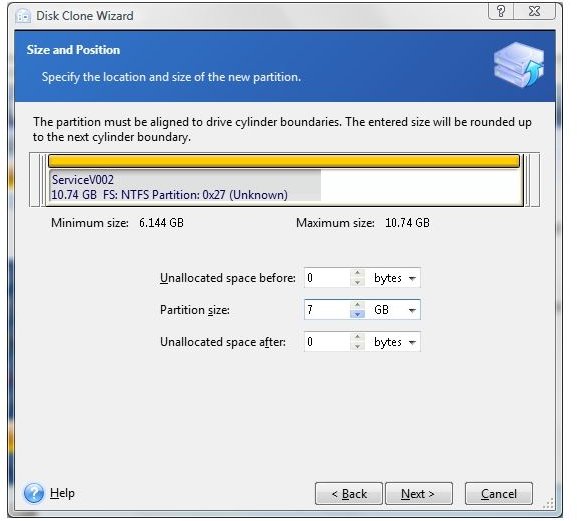
As can be seen in the image below, it’s offering to create a 10.7 GB service partition on the new hard drive. However, we only need about 6.1 GB. The oddly worded “Proceed Relayout” button at the bottom must be selected in order to change the assignments. Then click “Next.”

Then click the service partition and click “Next” again.
Here Acronis True Image will not accept values that can’t be done. In another interface oddity, it says that the minimum size is 6.144 GB and the maximum is 10.74 GB, but it does not accept numbers with decimal points. I entered 7 because it was closest to the 6.71 GB that I actually wanted.
This takes you back to the partitions screen, which is now labeled “Manual Relayout.” You’ll notice that the service partition is now showing 7 GB.
You’ll need to loop through the relayout again in order to give the saved drive space back to the primary partition. This can take some time, but don’t proceed until you’re satisfied.
If cloning to a hard drive mounted in the laptop and running True Image in Windows, a restart is needed at this point. Then comes some of True Image’s traditional magic.
When the laptop restarts, it will start the cloning process without starting Windows. This ran for about 41 minutes and was not much to look at – mainly just a couple of track-bars.
If running from the boot disk, True Image will show a summary screen. The last item in the list will be to transfer the MBR or master boot record, which is what makes the new hard drive bootable. Select “Proceed,” and True Image will start the cloning process. This also ran for about 41 minutes, although no reboot was needed.
After the operation is complete, select Operations, then Exit. While it’s shutting down, remove the boot disk from the CD/DVD drive.
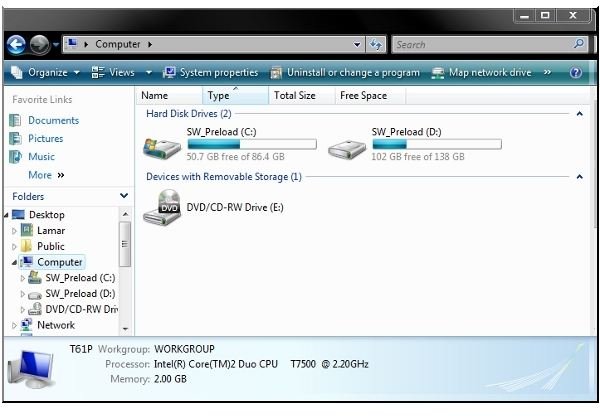
In either case, go to “Computer” after the restart, and you’ll see that you now have two identically named hard drives.
All that’s left now is the physical act of removing and replacing the laptop’s hard drive with the one from the enclosure.
*
You may also be interested in reading the full Bright Hub Review of True Image 2009. If so, please follow the first link in the next section.
Further Reading
Bright Hub Review: Acronis True Image Home 2009 - Long revered for its ability to provide perfect disk images for cloning laptop drives, Acronis True Image also includes a powerful and fast backup feature that can provide entire drive backup as well as incremental backups. In this illustrated review, we take True Image Home 2009 through its paces.
Is Using Vista’s Hybrid Sleep Good for my Laptop - Curious about whether the new power saving modes in Vista are actually better for use on the desktop than on your laptop? Here we look at Vista’s hybrid sleep mode and how hibernation and sleep are different from Windows XP.
Bright Hub Review: APC UPB90 Universal Laptop Extender - Carrying and swapping laptop batteries on the plane is no fun. What if you could have a powerful battery extender capable of powering the notebook from your laptop’s slim-line carrying case? Here we review the APC UPB90 universal laptop battery and find it to be an effective, but expensive product.
How to Dual Boot Windows 7 and Vista - Interested in trying the the Windows 7 beta version on your Vista PC? Vista includes a “Shrink Tool” that can re-size your Vista partition to make room for Windows 7. This can get complicated, but in this detailed step-by-step guide we cover shrinking the Vista partition and installing Windows 7.


