iPad apps are not usually permanently built in, and they can actually be installed to and deleted from the iPad quickly. Here is a look at how to remove apps from your iPad.
App Store
The iPad, as an iOS device, is centered on apps. Like the iPhone and iPod Touch, it has built in apps like FaceTime, Safari, Photos, iTunes, Camera, and so on. Beyond that the apps you download can be added and removed easily.
The process for installing these apps onto the iPad goes one of two ways: through your computer or the App Store built in app. You search for apps you want, download them, and, if you are doing this from your computer, you then sync them to your iPad. If they are downloaded through the App Store app then they will download directly to your iPad, and you then transfer them over to your computer to save them when you sync next.
But when you are figuring out how to uninstall an iPad app you have a different purpose altogether. How do you remove it from your iPad and your PC or Mac? There are a couple of different ways to do this.
Initial Delete
The most basic way to uninstall an iPad app is to simply delete it off of your iPad directly. To do this you start by
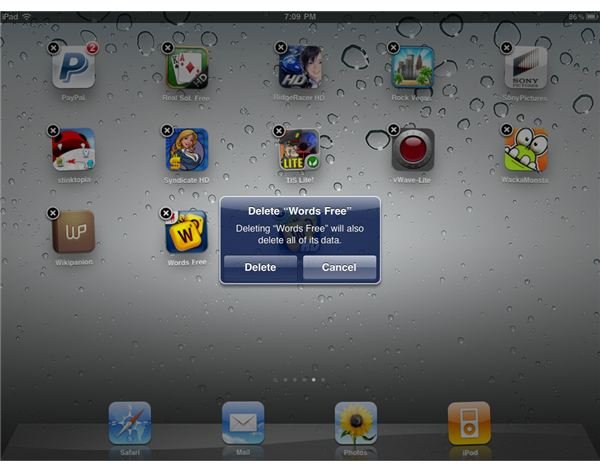
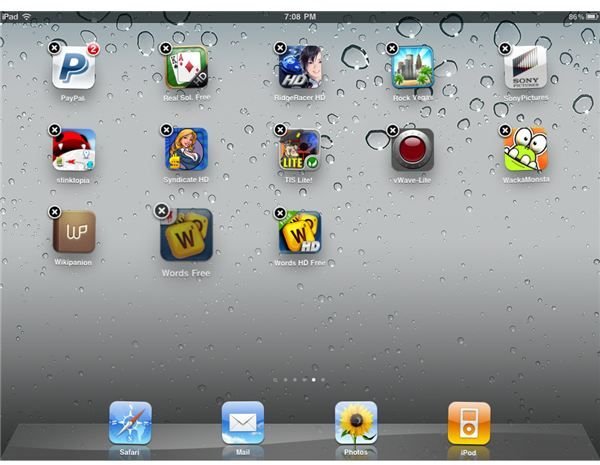
selecting an app and pressing down on it, holding your finger to the touch screen. All the apps in view will begin shaking slightly and they will have a small “X” in the upper right hand corner of them. Press this “X” and you will receive a pop up message asking if you are sure you want to remove that app. When you confirm, the app will disappear, as it has been removed from the iPad.
Final Delete
The process for removing that individual app does uninstall of it for the time being, but that does not mean that it is gone for good. Since you either downloaded the app to your computer and then synced it over to the iPad or transferred the purchase to your PC after downloading it from the iPad
, it will remain on your computer. Often times it will sync back to your iPad the next time you connect it. You must remove the source file to delete the app for good
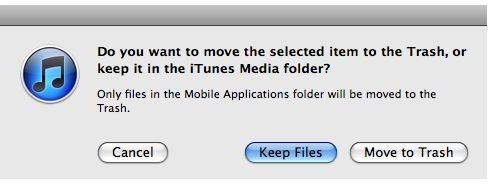
Go to iTunes and find Apps in the Library listing in the upper right hand panel, directly under Books and above Ringtones. Here there is a list of all of your apps for the iPhone, iPod Touch, and iPad. Identify the app that you want to uninstall from your iPad and right click it, choosing the Delete option. This will bring up a menu that will ask if you want to Keep Files or Move to Trash. Choose Move to Trash and the file will then go through the normal trashing process. Empty your trash and the file will be removed from your computer completely. Windows computers follow a similar process, although you’ll be sending the app to your Recycle Bin instead.
You do not have to worry about losing an app for good when removing an iPad app because any app that you have purchased can just be re-downloaded without charge. This gives you the room to free yourself up from apps to preserve system storage without being worried about lost purchases. Likewise you will be able to just go back and re-download free iPad apps without any problem.
Saving It and Preventing the Sync
If you want to keep the app on your computer and in your iTunes, yet do not want it to be re-synced to your iPad, there is another option.
Plug the iPad into your computer and cancel the sync. Select the iPad from under the Devices heading and then go into the Apps section in the middle panel. Here you’ll find the settings that determine how the desktop on your iPad is set up, what apps can transfer documents between the iPad and the computer, and etc.
Find the Sync Apps section that determines exactly what apps are going to be synced. Go down the list of apps and find the one you want. Remove the check mark in the box to the left of it to ensure that it will not longer be automatically syncing to your iPad. Then hit the Apply button in the lower right hand corner, and during the next sync the app will not be returned to the iPad.
You have the option to check the box later when you want to sync that app, as well as choose the position you want it to be in on the iPad desktop. Doing this will place the app back on your iPad
References
- Source: Author’s Own Experience
- All Screenshots by Shane Burley


