If you’re looking for a free, open-source desktop publishing program that is available for Linux, Mac, and Windows platforms, you may find an answer in Scribus. Resize pages in Scribus when you need to through resetting margins and other techniques you will learn in this Bright Hub article.
Scribus Pages
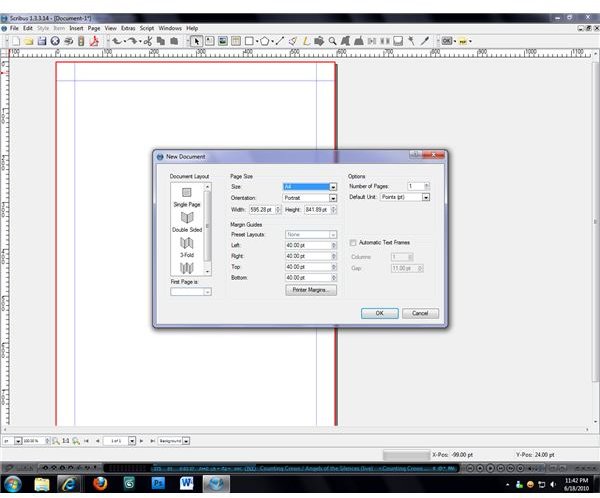
When creating a new document in Scribus , users are presented with a number of options. Documents can be created which contain a single page or multiple pages in any common printer layout. In addition to these options, the initial page margins can also be set. Once the document has been created, the overall outline of each page is shown in red while the “printed page” defined by the page margins is outlined in blue. This is fine for most users who will have no reason to change the size of the pages that they have created, but users who need to make a few adjustments to page size may find themselves wondering whether they’ll have to create a new document just to make these adjustments.
Adjusting Existing Pages
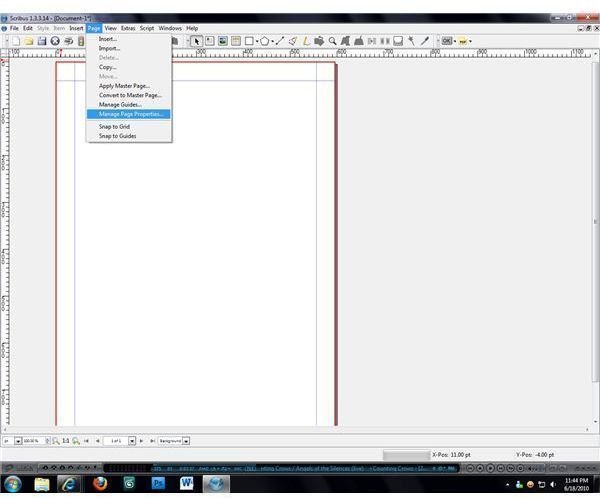
Adjustments to page sizes in Scribus are actually quite easy to make. The “Page” menu is located in the center of the menu bar and contains several options that can be used to make adjustments to the existing page. If you need to resize the page that you’re working on, select the “Manage Page Properties…” item from the Page menu to open the Manage Page Properties window.
The actual page size can be changed by selecting a different paper size from the drop-down menu at the top of the new window. All common page sizes are available, and custom sizes can be set by choosing the “Custom” entry from the bottom of the menu. When “Custom” is selected, new input boxes for page height and page width will become available.
Orientation changes can be made using the drop-down menu beneath the “size” menu. This allows you to change the size and shape of your page layout, switching from a standard portrait layout to a landscape layout so that your document will print horizontally instead of vertically.
Changing Margin Sizes
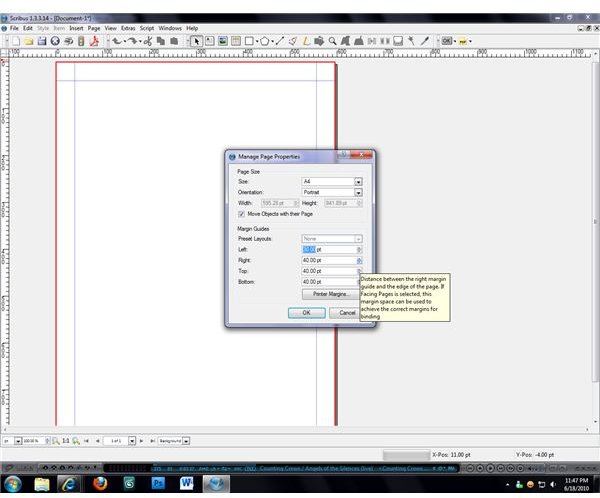
Changes to the size of the “printed page” in Scribus can be made in the Manage Page Properties window as well. Beneath the page size adjustment menus are four numerical entries that represent the size of the top, bottom, left, and right margins. By increasing the values in these fields the corresponding margin line will move farther from the side it is based on. Decreasing the values will cause the margins to move closer to their sides. Though most users will keep the margins set to the same numbers so that there will be equal margins all the way around the page, different margins can be set for each side if it better meets your page layout needs.
Once you’ve made all of the changes that you need to the page size, orientation, and margins, click the “OK” button to apply the changes. If further changes need to be made, you can open the Manage Page Properties window again at any time to adjust your page size and margins so that your pages look exactly the way that you want them.
Image Credits: All screenshots by J. Edward Casteele


