Most people do not have the time to spend creating a square in Adobe Illustrator and copying it over and over again to create a checkerboard effect. In fact, there is a much easier way to do it. This Adobe Illustrator tutorial documents how to create a checkerboard effect in Illustrator.
What You Need for this Adobe Illustrator Tutorial
Like many Adobe Illustrator tutorials, this tutorial uses Adobe Illustrator CS4 for Windows running on Windows 7. If you have a different version of Windows or are using Adobe Illustrator for Mac, the principles remain the same although keys and other details may slightly vary. You will need the software and a computer meeting the minimum system requirements of Adobe Illustrator CS4 to follow this tutorial.
Creating the Checkerboard using “Split into Grid”
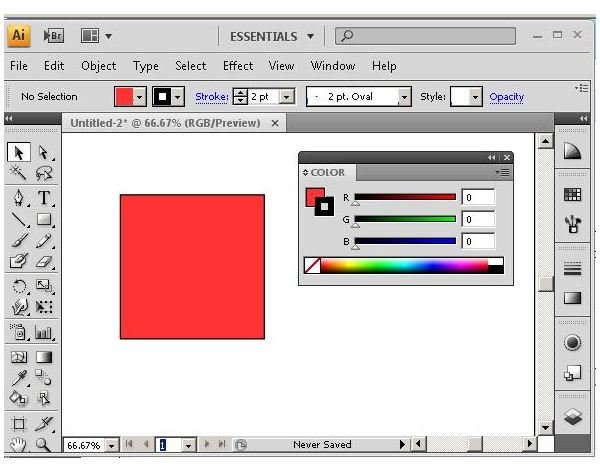
1. Create a Square the Size of Your Checkerboard. Grab the rectangle tool from the toolbox. Create a square that is the size of the checkerboard pattern you wish to create. Fill it with red and give it a black stroke.
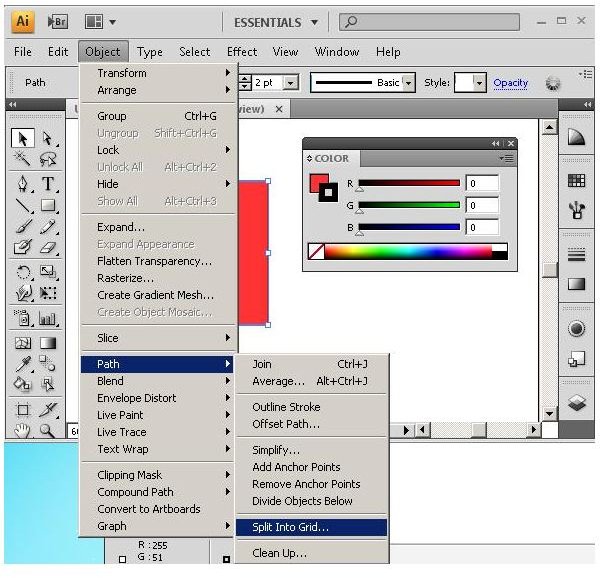
2. Create a grid to split the square. With the square selected, click “Object” and then “Path” from the menu bar. Choose “Split into Grid”.
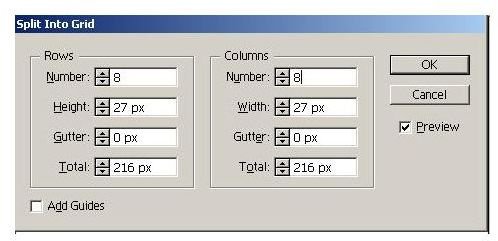
Enter “8” in the “Rows” field and “8” into the “Columns” field. Click the “OK” button.
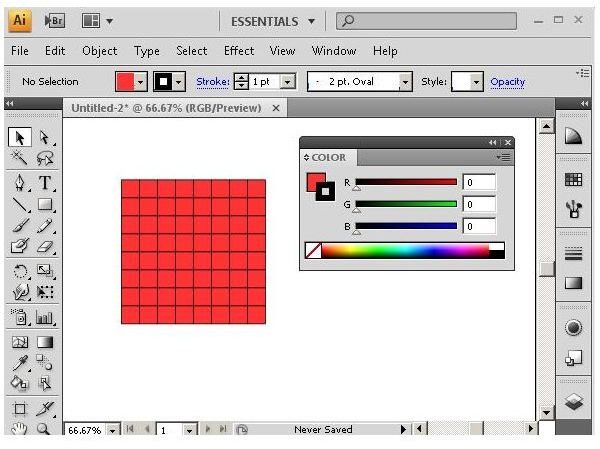
Your square should now look like this:
3. Add the alternate color. Each square is now its own path, so you can change them to alternate between red and black. You can quickly do this by selecting a black fill in the color palette
and then grabbing the eyedropper tool from the toolbox. Holding the

Creating the Checkerboard using “Transform”
Unlike some Adobe Illustrator tutorials , this one gives you two ways to do the same thing. In case you would like to use a different method for creating a checkerboard pattern, here’s how to do it using the “transform” effect.
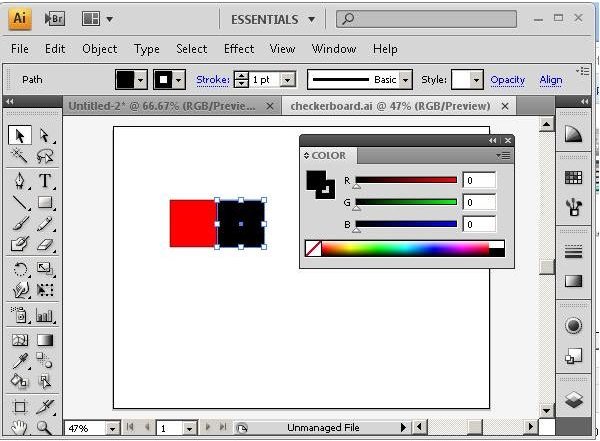
1. Draw a red square. Select the rectangle tool, click on the canvass and create a red square that is 100 px x 100 px. Give the square a black stroke.

2. Add a black square. Select your square and then - while holding the
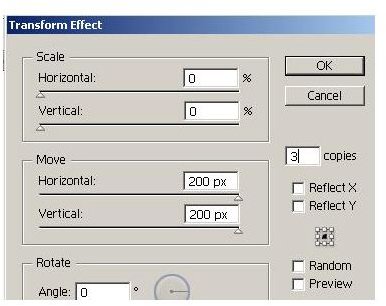
3. Create your first row. Select both squares and then click “Effect”, “Distort & Transform” and then “Transform”. In the “Transform Effect” window, under “Move”, enter “200 px” in the “Horizontal” field (because both squares together are 200 px). In the “Copies” field, enter “3”. Click the “OK” button to finish the row.

4. Create the second row. Follow the procedure above to create a second row that begins with a black square and has a red square to the right of it.

5. Fill out the checkerboard. Select the four squares and then click “Effect”, “Distort & Transform” and then “Transform”. In the “Transform Effect” window, under “Move”, enter “-200 px” in the “Vertical” field (because both rows together are 200 px). In the “Copies” field, enter “3”. Click the “OK” button to finish the row.
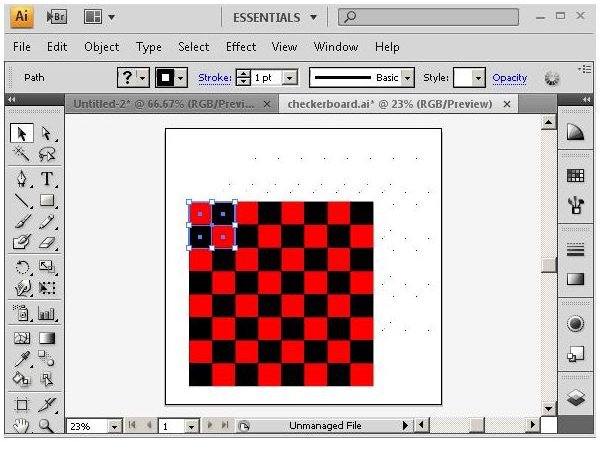
6. Expand appearance (optional). With your four squares selected, click “Object” on the menu bar and then “Expand Appearance.” You can now manipulate each square individually.


