In Part 2 of this series, we look at how to use the new background remover that comes packaged with Corel Paint Shop Pro Photo X2 Ultimate to isolate basic solid objects in a digital photograph.
How Hard is it to Remove the Background in a Photo?
The difficulty in removing the background in any digital photograph depends on a lot of factors, but one of the biggest obstacles is the shape and structure of the object that you want to keep. If you’re working with an object that has a lot of “fuzzy” edges, like a long-haired cat, or one that has a lot of interior “holes”, such as a window or shrub, then the process of removing the background can get a whole lot harder.
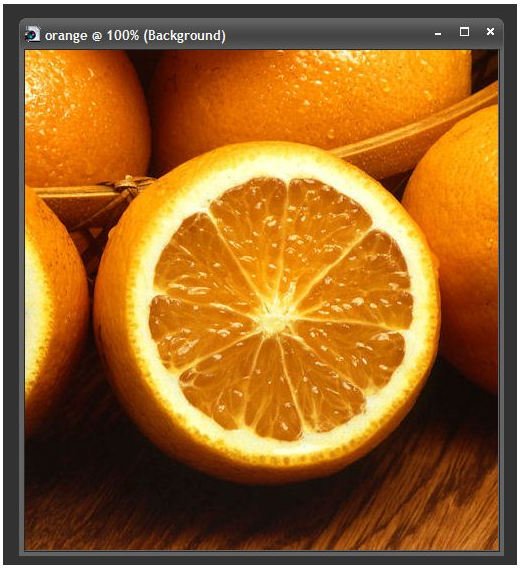
The easiest type of object to isolate in a photograph and remove the background from is one that is solid and has well-defined boundaries. We’ll use an example of this type for our first guide on how to use the new background remover tool in Corel Paint Shop Pro Photo X2 Ultimate .
Removing the Background from a Solid Object
Begin by opening the photo that you are going to be working with in Corel Paint Shop Pro Photo X2 Ultimate. If you plan on making any other adjustments to the photo, such as cropping or resizing, it’s a good idea to perform those tasks first. It’s also a good idea to save your photo after every change is made, and use a different file name for each saved image so if you make a mistake, you don’t have to start all over from the very beginning.
When opening a digital photograph in Paint Shop Pro, its layer type will default to Background. Before you can use the background remover plugin to edit the photo, you must first convert it to a full raster layer. To do this, choose Promote Background Layer from the Layers menu on the main toolbar.

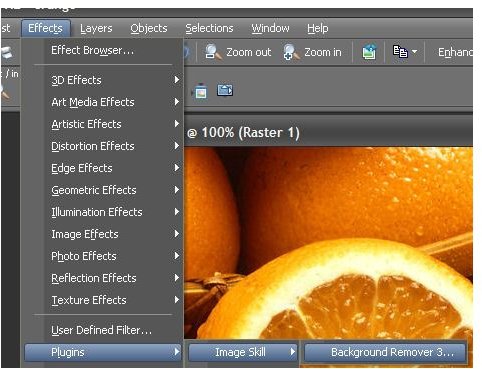
Now we’re ready to use the background remover plugin to edit the photo. From the Effects menu, select Plugins and then choose Background Remover 3 from the Image Skill submenu.
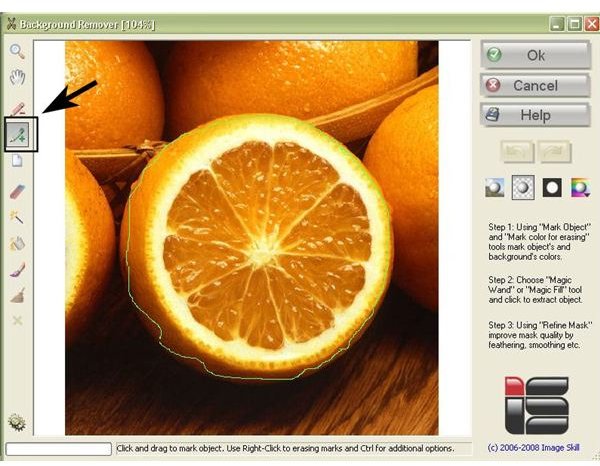
This will open a new window in which you can edit your photo using the background remover. Below is a screenshot of this.

Use the Mark Object tool to trace a path just inside the boundaries of the object that you want to keep in your photo. The markings from this tool will show up in green on your photo as shown in the screenshot below.
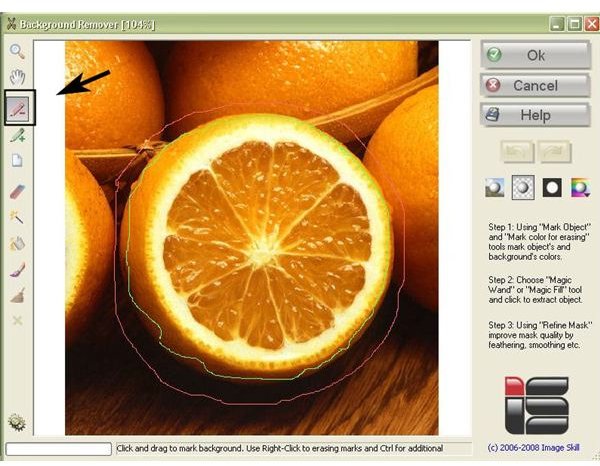
Next use the Mark Colors for Erasing tool to trace a path just outside of the boundaries of the object. This path will be shown in red on your photo. These paths don’t have to be perfect, and it may take a little practice before you’re fully comfortable with drawing them, especially if you’re using a mouse that isn’t very precise.
Now, select the Magic Wand tool and click anywhere in the background of the photograph. This will erase the background according to the marks you have made with the Mark Object and Mark Colors for Erasing tools.
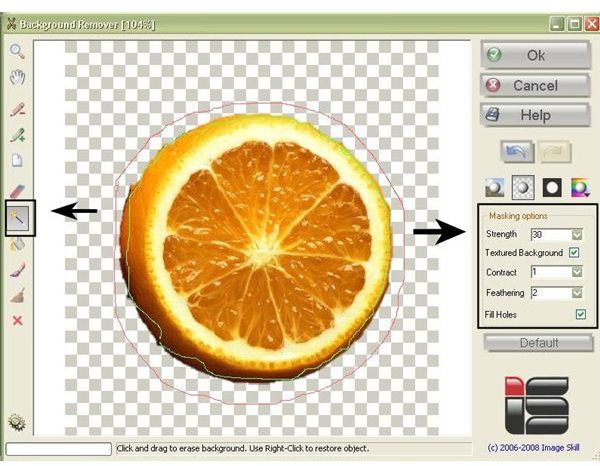
You will probably need to make adjustments to the Strength, Contract, and Feathering controls in order to get the best extraction for your object. The great thing about the new background remover in Paint Shop Pro is that you can play around with these controls and see what effect they will have on your photo before you actually apply the changes.
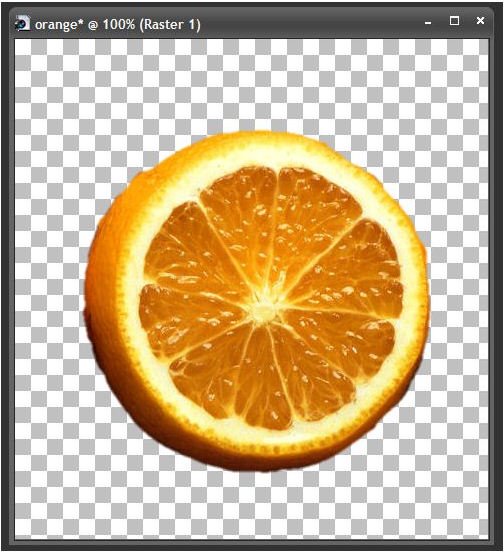
When you’re done making all of your modifications, click the Ok button, and you will be returned to the main Paint Shop Pro application with your edited photograph.
Additional Resources
Looking for more tips and tricks? Check out Bright Hub’s library of Paint Shop Pro tutorials here on the Digital Photography Channel. The following articles may be of particular interest to those looking for tips on how to remove backgrounds and extract objects from digital photos:
-
Saving Images with Transparency in Paint Shop Pro
Advertisement -
Create Your Own Picture Tubes in Paint Shop Pro
Advertisement
This post is part of the series: Corel Paint Shop Pro Photo X2 Ultimate’s Background Remover Plugin
In this series we’ll take a look at how to install and use the new background remover plugin that comes bundled with the Corel Paint Shop Pro Photo X2 Ultimate package.


