Lightroom Sharpening Tool Tutorial
Advances in Lightroom Tools
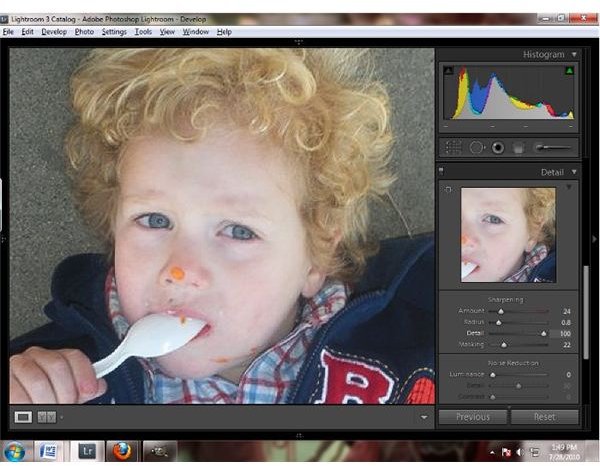
The sharpening tool given to us in Lightroom 1 only had two slider bars to control edges and contrasts, which left a want for more control over sharpened areas. Lightroom 2 and Lightroom 3 showed that Adobe was listening, gave us a few more sliders to control. Now we have Amount, Radius, Detail, and Masking available to control the sharpening of our photos. This is great for the professional photographer’s post-work, but may leave a few hobbyists and newbies in the dark. To familiarize yourself with the Lightroom interface, you may wish to read Beginners Guide on How to Use Lightroom 3. Here is a brief tutorial to explain these aspects of the Lightroom sharpening tool.
Open a Photo
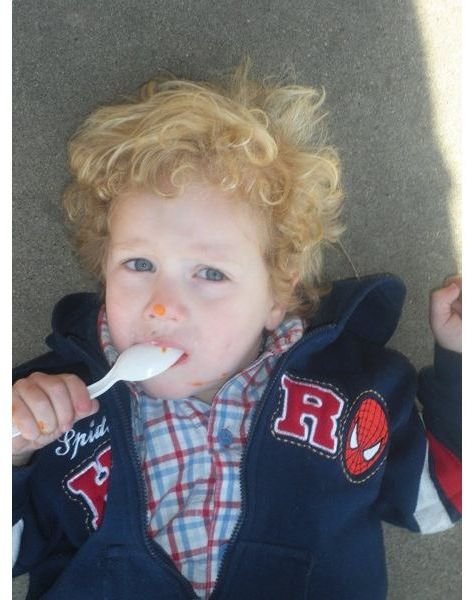
First we want to begin with a photo that needs a bit of touch up. When you begin to play with the sharpening tool, you will need to have your photo preview and/or photo of at least 1:1 view (I prefer 2:1). The Lightroom sharpening tool will display a warning telling you this before you begin, so it’s easier to simply switch to that view first. This allows you to actually see the changes made. It also helps to get rid of some unnecessary toolbars to see more of your photo.
Adjusting Amount
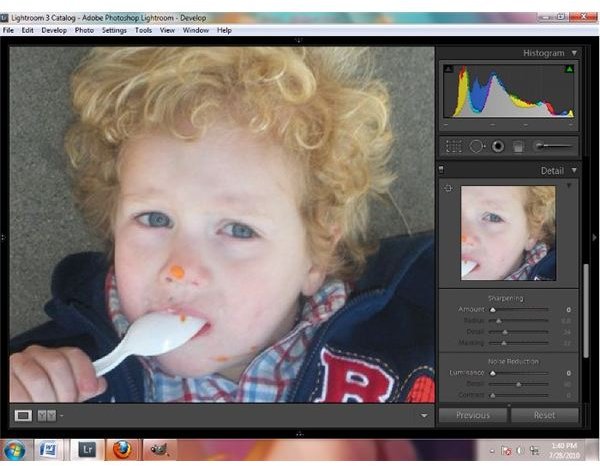
Now you’ve got a good view of your photo, and can begin changing it up. The first bar, Amount, is pretty straightforward. This Lightroom sharpening tool adjusts the amount of contrast around the edges within your image, or simply the amount of sharpening. The default in Lightroom 3 is 0, and can go as high as 150. Remember when using this slider that you want the picture to be improved. Most times, you also want the end result to be realistic (unless you’re looking for more artistic effects.)
The amount you choose is dependent on the type of camera used and the size of your image. The smaller the image in pixels, the more dramatic the changes with sharpening. This image is 600x450 pixels, which is rather small, so only needs the Amount bar set to about 26. The healthy range for this bar is 26-60.
Amount Examples
Working With Radius
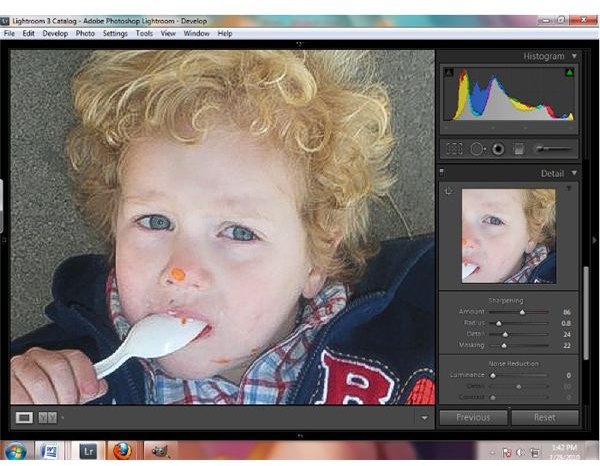
Radius determines how large the new lines around edges in the image are, or how far they extend. Sharpening is simply a trick of contrast and light in an image, and these lines help the eye quickly see the edges in an image, but a line which is too thick is not realistic. The average is about 1 for Radius, but for smaller images it is better to keep it between .6 and .8. Holding the ALT (Option for MAC) key while using this slider will show you where the lines are and how thick they are while you adjust.
Radius

Details
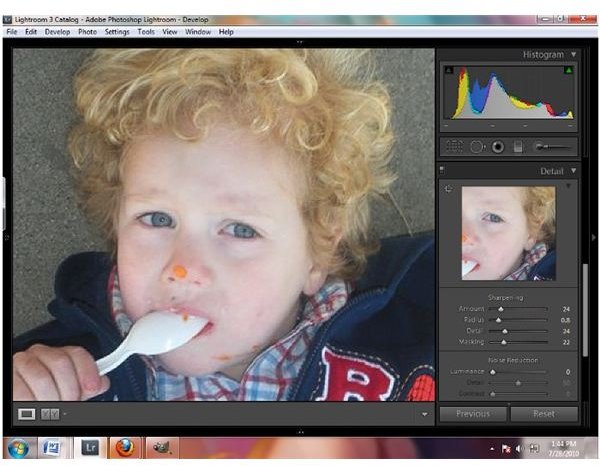
Detail is another bar which is very straightforward. This brings out more detail in the image as you bring the bar up. This bar does go up to 100, but almost never needs to. 100% detail creates a very harsh image and is not too realistic. Again, ALT or Option can be held while this bar is adjusted to see exactly what detail will be brought out and where. The average amount is 25-40.
Detail
Learning to Mask
Masking may be a bit tricky, but is really the Lightroom sharpening tool which controls which areas of the image are sharpened. Using Amount before sharpening all of the edges of the image, and masking helps keep that sharpening limited to larger areas of the picture. So instead of every little line of the face being brought out, it softens those lines and only lets the lines around the face stand out. This is where holding ALT or Option really helps you understand what’s happening in the image as you make adjustments, and the amount needed is different for each image and each personal preference. On smaller images like this, I prefer to leave Masking at about 20-30.
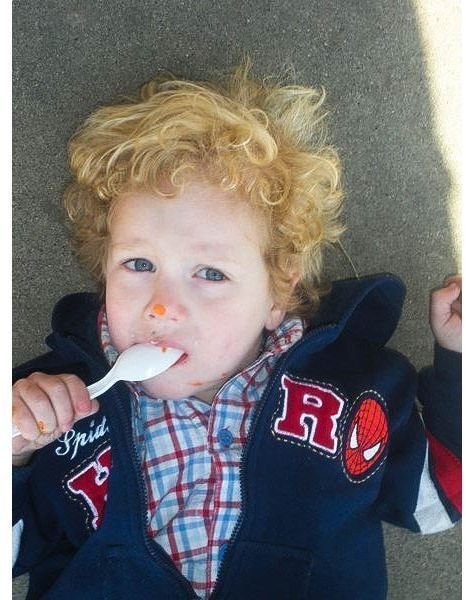
Masking and Final Result

Learning More
The Lightroom sharpening tool is but one aspect of the workflow in Lightroom. With all of the tools available, it’s easy to get lost and forget certain touch-up elements. To help, here’s a great article on mastering the Lightroom workflow. With all the tools available, post work can be a cinch!