How to Add a Watermark to Your Images Using Adobe Photoshop CS4 & CS3
Creating a watermark in Adobe Photoshop CS4 is an easy process that allows you to personalize and protect your images. This process happens to be very similar to that of Photoshop CS3 (aside from the tabs). Whenever you provide full size/high quality images to a client or when you post them on the internet, they should always be accompanied by a watermark. The benefits and requirements of what to put in your watermarks are listed here.
If you need to place a watermark on only one photo, you may skip the first few steps and insert the watermark as a layer on top of the photo you’re working on.
CREATING A NEW DOCUMENT
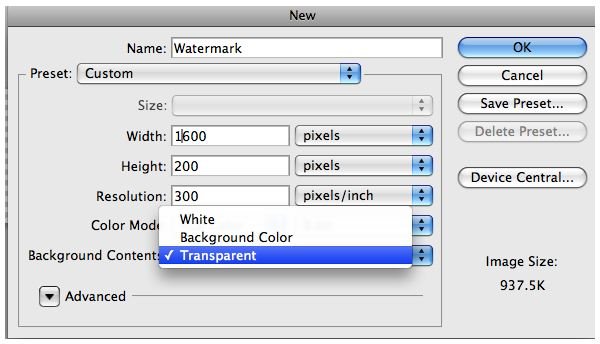
First, you will need to launch Photoshop CS4 and create a new document by going to File and then to New… (or use the keyboard shortcut CTRL + N). Then, name the watermark in the box at the top of the screen. Next, you will want to enter the width and the height. This can vary depending on the size of the image being produced, but I usually stick with a 1600x200 pixels, with a 300 pixels/inch resolution. This size will work well for a copyright or name watermark. For a square or circular watermark, you’ll have to experiment with what size works best for you.
Under Background Contents, make sure that you choose Transparent from the drop down box. The background needs to be transparent so that when we copy the watermark into a layer on another photo, only the text will be visible.
New Watermark
ENTERING YOUR TEXT
Your new document will appear to be a checkered box. If you don’t see a checkered box, then you forgot to choose a transparent background. The next step involves entering our watermark text. To do this, we will need to use the Horizontal Type Tool (Shortcut T) from the Toolbox.
Click anywhere in your new document and type in the text that you want your watermark to display. Make any changes to the text font or size that you want from the Options bar at the top of the screen. In this example, I’m changing my text to Apple Chancery.
Images

ADDING STYLE LAYERS
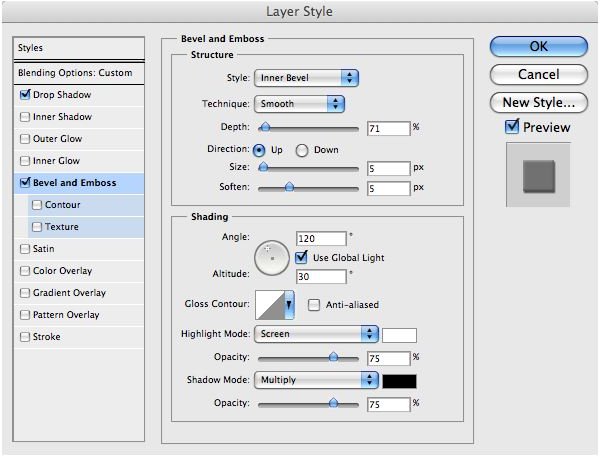
After you get the font and size the way that you want it, the next thing to do is to add a style layer and change the opacity to give it that authentic watermark look. Accessing the style layers is easy. On the bottom of the Layers Panel, just click on the icon that says fx and choose Bevel and Emboss.
Of course, there are a lot of different looks and styles to a watermark. This is an area where you have a lot of freedom to mess around with the style layers until you get a look that works for you. In this example, I used the Bevel and Emboss style as well as a faint Drop Shadow.
Bevel and Emboss
After applying the style layers, you need to go back to the upper-right hand corner of the Layers Panel and change the opacity of the watermark. I would recommend an opacity between 50-66 percent.
Tutorial continued in the second article in this 2-part series.
This post is part of the series: Watermarks and Adobe Photoshop CS4
Creating a watermark in Photoshop CS4 is easy with this tutorial. In this article, five easy steps are given to make your own watermark and add it to your photos. This tutorial also works using Adobe Photoshop CS3.