Google Notebook uses “notebooks” as a way to help keep your notes and clips organized. They work like categories to keep your notes filed under. After you learn how to create notebooks, simply drag and drop your notes and clips into the appropriate category in order to easily find them later.
How to Make Your Google Notebook Account
Notebooks are one of the primary methods of keeping track of your notes, clips and bookmarks within Google Notebook. Think of notebooks as a system of making categories and sub categories. It’s a relatively straightforward process, done in a few easy steps,and will really help keep you organized!
- To get started, log into your Google Notebook account , and take a look at how it’s organized. In the center you’ll see an area that looks something like a word processor. On the left you’ll see various sections in a menu layout. This is where we will focus our attention when creating notebooks.
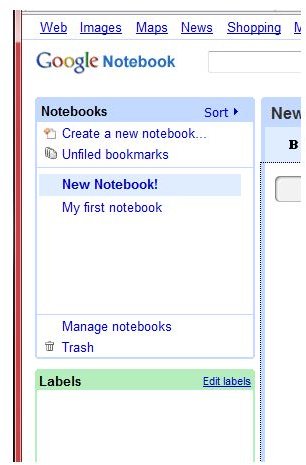
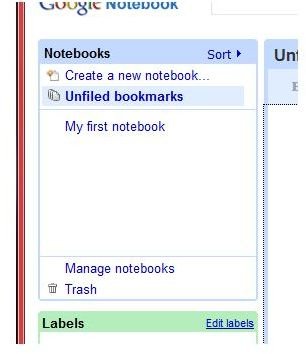
- In the left hand menu, you’ll see “Create new notebook”, “Unfiled bookmarks”, and under that, it will say “My first notebook”. Right now you’re probably in “Unfiled bookmarks”. You can check this by looking at the center word processing module, and at the top of that module it will give the title for what notebook you are in. Go ahead and click on “My first notebook”, and the title in the center should change to read the same. Now you understand how to change from one notebook to another!
- To create a new notebook, find on the left where it says “create new notebook” and click that. You’ll see the center title area change to a dialog box, with the default “Notebook 1” entered in it. Here you can enter in a name of your choosing. Go ahead and name it whatever suits you. I named mine “New Notebook!” so you can pick it out easily in the accompanying photos.
- Name your notebook and click “ok”. Congrats! You just made a new category to file clips, bookmarks and notes under (Don’t worry, we’ll get to what those are). You can make as many notebooks as you need to keep all of your stuff nicely organized.
- You should now see your new bookmark on the left, ready to use! Go ahead and click on it to open it up.
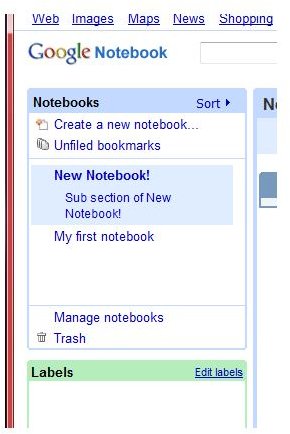
- Here is where it gets even better! You can create sub-categories within the main “notebook” category we just created. If you opened up your new notebook category, you will see a grey line in the center, and towards the right inside that line it will say «Type, Paste or Add section.
- Click on “Add section”, type in the name of your sub-category and it will show up in the left menu, under the main notebook category. This is a great way to further organize your information with even more precision.
It’s important to mention, if you make a mistake or decide you don’t need a notebook any longer click on “manage notebooks” towards the bottom on the left. A menu will pop up, allowing you to share, export, rename or delete your notebook. Also, from within the notebook you wish to change, you can use the drop down menu labeled “Tools” on the upper right side of the screen and use the delete button there.
Now you know the main method of organizing the content of your Google Notebook. There are other ways as well, which I will show you in another article. I hope you’re starting to see just how useful this tool can be!
Next: Capturing information with Google Notebook
Creating a notebook images