Google Notebooks is a free online notebook, similar to Microroft One Note. With virtual notebooks you can keep track of everything you have going on in life. The handy browser plug-in lets you take note of websites that are important. Learn how to use this to better manage your projects.
Before you Begin
Before you start using Google Notebooks, you will need to sign up for an account. The great thing about this is when you sign up for Google Notebooks you can use it with your exisiting Google account and other services. For help with this, you should check out this excellent article by Mike Carlson: How to Create a Google Notebook Account
Using Google Notebook
Using Google Notebooks is simple. You can create several notebooks to keep track of everything you need, and easily export the information into Google Docs–the online word processor compatible with Microsoft Word. Create new notebooks with a simple click, download the Notebook plugin for your browser. You’ll find instructions for how to do this when you sign up for the account. When you find something online pertaining to your particular project you will be able to quickly save it, also with just a click of your mouse.
For more help with Google Notebooks, check out:
Managing your Projects
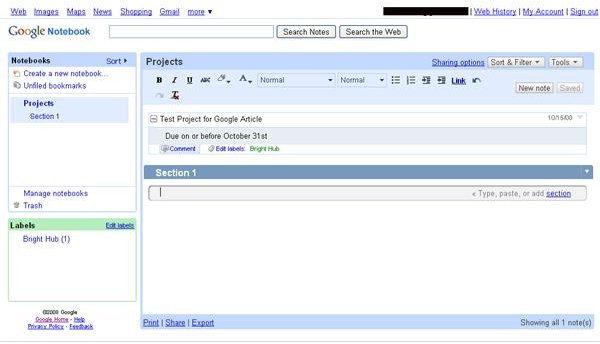
See the picture at the left for a screen shot example of how you can make this work for you. Simplying create a notebook called “Projects.” Inside it, create sections for your projects or dates, depending on your preference. Make notes regarding what needs to be done and include notes you clip from your research with the plugin. Label it with due dates or project names–the opposite of what you chose to dictate as your sections.
This way, everything is laid out in front of you and if you organize your notes well, it will be an easy job for you. If you want to try another way, you can make separate notebooks for each project, use labels to notate the client and sections to layout a plan of action by date. There is more than one way to get things done with this program, and how you do it is entirely up to you.


