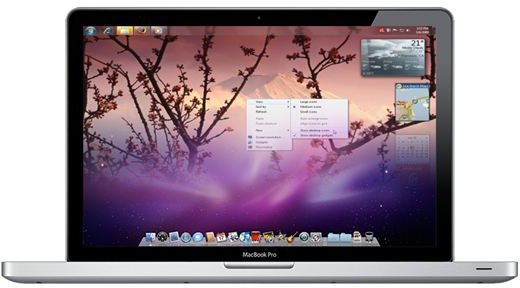
Mac OS X is a nice operating system, but if you want to run Windows programs you’ll obviously need to install windows on your MacBook Pro. Fortunately, Apple includes an officially supported Windows installation method with every MacBook.
Installing Windows 7 on a MacBook Pro
So you want to install Windows 7 on your Mac? You might think that you need to use some sort of complex hack to do this - after all, Apple usually keeps its products very locked down. This is one exception, however, because instead of forcing you to jump through hoops to install Windows 7, Apple offers an officially supported method of Windows installation. Let’s take a look at how it works - and what you can expect once Windows 7 is installed.
Welcome to Boot Camp
The official Windows installation method in Mac OS X is called Boot Camp . This utility comes automatically installed on every MacBook Pro and can be found in the /applications/utilities folder. In order to install Windows 7 you are also going to need your Mac OS X 10.6 installation disk and your Windows 7 installation disc. Finally, you should make sure that Mac OS X is completely up to date, which you can do by clicking the Apple icon in the upper left hand corner of the operating system and then clicking Software Update.
Settting up the Boot Camp Partition
Once those basics are taken care of, run the Boot Camp application on your MacBook Pro. Boot Camp’s purpose is the creation of a hard drive partition onto which you can install Windows. When you attempt to create the partition you will be asked the size of the partition you’d like to create. Remember, this amount of hard drive capacity will be removed from your OS X installation and made available for Windows.The partition you create must use NTFS format, as this is the only format Windows 7 accepts.
If you have a 320GB hard drive, and you devote 120GB to the Windows partition, you’ll have only 200GB left to work with in OS X. You should set aside at least 20GB, and you’ll want to set aside several times more if you intend to install a number of programs on the Windows partition.
Installing Windows 7
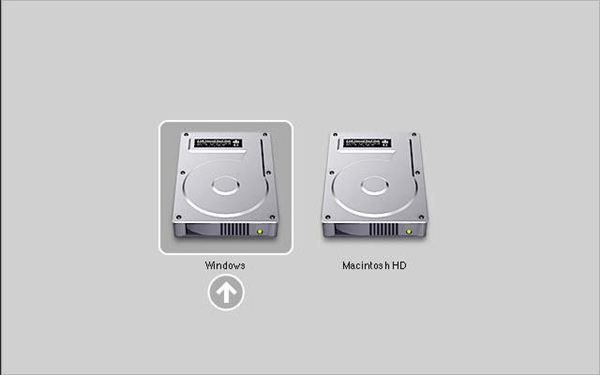
Once you’ve created the partition it is time to actually install Windows 7. Make sure you have your Windows 7 disk handy and Boot Camp open. Then click on Start the Windows Installer and Continue. Insert your Windows installation disc and, when prompted, click Start Installation.
Your MacBook Pro will reboot and begin installation of Windows 7 from the installation disc.The remainder of the Windows 7 installation will proceed exactly as it would on any other PC. When you come to the prompt that asks where you want to install Windows 7 be sure to select the partition labeled as BOOTCAMP. Don’t select any other partition, as doing so may delete your Mac OS X installation - obviously not the desired outcome!
Installing the Boot Camp Drivers
Apple computers, and MacBooks in particular, have a user interface that very different from the one found on Windows 7 laptops. The trackpad is different, and some of the keyboard buttons are different. Some MacBook Pros also come with hardware that wouldn’t normally be found in a Windows laptop.
In order to make sure your MacBook Pro is functional in Windows you have to install the Boot Camp Windows drivers. These drivers are found on the Mac OS X installation disc . The installer should start automatically when you insert the disc, but if it does not start automatically you can begin the installation by finding the setup.exe file in the Boot Camp folder of the disc.
Simply follow the on-screen instructions and authorize any changes that Windows 7 wants your permission to complete. Once complete, your MacBook Pro will be fully functional in Windows 7.
Using Windows 7 on the MacBook Pro
Once you have installed Windows 7 on your MacBook Pro you will be able to run Windows programs. However, running Windows 7 on a MacBook Pro isn’t perfect - there are some issues you should be aware of.
You will likely need to purchase a portable mouse if you have any intention of using Windows with your MacBook Pro frequently. The touchpad works with Windows 7, but it doesn’t work very smoothly. Scrolling is not as smooth as it is in OS X, and the two-finger right-click motion used in OS X, although functional in Windows, often doesn’t register correctly. These can be frustrating issues if you want to get anything done in Windows 7 besides the most basic tasks.
Driver issues can also raise their ugly head, although they’re not as common as you might think. On my 13 inch model I’ve found that the biggest issue is the MacBook Pro 13’s unique Nvidia 320M graphics solution. This is not something found on any Windows PC, and games often complain about it. Games still work, but they sometimes have small glitches or problems. For example, my MacBook Pro 13 will only run Starcraft 2 in a window when I play the game with Windows 7.
Finally, you can expect decreased battery life when using Window 7. Mac OS X is a carefully tuned operating system that is built to maximize the battery life of the MacBook Pro hardware Apple uses. Windows 7 is not optimized in this way for these systems, so it can’t achieve the same battery life. You can still expect about 4 to 5 hours of light usage, however.


