One of the things I really miss from previous versions of Microsoft PowerPoint is the ability to simply record a macro. You can still create macros in PowerPoint 2007, but it requires a little more work.
Macros in Microsoft PowerPoint 2007
In previous versions of Microsoft PowerPoint, creating basic macros was easy. There was a macro recording feature that allowed users to click a button to start recording, manually perform the tasks to include in the macro, and then click another button to stop recording. This functionality is not part of the PowerPoint 2007 software. However, there are some third-party applications such as Macro Express 3 which allow you to create recorded macros for any Windows application.
The ability to create macros still exists in PowerPoint 2007, but now they have to be written in Visual Basic for Applications (VBA). Before you shudder and decide to look for another alternative, this isn’t as bad as it sounds. Although you will need to gain some familiarity with VBA to create macros in this manner, you don’t have to be a whiz at programming to get this done.
Later in this series, we will give some sample VBA code commonly used in PowerPoint macro creation that you can just cut and paste into the Visual Basic Editor and use to create macros for your own presentations. For now, we’ll cover the general steps needed to create a macro in PowerPoint 2007.
How to Create a Macro
Before we begin, make sure that the Developer tab is visible on your PowerPoint ribbon and that macros have been enabled. If this is not done, refer to Part 1 of this series, and follow the instructions there before continuing.
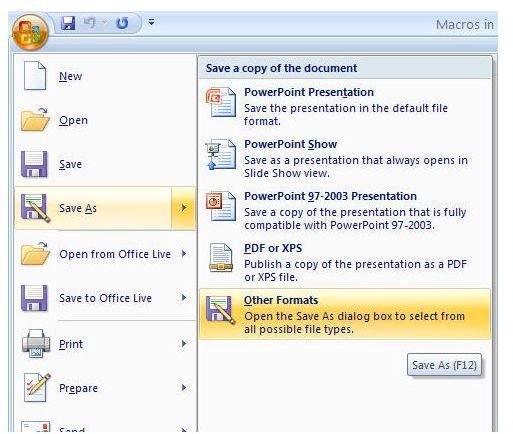
In order for our macros to work after we define them, we’ll first need to save our PowerPoint presentation in a special way. To do this, click on the Office button and choose Other Formats from the Save As category. Alternatively, you could press the shortcut key, F12, on your keyboard to access this option.
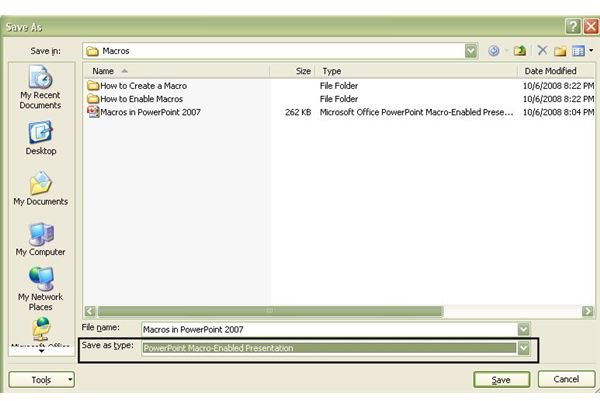
When the Save As dialog box opens, select PowerPoint Macro-Enabled Presentation from the drop-down list next to Save as Type. Click Save to continue.
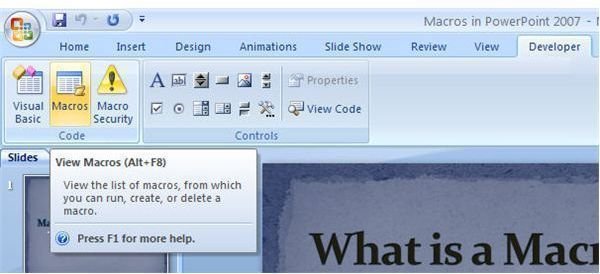
Now, we’re finally ready to create a macro. Open the Developer tab and click on the View Macros button as shown in the screenshot below.
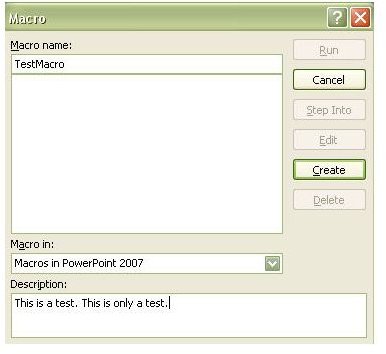
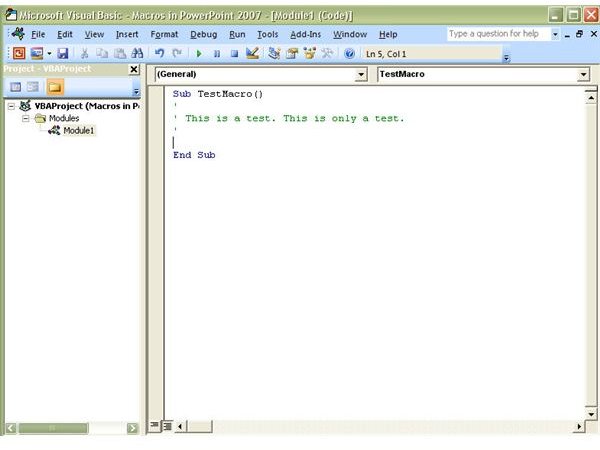
This will open the Macro dialog box, which should look familiar to those who used the macro recording function available in previous versions of PowerPoint. The only thing mandatory to do in this box is name your new macro. However, it’s also a good idea to provide a short description of what the macro will do, especially if your memory is as bad as mine. For now, we’ll just give this macro the incredibly descriptive name of TestMacro.
After you’ve finished here, click Create to continue. The Visual Basic Editor window will now appear on your screen, with the cursor placed between the lines of code that read as Sub TestMacro( ) and End Sub. Any commands that we want the macro to perform should be typed or copied in between these two lines.
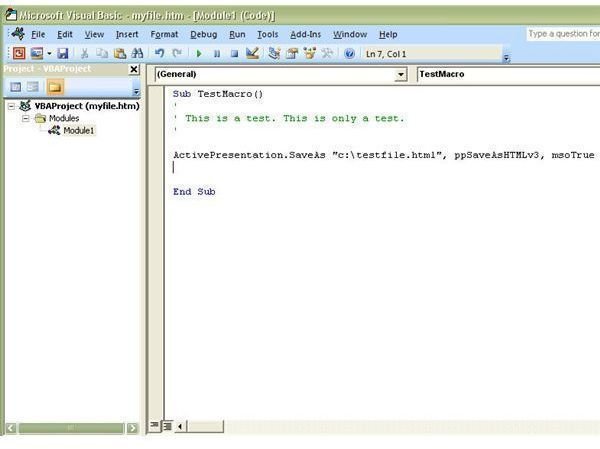
We’ll save more detailed examples of VBA code for later articles in this series, but we’ll go ahead and create a very simple macro here just to illustrate the process. Let’s suppose that we want to write a macro that will save our PowerPoint presentation as an HTML file entitled testfile.html. The VBA code needed for this command is:
ActivePresentation.SaveAs “c:\testfile.html”, ppSaveAsHTMLv3, msoTrue
In the Visual Basic Editor, our macro code will now look like this:
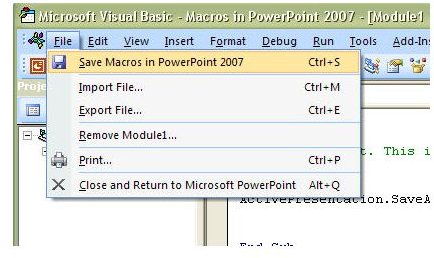
At this point, we could include additional code if we wanted the macro to perform more tasks, but we’ll leave it just like this for now. We can go ahead and save the macro file by either pressing Ctrl+ S or choosing the Save option from the File menu on the Visual Basic Editor toolbar.
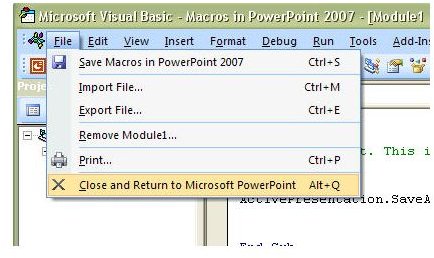
After saving, we can exit the editor by pressing Alt + Q or selecting Close and Return to Microsoft PowerPoint from the File menu.
Now that the macro has been created, it can be used at any time. Next, in Part 3 of this series, we’ll cover how to run existing macros in PowerPoint 2007.
This post is part of the series: Using Macros in Microsoft PowerPoint 2007
If you constantly find yourself performing the same tasks over and over again in PowerPoint 2007, break free from the monotony by learning to create and use macros. In this series we will cover how to use macros in PowerPoint 2007 and how they have changed from previous versions of the application.
- Microsoft PowerPoint 2007 Macro Basics
- Creating New Macros in Microsoft PowerPoint 2007
- Executing Macros in Microsoft PowerPoint 2007
- Inserting Multiple Slides in Microsoft PowerPoint 2007 Presentations
- Slide Layout Values in Microsoft PowerPoint 2007
- Best Add-Ins for Microsoft PowerPoint 2007
- Microsoft PowerPoint 2007: Installing Third-Party Add-Ins
- Using OfficeOne Shortcut Manager in Microsoft PowerPoint 2007


