Is your home office cluttered with books, stacks of paper and office supplies? It sometimes seems no matter how many filing cabinets or how much desktop space you add to your office, it’s never enough to meet the demand. The addition of home office shelving may be the answer to your clutter problem.
The Shelving Desk
Home office shelving does not have to mean metal grids screwed into your wall with brackets and faux wood shelves. With a little ingenuity, you can create office furniture that serves as both shelving and a desk, making the best use of your floor space. Begin the project by making or purchasing bookcases that stand two shelves high. A good height is around the 30-inch range. You will need one bookcase for each side of the desk and one long bookcase for the front of the desk or, if you cannot find a long bookcase, two regular sized bookcases.
Place the front bookcase(s) in the home office where you want the front of the desk to rest. The shelving part of the bookcases should be facing out. Place the side bookcases, shelving facing out, flush with the corners of the front bookcase, forming the u-shape for your desk. Purchase a top for your desk in your favorite material. The top can be finished wood, stone, or finished with ceramic tile or laminate. Now, you have a function desk with shelving contained around the perimeter. An additional advantage to this type of desk arrangement is that all cords can be hidden under the enclosed desk for a more attractive office.
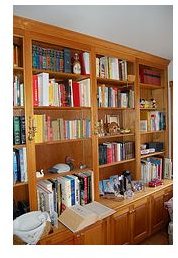
Built-in Bookcases
Prefabricated bookcases are easy and functional, but lack a polished look. If you want a higher-end look for your home office, and you can make a few basic cuts on molding or have a friend that can, you can create a beautiful set of built-in bookcases for your home office.
Start by selecting the wall on which you wish to place the bookcases. Measure the wall and figure out how many bookcases it will take to cover the entire wall. Do not include the floor molding in your measurement. You may have to mix up the size of the bookcases to get the space effectively covered. Don’t worry about being short a couple of inches.
Remove the baseboard molding from the wall where the bookcases will stand. A rotary tool is the easiest way to cut away a section of baseboard molding. Once you have removed the baseboard molding, place the bookcases against the wall in the order you wish to arrange them. Level the bookcases using shims to align them properly. Cut one piece of baseboard molding the length of the wall and install it across the bottom of the shelves. Cut one piece of crown molding the length of the wall and install it across the top of the shelves. Install decorative molding down the two end bookcases to close the gap between the bookcase and the wall. Choose molding width based on the size of the gap that needs covering. Glue thin decorative molding down the bookcase sides where two independent bookcases rest against each other.
Now you have functional yet attractive home office shelving that complements your space.
Reference & Photo Credit
Reference:
“Built-Ins”; Robert J. Settich; 2009
Photo: flickr.com/thumeco


