In order to make your home office wireless network do anything useful, you’ll need to configure your wireless network card. Here is a walk through of the setup process.
Setting Up the Wireless Network Card
Once you have Setup Your Home Office Wireless Router, you need to configure the wireless network card on the workstation. If the wireless network card has never been connected to your system before, run the installation software BEFORE you connect it. Otherwise, the computer may try and install something else because it doesn’t know what you are attaching.
Once the software has been installed (or when instructed during the setup program), connect the wireless network card to your system. The card should be installed and activated. At this point, another configuration program my try and run. Here is a very important point. You can only have one management software running at a time. If you try and use two, you are begging for tiny hard to spot errors to creep up.
First, try using the Windows Wireless Zero Configuration Utility. That will make it so that you can configure all of your systems the same way even if the hardware is different, so when you software asks, or when Windows asks, choose “Let Windows Manage Wireless Network”
Wireless Network Card Settings
For the most part, configuring the wireless network card is as simple as matching the settings on the wireless router. This makes both devices speak the same language. If you cannot select a setting or the choice is not available, you most likely need to update your wireless network card drivers. This is especially true if you have built-in wireless in a laptop that is more than a couple years old.
Follow your network card’s setup program if there is one to configure all of the settings. If not, then you need to configure your network adapter. This is different than configuring your wireless network settings. So, go into Control Panel -> Network Connections (or Network Neighborhood). You can try the Wizard if you like, but there have been mixed success with it. The manual route is a little cleaner.
Once you are in the network window, you should see your wireless adapter.
At this point, if you are not going to be using the wired network adapter, then Right Click the wired adapter and choose Disable. It will change to gray and say “Disabled”. This will keep the computer from trying to use that adapter for any network activity. (In theory, this works without you having to do this, but you might as well make sure.)
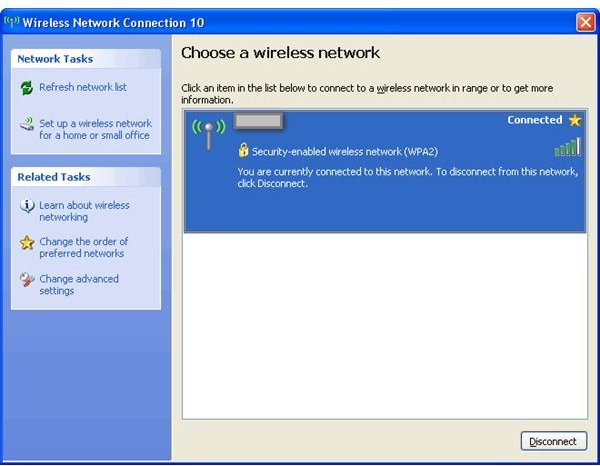
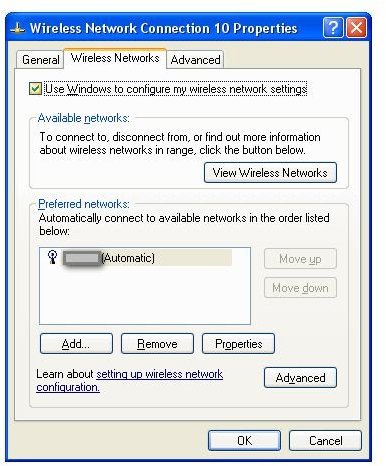
Right Click you wireless adapter and then choose Properties. Select the Wireless Networks Tab. “Use Windows to configure my wireless network settings” should be checked. If you see the SSID you setup when you configured your wireless router under Preferred Networks, then highlight it and choose Properties. Otherwise click View Wireless Networks and choose to connect to your network. You’ll end up entering the same information.
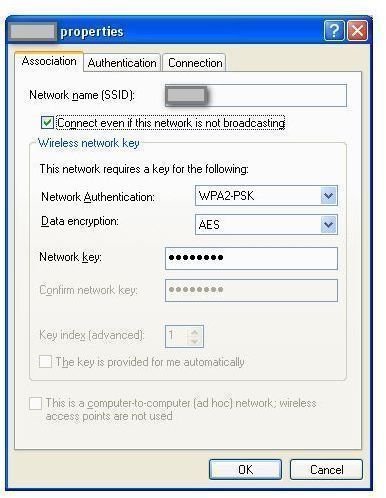
Depending on how automatic your wireless network card has been manufactured, it may figure out by itself what kind of security your wireless network is using. If not, just input the same values as when you configured your wireless router (WPA2 PSK AES if you followed along). Then you will have to type in the passkey (it is called Network Key on this screen). At this point your adapter should connect to the wireless network and show Connected.
If you setup your wireless router as a DHCP server, then it should get all the numbers it needs automatically. If not, you’ll need to enter them manually under the TCP/IP settings (that’s a whole other article).
Enjoy Your Home Office Wireless Network
Repeat the same steps on each device you want to connect to your wireless network. When everything is configured, celebrate by doing some work in the hallway, just because you can!
Bonus Tip:
If you are not using the built in Windows Firewall, you may need to set your firewall to allow trusted communications between your computer and the wireless router in order to get full functionality.
Screenshots