
Google Apps makes creating a collaborative calendar easy with their free scheduling application. Learn how to create a calendar that can be shared with coworkers or the public in a variety of ways.
The first step to creating a collaborative calendar is signing up for a free Google Apps small business account. After the account has been set-up, click on the calendar icon and you’re ready to start.
Share Calendars
To create a shared calendar, log in and enter the settings area of the calendar. In the Share with specific people box, type the email address of the coworker you will be collaborating with and click Add.
Choose the person’s access level from these options: see event details, change events or change and manage events. Click Save. Repeat the process to add as many coworkers as you wish, each with their own specific access settings.
Once created, the collaborative calendar will be accessible through the coworkers Google App accounts alongside their personal calendar. This makes it easy to sync dates and create meetings.
Create a meeting using the shared calendar by typing the names of the coworkers to attend the meeting in Other Calendars. Their schedules for that day will layer on the shared calendar making it easy to find a time when everyone is available. Select a time and create the meeting. The meeting date will appear on the shared calendar and on individual calendars.
Public Access
Your Google calendar can also be made publicly accessible, which allows coworkers to view schedules and posted events even if they are not included in the shared calendar. This is especially important when working in large groups, arranging workshops or setting up public events. You can make the address of calendar public, publish the calendar or embed the calendar on a web page.
Click the triangle icon next to the calendar’s title and click Share this calendar. By choosing this option, the public will be able to view your calendar and it will be included under Google Calendar and Google search listings.
You also have the option to make the calender accessible to only people you have chosen. The calendar will be issued an address where selected users can view an HTML read-only version of the calendar. The address can also be used to make the calender accessible through various feed applications including Google Reader and Apple’s iCalendar.

After making the calendar public, the app will also generate a HTML code which can be used to embed the calendar into a web page. The code can be found by clicking the HTML icon next to the calendar’s address in the settings section. You can also create a button to add to the web page that allows visitors to add your events to their calendars.
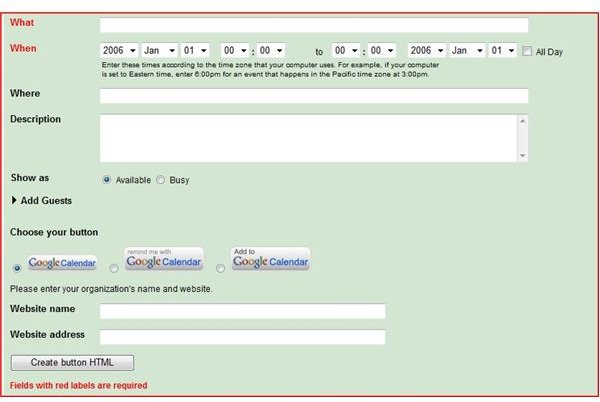
Create the button by going to the calendar’s settings page and clicking the XML icon to retrieve the calendar’s address. Copy the address and go to Google’s event button generator . Pick the event’s date and fill out a brief description. Choose the button style and paste in the calendar’s address. The generator will create the code for the event reminder button, which can easily be added to the web page.
Resources
For more on Google’s calendar, check out Why Use Google Calendar?
Find out more about scheduling at the Google Apps for Small Business website.
This post is part of the series: Google Apps: Collaboration Tools for the Home Office
Learn how Google Apps free online collaboration tools can increase the productivity of your home office.


