In this guide I will show you how to insert tables into your document. Then I will show you how to customize the tables.
In this Microsoft Works Beginner’s Guide, I will show you how to insert tables into your document. Then I will show you how to customize the tables. You can do many things with tables. Some of the things that you can do is create invitations, worksheets, charts, and certificates. Open your Microsoft Works program and we will get started.
How To Insert a Table Into Your Document
First, I will show you how to insert a table into your Microsoft Works document. Go to the top of your window and click Table > Insert Table. The insert table box will open. In the box you will see the number of rows and the number of columns field. In those two fields you will need to enter the number of rows and the number of columns that you want in the table.
You can also choose a format for the table. In the top left side of the box, you will see the Format window. You can click through the different formats to look for a format to use. You can see the previews of the formats in the bottom window. If you do not want to use a format, click the None or the Basic table. Then click the OK button to insert the table.
Changing the Size of your Table
Next, I will show you how to change the size of your table. To change the size of your table, you will need to place your mouse on a line and drag it. Dragging the line with your mouse will change the size of it.
Customizing the Table Border
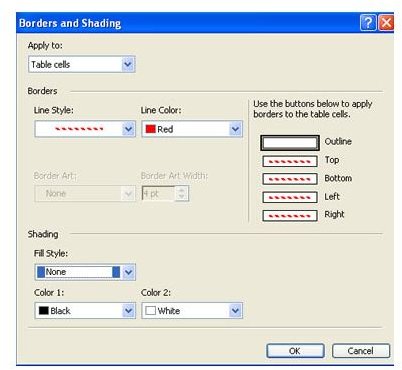
You can customize the table border by changing the border style and color. Click your mouse inside your table. Right click and click Borders and Shading. The Borders and Shading box will open. In the border section of the box you will see the line style. Drop that box down and select the line style that you want to apply to the border. Then drop the color box down and select the color that you want the border to be. Click OK on the box to apply the line. You will need to repeat this step for each cell.
Customizing the Background Color of the Table
You can change the background color of the table. You can make each cell a different color. Right click in one of the cells and click Border and Shading. In the shading section of the box, you will see the Fill Style box. Drop that box down and select the style of your choice. Then drop the color boxes down and select the color of your choice. Click the OK button to apply it. You can do each cell the same way.


