Looking for another way to promote your business with social media? Here, we’ll walk you through the steps of setting up a Google+ brand page, and we’ll give a few extra tips as we go. The whole process is actually fairly quick and easy, and should only take a few minutes.
Getting Started
Similar to Facebook, you can’t create a Google+ business page unless you’ve already set up a Google+ personal profile. So the first thing you’ll need to do is log in to your personal Google account.
Important Note: At this time, Google+ business pages do not allow you to have more than one administrator. Multi-admin support is one of the features still in the works and hopefully it will roll out soon – else, this isn’t going to be a very useful venue for most businesses. However, for now, be sure to create the page under the name of the person who will be updating and maintaining it.
Now head on over to the Google+ Your Business home page and click on the big blue Create Your Google+ Page button.
Filling Out the Basics
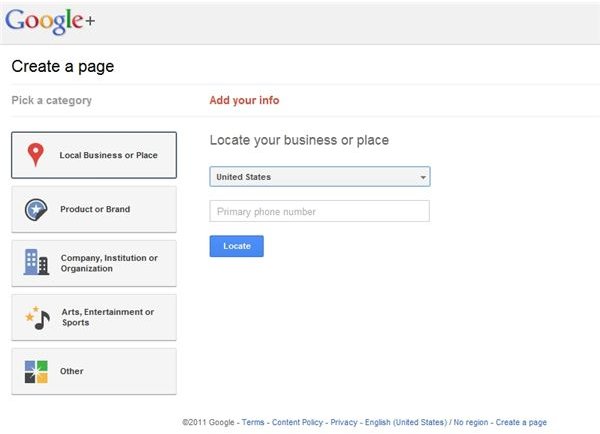
The first thing you need to do is select a category for your page. You can pick from the following choices.
1. Local Business or Place – If your business primarily serves a local area, this is generally the best option to choose. This category is the most distinct of the five options and its setup fields are a bit different, as shown in the screenshot to the right.
If you pick this option, you’ll be asked for a phone number for the business and then Google+ will attempt to locate it on a map using that phone number. If your business cannot be located, you have the option of adding it to Google at this time.
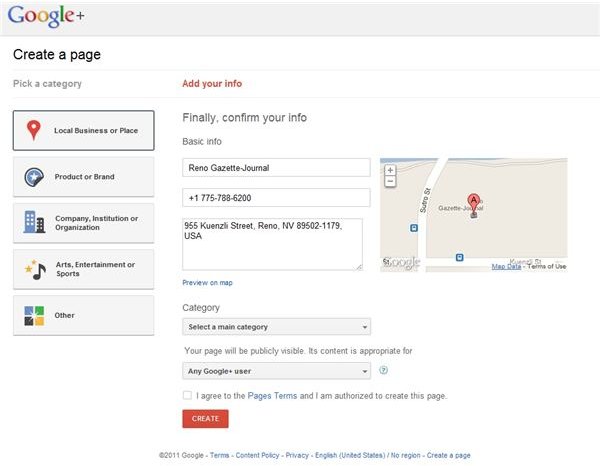
Once your business is located on the map, you’ll be presented with a couple of additional fields – see the second screenshot to the right. (Note: I entered some info for the Reno Gazette-Journal here just to illustrate the creation process for a local business page, but since that’s not my company, I did not actually create the page!)
2. Product or Brand – Choose this option if you want to create a page for a specific product line, service or brand associated with your business.
3. Company, Institution or Organization – If you want to set up a general page for your company or organization, this is probably the best category to pick.
4. Arts, Entertainment or Sports – Do you want to use Google+ to promote your book, band, sports team, art work or video game? Most likely, your page will fit best in this category.
5. Other – Finally, we have the good ole general-purpose Other category, just in case the page you want to create doesn’t seem to fit anywhere else.
After selecting a category, fill in the necessary fields, read and agree to the terms of use, and click the Create button to continue.
More Profile Basics
Next, you’ll be given the chance to add a short tagline for your company and to upload an image that will be used as your page’s avatar. If you’re not sure what to add here, don’t worry – these fields can always be edited later. You can even leave them blank for now, if you want.
Tagline – Your tagline will appear directly underneath your page’s name. It’s best to choose something relatively short for this field; Google recommends 10 words or less.
Profile Photo – If you have a company logo, this is the perfect place to display it. Before trying to upload, make sure that the image is at least 200 x 200 pixels. Also, it’s a good idea to do your cropping and resizing before the upload so that you’re using a nice, high-quality image with square dimensions.
Click the Continue button when done here.
Announcing Your New Page
At this point, you’ll be asked if you want to post a message on your personal Google+ account to let others know about the creation of your new page. I recommend skipping this step for now – you can always send out a message after you’ve beefed the page up a bit.
Why should you skip for now? Even though you’ve officially created the page, it’s still basically a placeholder. It doesn’t have any content yet, and there’s no way for people to really interact with it. Well, that’s not quite true – people can still +1 the page and choose to add it to a circle at this time. But, if they’re not already familiar with your brand, they really won’t have a reason to follow you yet.
Instead, wait until you’ve at least made a welcome post and added a few more details about your brand or business. Then, you can start sharing with your circles.
Click the Finish button to continue.
Initial Page Creation Done - What’s Next?
Instead of taking you immediately to your new page’s profile, you’ll first be routed to a Get Started page that lists a few more things you can do at this time. Again, don’t worry, you can always do these things later. However, if you’re relatively new to Google+, you may want to take a few minutes to read through the items on this list.
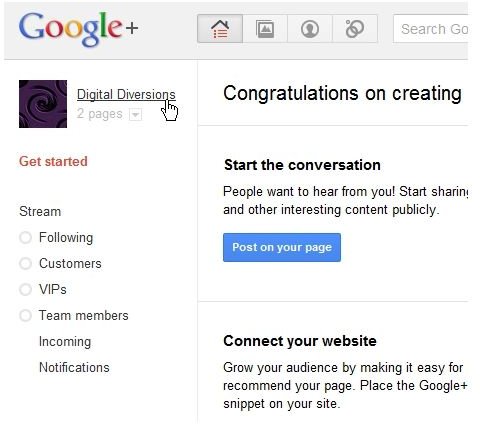
If you want to jump ahead and see how your new page currently appears to the public, click on your page’s name in the upper left corner of the screen (see image to the right).
Bare Bones of Your New Page
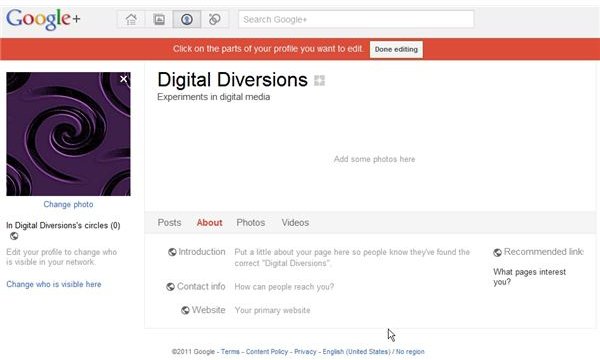
Here’s what your new page will look like at this point. Since the only things you’ve really added so far are a name, tagline and a profile photo, it’s not very interesting. This is why I recommend waiting before sharing your page, because there’s nothing really to share yet!
Unless you’re really pressed for the time, it’s a good idea to go ahead and fill out the fields on the About tab. To do this, just navigate to that tab and click the Edit Profile button. You can then click on any field on the page and modify it. You can even click on the page’s name if you want to change it to something else.
When finished, just click on the Done Editing button to return to your page’s public profile.
Making Your First Post
After you’ve finished with the initial creation basics – and remember, you can go back and edit the elements on your profile page at any time – click on the Home button at the top of the page. This will take you to your Stream, where you can make new posts, read and respond to comments, etc. Basically, your Google+ Stream is the counterpart to Facebook’s Wall.
Although it’s entirely optional, it’s a good idea to go ahead and make some sort of initial post – whether it’s a simple welcome message or something more elaborate. That way, people who find your new page can start making comments and you can interact with them.
Navigating Between Pages and Your Personal Account
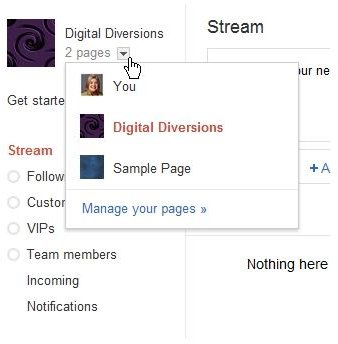
The Home, or Stream, page is also the place to go if you want to switch from one page to another, or from a page to your personal account. Just look in the upper left corner of the window (see screenshot to the right) and notice the down arrow underneath your page’s name. Click on this arrow and a box with a list of your various pages, including your personal profile, will appear.
Before posting on your page or personal account, you may want to take a second to glance at this area and make sure you’re on the right page. You can always delete or edit accidental posts later on, if you do happen to make a mistake and post on the wrong page, but it can be a bit of a pain if someone has already seen the post and commented on it or shared it.
What Do You Think of Google+?
Once you create your page, come back and let us know what you think about the process. Personally, I think there are a lot of key features still missing. Even though the developers say that this is just the initial launch and additional features are still being developed, I have to wonder if Google jumped the gun in releasing this product so early. How do you feel?
References
- All screenshots taken by author.
- Google+ Your Business, http://www.google.com/+/business/


