New to Camtasia and not sure where to begin? We’ll take a look at ten Camtasia tips that focus on becoming more efficient when using the software and creating professional-looking screencasts that will appeal to your intended audience.
Getting Started with Camtasia
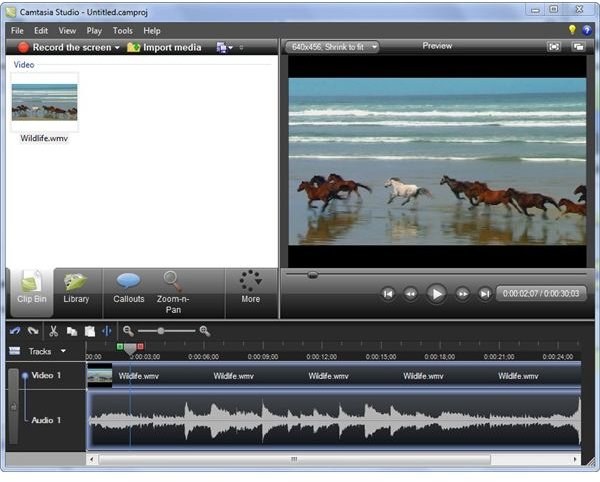
Although there are a lot more developers releasing their own versions of screencasting software these days, TechSmith’s Camtasia Studio 7 is still the tool of choice for professionals and dedicated enthusiasts.
One of the main features that makes Camtasia so popular is its intuitive user interface that makes the video creation process as easy as possible without sacrificing high-powered functionality. Despite this relatively easy learning curve, there are several Camtasia tips and tricks that can allow you to become more proficient with the software and create professional-quality screencasts.
10 Camtasia Tips for Better Screencast Recording and Editing
Tip #1. Create a dedicated directory on your PC for storing all of your recordings and related material.
Video files take up a lot of room and can quickly fill your hard drive, if you’re not careful. Still, it’s likely that you’ll use many of the same elements in multiple screencasts, or you may want to splice various recordings together to make a longer video. Either way, it’s good to store all of your Camtasia recordings and related content in a dedicated location, so that the material will be easy to find and access.
If you’re worried about hard drive space, you can choose to store these files on an external hard drive, a USB flash drive , or even in a cloud storage environment. Although this will probably result in slower access times than storing the content locally on your PC’s hard drive, it will make it easier to transfer your data to multiple computers. Plus, you can always temporarily copy files from these external storage mediums to your local PC while you are working with them, transfer them back to the external storage site when done, and delete the temporary files on your hard drive to reclaim the space.
Tip #2. Invest in a quality microphone or headset.
In many ways, the audio portion is the most important part of a screencast. Viewers will quickly forgive a couple of blurred frames or an off-center slide, but a crackling microphone or audio that fades in and out will turn people off right away. Even if your audience does continue to watch the entire presentation, a bad audio recording will be a constant distraction and take away from the focus of your material.
In general, USB microphones and headsets are better choices for recording the audio portion of your Camtasia screencast. There are several different types of microphones that are capable of getting the job done, and many are quite reasonably priced.
Tip #3. Do at least one practice walkthrough of your presentation before you begin recording.
You can save yourself from a lot of headaches if you take the time to rehearse your presentation before you actually begin recording with Camtasia. Not only will this allow you to become more comfortable with the material, but it will also let you spot potential problems or gaps in your presentation. In addition, you can use the rehearsal as a way to gauge the length of your screencast so you can determine if you need to break it up into smaller, more manageable chunks.
Tip #4. Close all unnecessary programs on your PC.
If you don’t need a particular application or utility for your presentation, shut down the program before you begin your project. Recording and editing video files is very resource intensive, so it’s a good idea to close any other software that may be competing for those resources.
In particular, close email and instant messaging programs – or any other tool that is prone to send sound alerts or pop-up notifications. The last thing you need is a ringing bell or a “You’ve got mail!” notification to pop up on your screen in the middle of a Camtasia recording.
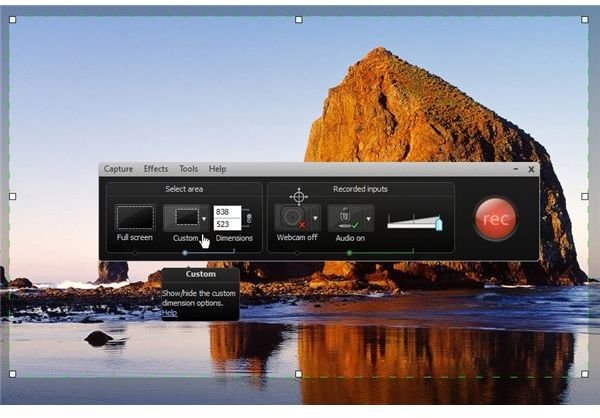
**Tip #5. Use the “**Custom Select Area” controls to define your screen recording area before you begin.
Never rely on the factory default screen capture area settings. Customize the screen capture area so that it is large enough to include all the video footage that you want to record, but small enough so that no other desktop items distract from the presentation.
Tip #6. Record your video in smaller segments that can be spliced together later.
Recording your screencast in small segments makes it easier to manage the size of individual video files, and it can be a huge blessing if you need to make edits or corrections to certain frames. Try to keep each segment less than five minutes long, or even less than 3 minutes if possible. You can always splice segments together later on, but it’s a much more painstaking process to cut the middle of a segment out and replace it with another clip.
Tip #7. Record a 30-second test session before creating an entire video segment.
Even if you’ve just recently recorded another screencast and you want to use the same settings, it’s good practice to record a short 20 or 30 second test session with Camtasia before embarking on a new, full recording project. Play back the test session and check audio quality, general presentation flow, and other aesthetic factors. Then, when you’re positive that everything is just the way you want it, you can continue with the full recording.
Tip #8. At the beginning of each video segment, wait a few seconds before you begin your presentation.
In the rush to get a screencast recorded, we often forget the usefulness of a short pause that allows the viewer to get comfortable before the beginning of a presentation or to absorb the point made in a previous segment before moving on. Also, pauses at the beginning and end of each video segment can be extremely helpful when you move on to the editing stage of your project, since this “dead” time allows more flexibility when trimming and splicing segments together.
Remember, “dead air” can always be trimmed during the editing process, so it’s always better to have a longer pause than one that is too short.
Tip #9. Use a conversational voice when recording your narration.
You may want to “read from a script” for your initial walkthroughs, but take the time to plan and memorize what you want to say before recording the final video. Your presentation will be more appealing to the audience if you use a natural, conversational tone during the recording.
Tip #10. Limit the number of special effects used.
When you first start to create and edit your own videos with Camtasia, it can be tempting to use a lot of transitions and other effects in effort to achieve a “wow” from your audience. But, in the end, these effects often turn into distractions and take away from the focus of the material you want to present.
Instead, only use special effects if they help to illustrate the point you’re making. Let your content be the portion of your presentation that “wows” your audience.
One Final Tip
Consider recording your video and audio separately.
One great feature in Camtasia is the ability to separate your video and audio tracks. Basically, this means that you can narrate your video while recording your screencast, and then you can replace that audio file during the editing process. So, when making the initial recording, you can speak slowly and comfortably without worrying about leaving something out. Afterwards, you can use a free audio editing tool like Audacity to record a new sound track to attach to your pre-recorded video.


