Here is a tutorial for the Celtx screenwriting software on how to add Scene Details.
Scene Details
Celtx is touted as a free screenwriting program, but it really extends far beyond that title into being a complete pre-production software component system. Celtx includes the free screenwriting program with attachments to all different types of documentation, some of which is based off standard forms that are used in film production and some that are unique to the Celtx software. Many of these different items are forms that are attached to specific words or titles in the screenplay and then linked to a type of item they are, such as prop or location. Scene description works in a similar way except it is attached to specific scenes as they are listed in the scene headings. In this way the scene description in Celtx goes into the Master Catalogue , but stands out as having a different process than most items within it. Here is a tutorial on how to add scene descriptions in the free screenwriting program Celtx.
Adding
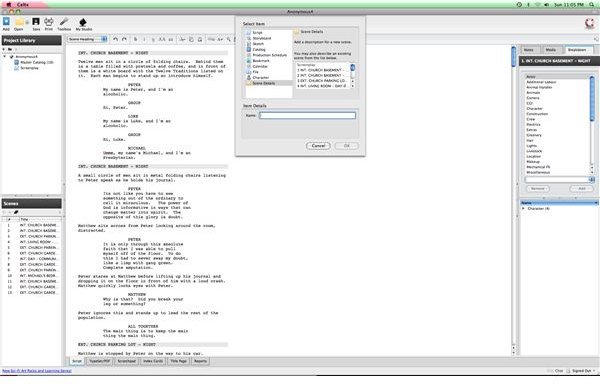
Begin by going to the Add button in the upper left hand corner of your Celtx display. Under the Select Item list you will have several items with Scene Details at the very bottom under Character. Go ahead and keep it on Screenplay or whatever format your project is in and select Scene Items. A scrolling menu will take up the right part of this window and it will have all of your scenes listed according to the order and title they appeared in your Celtx Screenplay document. Start by selecting the scene you want to add Scene Details for and then hit OK. You can also alter the basic name for this scene as well.
Filling Out the Form
When you finally have the Scene Details up for this scene it will be added to the Master Catalogue and you will have a tab open with that form
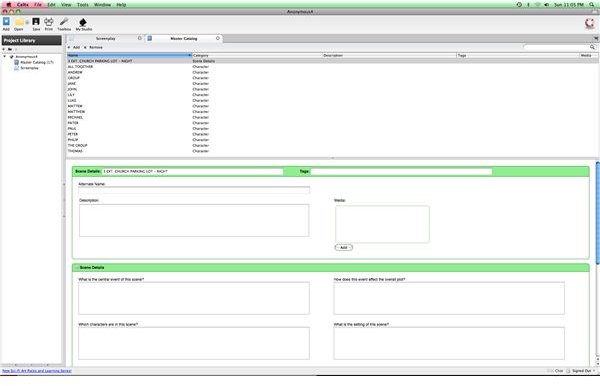
up. In Scene Details you are going to enter information about the scene that are less focused on technical filmmaking aspects and more on story structure and the importance of the scene in the overall film. At the very top will be basic Scene Details where you enter in the alternate name for the scene and general descriptions of the scene, which may just be a summary of the scene. You can also opt to add media to this spot, which may be good during post-production . The next Scene Details labeled section you will begin putting in an understanding of what happens in your scene, which is important to have the director fill out. This includes questions about where the scene takes place, what is the main event, who are the characters, how it affects the plot, what the mood is, and so on. In the final section at the bottom will be where you identify who the protagonist and antagonist both are and what their qualities are. You can provide these Scene Details for every scene and are a great way to work on the script and understand it before going into full pre-production.


