Heard of VirtualDub? Not sure what to do with it? Well, learn some tips and tricks on how to use VirtualDub!
What is VirtualDub?
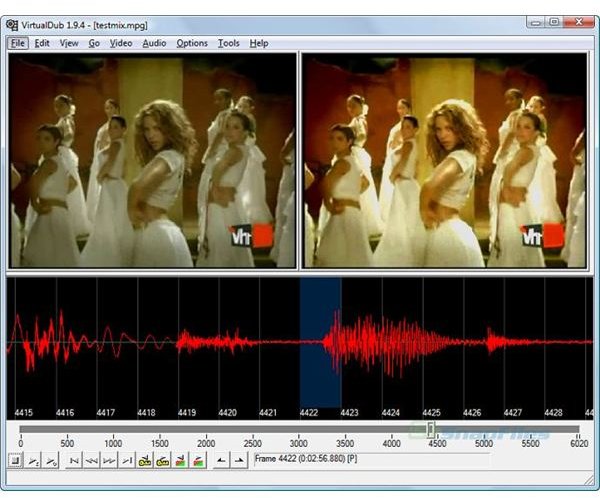
VirtualDub was created to be used on 32- and 64-bit Windows Platforms, ranging from operating system 98 to the present. This is a video capturing and processing software to be used mainly with AVI files, but it can view MPEG-1 and BMP images as well.
VirtualDub does not have the same features as a regular video editing program , but it can filter and recompress video files. VirtualDub is a free video editing software and was initially intended to be used with anime video files.
How to Speed Up Files
With VirtualDub, you can make your video clips move faster. This will be beneficial if you are making a movie and have filmed action
sequences in normal or slow motion. You can now speed them up to reflect what the action should look like.
To speed up your video, follow the below procedures:
- Delete any unnecessary frames using the Frame Rate/Decimate option. As you delete frames, you audio will remain in sync. It just creates a picture that is faster with less frames.
- Close and reopen the new file.
- Re-process the resulting file at 30 frame-rate per second (FPS).
You will now have a video that looks that same as the pre-edited one, only faster.
Batch Editing
One of the advantages of VirtualDub is the ability to do batch editing operations of AVI files. This allows you to easily and quickly edit your entire library of clips without having to continually re-render files. To batch trim your AVI files, follow the below procedures:
- Open up VirtualDubMod, and open up your video file.
- Place the in-point at the start of the video.
- Hit the Mark-in button.
- Go to Video -> Direct Stream Copy.
- Go to File -> Save processing settings.
- Save the file on your computer with the .vcf extension.
- Next, go to File -> Job Control -> Process Directory.
- Here you will find all of your processed files. You now have the option to delete any files that you do not want processed.
- Hit Start.
This could take several minutes, but you will be able to watch the entire process.
Please continue on to page two to learn more tips on how to use VirtualDub.
Video Filters
Another advantage of VirtualDub is the video filters, which can allow you to de-interlace frames, shift fields, etc. While some come pre-loaded, you can always download additional filters for VirtualDub . To use filters, follow the below procedures:
-
Open up VirtualDub, and ensure that the window is set to the maximum size.
 Advertisement
 -
Go to File -> Open, and select your video file from the menu.
-
Got to Video -> Filters.
Advertisement -
Go to the Add button within the Filters menu.
-
Find the filter that you wish to use, and select it.
Advertisement -
Select OK.
Configuring Filters
Once you have added your filter, you now need to configure it based on your needs. You can configure a filter by following these steps:
- Once you select OK, the configuration box will appear.
- Select the settings for your filter.
- Preview the filter to see if it will do what you need.
- Once you have the settings just like you need them, select OK.
- Click OK again to completely exit the Filters menu.
File into an Image
Another interesting feature for VirtualDub is the ability to convert a file into an image. This can be useful if you wish to create a DVD cover. To do this, follow the below steps:
- Go to File -> Open and select your video file.
- Select a clip from your video by moving the first slider to the beginning of the scene.
- Hit the Mark-in button.
- Move the second slider to the end of the scene, and hit Mark-out.
- Go to File -> Export -> Image.
- Save the image in your chosen format and folder where you want it.
Changing Video Formats
Another feature of VirtualDub is the ability to change the format of videos. To easily do this, follow the below instructions:
- Open VirtualDub.
- Find and select your video files by going to File -> Open.
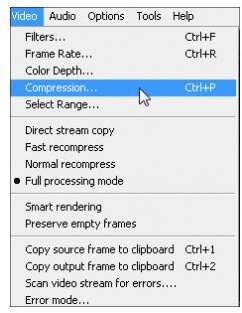
- Next, go to Video-> Compression.
- Select your video compression setting.
- Select OK.
To select only a section of the video to compress, follow the below procedures:
- Go to File -> Save AVI.
- Add your file name with the extension .xvid.
- Save your file.


