In this Celtx tutorial you will learn how to add a character description document to the characters in your screenplay.
Building On Your Celtx File
Celtx allows for a number of options other top screenwriting software does not. What Celtx does is allows you to treat your screenplay and film pre-production as a single project and lets one build off of the other. It does this by taking the screenplay elements and allowing you to create pre-production forms associated with them. Character descriptions are a part of this and you can create this outline directly from the characters that already exist in your screenplay. Here is a Celtx tutorial on how to create character descriptions inside your project.
Adding the Character Description
Start by opening up your Celtx script project and looking to the Project Library, which is in the upper left hand corner. From here you are going to select your Master Catalog. You Master Catalog will open up in a new tab and at the top will be a list of your characters by name. From here you then select one of the characters, bring that character’s character description into its own tab.
The Celtx Character Description
In the Celtx character description you have a whole series of specific details you will add to that character based on how you see them, both in terms of the story space and what will be need from the actor.
First you will enter in the full name and the description about them. You can enter in a schedule ID number, but you may not have that information yet. At the bottom of the top section of the Celtx character description you will have the scenes listed from the screenplay where they appear, and this will already be listed as this is already in the script. If you have already begun attaching actor information to the Celtx file then you will have the option to assign one.
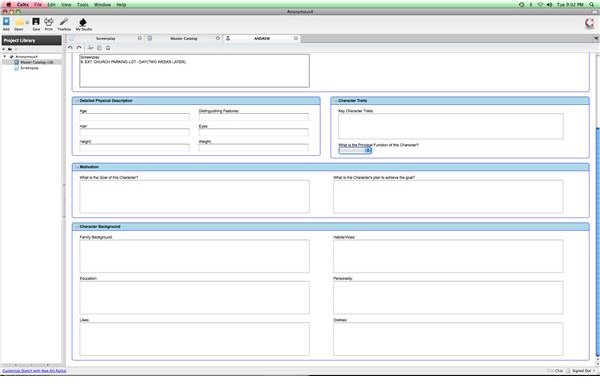
Below this will be the Detailed Physical Description where you list the age, hair, height, eyes, weight, and distinguishing features of that character. This is going to be an important part when you are actually casting the part.
To the direct right of that will be the Character Traits where you can write in the Key Character Traits and choose what the Principle Function of that character is from a pull down list of character functions.
Below this is the Motivation section where you can write in the goal of the character as well as how they plan to achieve this goal.
At the very bottom, below Motivation, is going to be Character Background. In Character Background you have text boxes where you will enter in prose information about their family background, education, likes, dislikes, personality, and Habits / Vices.
This Celtx character description process should be repeated for each character as listed in the script to aid both the producer and director in their work with casting, working with the actors, directing them in production, and fleshing them out during the editing and post-production processes.
This post is part of the series: Celtx Tutorials
Here are articles with Celtx tips, tutorials, and tricks.


