Creating a video? Want to add submenus? Well, it’s easier than you think. Learn how to create a submenu in Adobe Premiere with this tutorial!
AutoPlay Discs versus Videos with Submenus
When creating a movie, oftentimes you just want your movie to play through, especially if it’s a shorter film. But, what if it’s a long movie? Then, you’re probably going to want to make submenus that take you to certain interesting points within the movie.
Autoplay discs are movies that are not broken up into scenes. These types of DVD are perfect if your movie is short or just of the same event. These will just play straight through the moment that you stick it into your DVD player.
But, most of us want to be able to scan through our videos by selecting a scene on the submenu. You can easily create submenus in Adobe Premiere . These are great for scene selections like the ones you find on your standard DVD or for making completely separate films on the same DVD.
Scene Selections
Scene selections break up your films into interesting sections. For example, if you have major turns of events or major location changes, you
can actually divide up your movie based on these scenes. Then, the scenes menu of the DVD will allow you to navigate to these scenes without having to watch the entire film. If you’re film, however, doesn’t have many shifts in scenes or action, you can simply break up the movie based on the amount of time that has elapsed.
You can also create mini vignettes within the larger movie. These can be especially useful if you’re filming an event . Let’s say that you’re filming the World Cup Futbol match coming up this summer. You can divide your film up based on teams, finals matches and the championship game itself. It’s basically individual movies within the larger DVD. This way, if you want to navigate to a certain game within the action, you simply have to scroll to that scene.
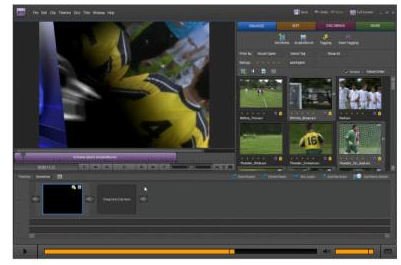
Creating Submenus in Adobe Premiere Tutorial
Now, it’s time to learn how to create scene selection submenus. To create a submenu in Adobe Premiere, follow the below steps:
- Add your scene markers to the scenes of your movie.
- Go to Tasks -> Disc Menus. This will open the Disc Layout and Templates panels.
- Select a template that works with your movie. Pick one that has submenus, including Scenes.
- Select Apply.
If you didn’t add scene markers before you started, you can add them now. A pop-up will ask you if you would like to add scene markers. Click yes, and select from the following submenu options:
- Every_Minutes: This will add scene markers based on the time that you input.
- At Each Scene: This will add these markers where clips have been edited in the movie.
- Total Markers: Try to avoid this one if you can. It will place scene markers at regular intervals in your movie.
Now, you can continuing editing your movie, or go ahead and share or burn your movie.


