The angle of incident always equals the angle of reflection, even on a rough surface.
Incident and Reflection Angles
Angle of Incident = Angle of Reflection
If you understand that the angle of incident is equaled to the angle of reflection, you should be able to prevent many problems associated with unwanted reflections or glares, especially those annoying glares that may appear on your camera lens.
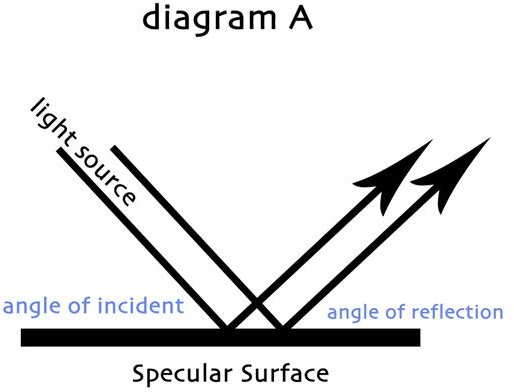
Seeing the angle of reflection is easier to see if you were to take a more directional light source (such as a flashlight) and bounce it at any angle toward a flat reflective surface in a darkened room. (Specular surfaces such as an unbroken mirror will reflect the light more narrowly.) The result creates a reflection of the light that bounces at the same degree of angle (angle of reflection), except in the opposite direction from the incident light. (refer to diagram A)
Setting up your key and fill light at approximately 45 degree angles is a sure guarantee to rid unwanted lens flares, but keep in mind there are plenty of other places to set up your light and still bypass those annoying glares from specular surfaces. Don’t be afraid to experiment, especially if the conventional way (the 45 degree angle approach) isn’t the look you want.
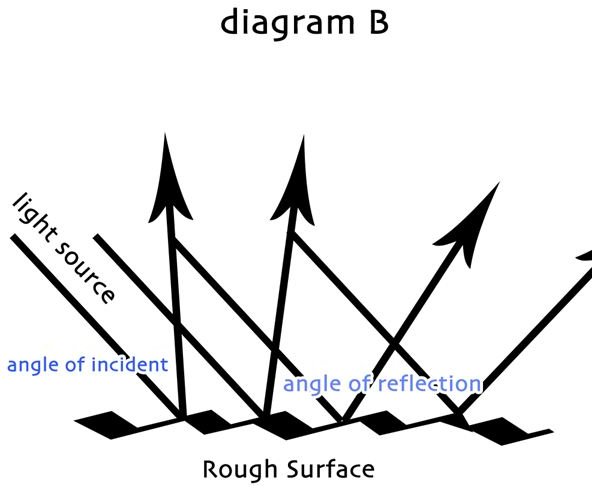
Now, if you were to shine a flashlight at a rough surface, such as a textured reflector, the angle of reflection scatters in various directions. What the light is doing is bouncing off the many flat edges which are on the rough surface. (refer to diagram B) This is one way to produce softer light. Although not as noticeable, you still have the light source (angle of incident) and you still have the angle of reflection (the angle in which the light bounces off a surface even if it’s in various directions). Shooting soft light doesn’t create those pesty glares that hard light is notorious for.
Light Angle Diagrams