Adobe After Effects helps aid in special effects and complex editing tasks. The main tool used in this software when working with video is the timeline and there are a lot of things an editor can manipulate from within this feature.
About the Timeline
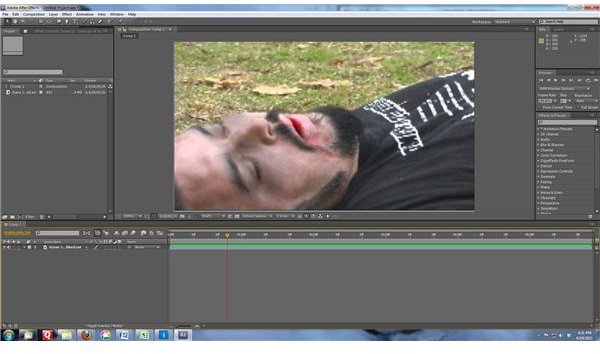
The timeline is the main window where an editor works to animate layer properties. When trying to learn how to edit the timeline in After Effects, it is a good idea to understand how the timeline works and what all the controls accomplish. The timeline control panel offers most of the controls used to work with your video footage including animating, arranging layers and blending modes in the footage.
Adding a Timeline
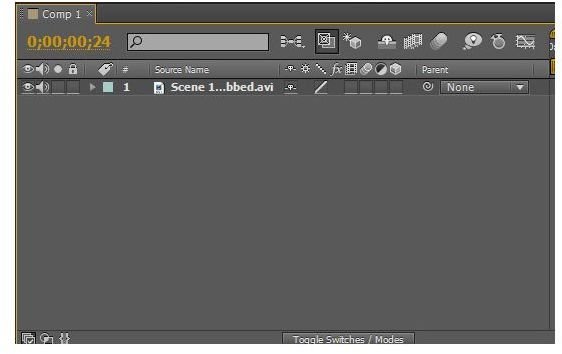
Each layer added to the timeline is stacked up in the order which they are added with the newest at the top of the column. The names of the layers are there and are followed by symbols on the layer’s row. Here are what the icons mean and what you can do with them.
- Eye: The eye turns the layer’s visibility on and off. This is useful when working with numerous layers. Use the eye to toggle the visibility of the layer off and on.
- Lock: Once you finish working with a layer, use this icon to lock it. This helps to prevent making changes to a completed layer.
- Triangle: This button opens up all the properties for the applied effects. Use this to work with the values and adjust the layer.
- FX: The FX button toggles the effects on and off. Each layer may contain various effects and this allows you see what a layer looks like with various effects turned on and off.
- Motion Blur: The motion blur replicates film motion, basically stop-motion photography. This blurs the layer in the timeline.
- Cube: The cube button transforms any layer into 3D.
Understanding the Time Graph
The time graph in the timeline panel includes a time ruler, specific time markers and the duration bars for the composition layers. Before an editor starts animating in After Effects, it is a good idea to understand how the time graph works.
The duration of the composition, layer and footage is visually represented in the time graph. On the time ruler, you can see what frame you are viewing or editing. This frame also appears in the Composition panel. The editor also sets the work area start and end brackets to indicate what portion of the composition will be rendered and edited when animation begins.
The current time of the composition appears in the upper left corner of the timeline panel. To move to a different time in the panel, move the current-time indicator to the ruler or click the current time field in the timeline panel or composition panel. When here, type in the new time and click OK.
Layer Properties in the Timeline
The main group of properties to animate in After Effects is the Transform group. The options to edit in this group include Position or Opacity animations. Adding additional properties to this layer, such as converting it into a 3D layer, adds more properties to the timeline. Any properties you add to the timeline that includes a stopwatch can be animated, which means they can change over time.
An example is if you add Opacity to your timeline, you should find where the animation should start. Click on the current time indicator in the timeline where you want it to start and then click on the stopwatch. If you want the specific layer to turn transparent, move to where you want it to finally disappear, click on that area of the time indicator and then click the stopwatch again. This means that at the first stopwatch point, the layer starts to fade and then, by the second stopwatch point, it is invisible.
Hiding and Showing Properties in the Timeline
When you finish using a specific animation in the timeline, it is often easier to hide the properties no longer in use to make your work area cleaner to use.
- To expand or collapse a property, click the triangle by the layer or property group name.
- To expand or collapse all properties for selected layers, press Ctrl+’ (Windows) or Command+’ (Mac OS).
- To reveal an effect property, double-click the property in the Effect Controls panel.
- To hide a property or group, press Alt+Shift-click (Windows) or Option+Shift-click (Mac OS) while highlighting the property or group name in the timeline panel.
- To add a property or group in the timeline panel, hold Shift while pressing the property or group shortcut key .
- To show only modified properties select Animation>Reveal Modified Properties.
- To show only properties with key frames or expressions, choose Animation>Reveal Animating Properties.
Copy and Duplicate Layers in the Timeline
When animating layers, it is often necessary to copy an identical layer into the timeline. This allows you to add effects to one layer and manipulating the image with the unmodified layer. To copy properties from one layer or property group to another, select the layer, property, or property group and use Ctrl+C (Windows) or Command+C (Mac OS). If you want to just create a duplicate layer, select the property group and press Ctrl+D (Windows) or Command+D (Mac OS).
References
Adobe After Effects CS5: Classroom in a Book
Images provided by author.


