Learn how to edit video clips with this Adobe Premiere Elements 9 tutorial. It covers several basic features that will get you acquainted with this video editing software.
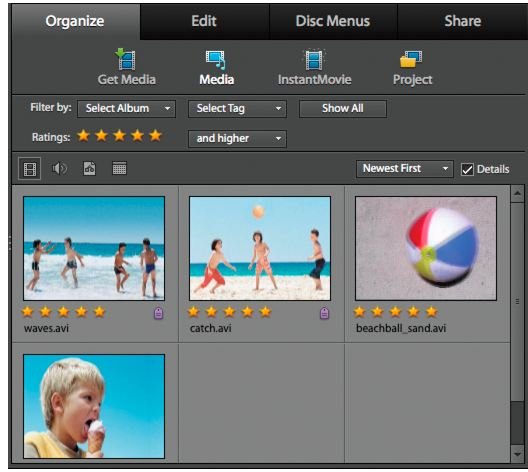
After installing Adobe Premiere Elements 9 and signing up for free online benefits from the Welcome screen with your Adobe ID, get acquainted with the software interface. Use the Elements Organizer to import and manage media files. Tag them appropriately to locate them within the editor. Navigate from Elements Organizer to Adobe Premiere Elements Editor to edit videos. Simply select the media file to edit and select Fix. Then click Edit Videos.
Trimming Clips
Taking a particular segment from a long video clip is one of the basic editing features of this software. To do this, use the trimming features in the Preview window, the Monitor panel’s mini-timeline, or the Timeline. Choose where the segment should start ( in point) and where the segment should end (out point). The video before and after this segment will be trimmed.
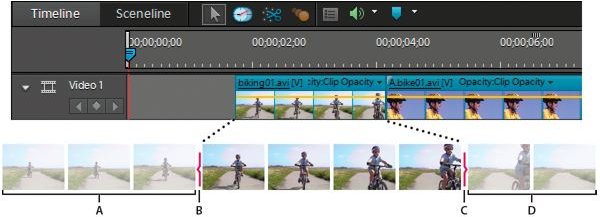
To remove a segment in the middle of a video clip and use the two resulting parts, use the split feature first. To do this, select a clip in the Sceneline or Timeline. In Sceneline, drag the current-time indicator of the mini-timeline, which is located in the Monitor panel, to the start of the segment you want to remove. Then select the Split Clip button in the Monitor panel. This creates two clips. Now, trim the unwanted portion from the second clip by selecting in and out points.
Another trimming option to consider is smart trim. This feature removes portions of a video clip that contain low-quality or blurred content. To use this feature:
- Select Timeline, choose Smart Trim Options, and click Automatic.
- Enable smart trimming by clicking the scissor icon located in the panel above the Timeline.
- Click Organize and drag the clips into the Timeline.
- Review the segments that are highlighted for trimming and select Yes to remove them.
Clip Speed and Duration
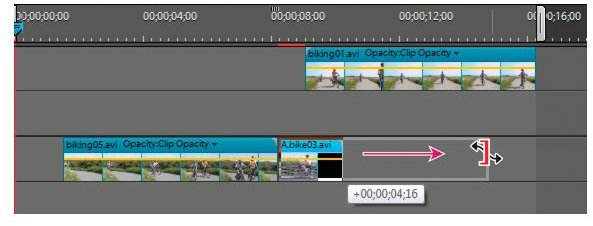
By altering the speed of a clip, slow motion video and fast motion effects can be achieved. To do this, drag the clip onto an empty track in the Timeline and do the following:
- Select the clip in the Timeline, choose Clip, and click Time Stretch.
- In the dialog box, type a percentage for Speed. To slow down the clip, enter a value less than 100%. To speed up the clip, enter a value greater than 100%.
- Select Maintain Audio Pitch to keep the same audio quality.
- Click OK, preview changes, and make adjustments.
There is an option to change the duration of a clip. To do this, select a clip in the Timeline, choose Clip, and select Time Stretch. In the dialog box, unlink the speed and duration of the clip by clicking the Link Button. Then, enter a new duration for the clip and click OK.
Capturing an Image From a Clip
During any portion of a video clip, you can grab an image, similar to how a screenshot works. To do this, select a clip in the Sceneline or Timeline and drag the current-time indicator to the frame you want to freeze. The image is displayed in the Monitor panel. Once you have selected the right image, click the Freeze Frame button in the Monitor panel. A freeze frame box opens with several options. Export the image to the hard drive or insert the image into the video. Set how long the frame will be displayed by adjusting its duration. This is useful for displaying frozen sequences, such as stopping the ripple of a water droplet falling into a lake. Afterward, the image can be edited in Photoshop Elements if that option is checked.
Modifying Source Clips
Locating and editing source clips is the final section of this Adobe Premiere Elements 9 tutorial. To find the source clip of a particular section of video, go to the Task panel. Click Organize and select Project. Then, go to the Timeline and right-click on the clip and select Reveal In Project. The clip will be highlighted.
Once you have found the clip, remove any editing that was previously done to reuse the clip. To remove in and out points, do the following:
- Double-click the source clip in Project view.
- Choose Clip and select Clear Clip Marker.
- Remove In points by clicking In and remove Out points by clicking Out.
- Click In and Out to reset both.
To make new edits of a source clip in the application it was originally created in, do the following:
- Select the source clip in Project view.
- Choose Edit and select Edit Original.
- Edit clip, save changes and close application.
Reference
Using Adobe Premiere Elements 9 - https://help.adobe.com/en_US/premiereelements/using/index.html
Image Credit - Images courtesy of ‘Using Adobe Premiere Elements 9.’


