Here is a look at how to export from After Effects, including the best settings to render in Adobe After Effects.
Get It Out
Exporting is the simple act of taking the video from the project you produced or worked on it in outside of that program onto an independent storage medium. This can often mean to a physical format like a mini DV tape or DVD, but in many cases it just indicates an independent movie file that can be compressed and converted later using the right programs. The Adobe After Effects export process is a little different than programs like Final Cut Pro , at least in the language and display that is used. In terms of what you get from an After Effect export, you will end up with something very similar. Here is a step by step tutorial on how to export your project from After Effects, as well as information on the best settings to render in Adobe After Effects.
Exporting Your Project
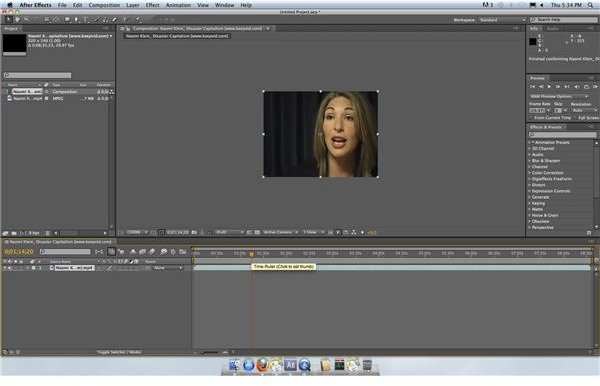
First off, make sure that your Composition is as it is intended to appear, and to do this you may want to use the RAM Preview to get a good
look at it. When it is rendering, you will be able to watch it at a slowed speed, and you can cancel it halfway through if you see a problem. It will still save a video from your After Effects export, but if it is canceled halfway
through it will only be the video from the start to the point in which you canceled the render.
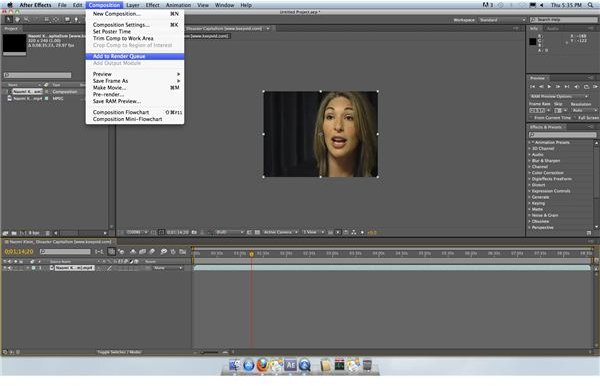
Once your After Effects project is ready for export, go up to Composition in the upper task bar. Go down the list and select Add to Render Queue, which will then open up the Render Queue where your Composition timeline once was.
It is under the Current Render heading that you will see your project. You can alter the name of the Composition here, and then look at a few settings areas. In Render Settings you can make choices about things like the quality, color depth, different issues around layers, and the basic way that your After Effects
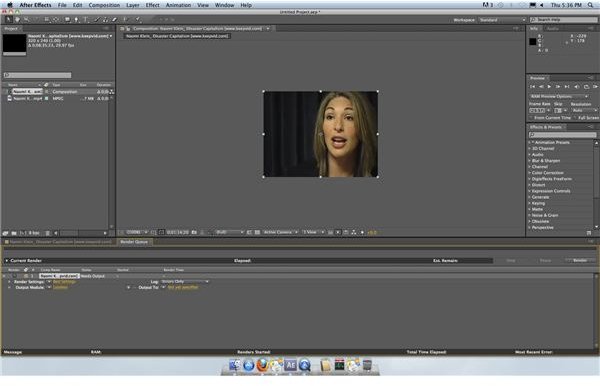
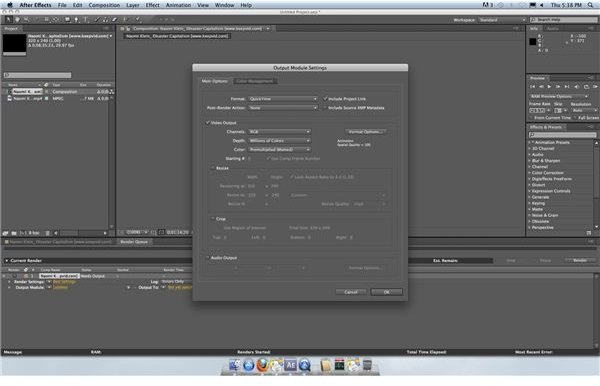
video will be exported. In the Output Module you will find even more After Effects export settings around the way the final video file will be, such as the size, file type, depth, and other video features. This is going to be even more familiar to people that deal with regular video post-production. In Output To you will set a location for the
final video to go to.
Once you are done, you will go ahead and hit the Render button in the upper right hand corner of the Render Queue. You will watch your video play through at a slow pace, and once it has finished this your exported video will exist in the location you set according to the settings you decided upon. This render period can take quite a while if a lot of effects, layers, and changes are made to the files, and you may have to do it several times since you cannot always get real-time playback in After Effects.
Best Settings to Render in After Effects
Settings in After Effects can be difficult, especially for the After Effects export and render process. The best settings to render in Adobe After Effects are going to be determined by the types of source video you are rendering in the program, the type of format it is to be shown on, and any file types that you brought into it. For example, the best settings to render in Adobe After Effects for source video that was shot at 24 fps, 16:9 aspect ratio, and a specified color depth will be to match those as close as possible in the Render Settings. You do not want to awkwardly compress the appearance of the image, so you need to maintain the dimensions and pixel size.
The best settings to render in After Effects will also be ones that allow the highest resolution video to be exported in the most accessible format. This means that you usually want to keep the settings so that there is no loss in video quality and so that the file is in a QuickTime format . You can always compress and convert the video file later on, but you want to have the best quality you can from your After Effect Export.
This post is part of the series: Adobe After Effects Tutorials
Different tutorials outlining features in Adobe After Effects.


