
Are you in a hurry to send holiday greetings? A free holiday letterhead template on the web can help. Such a template also saves you money. If you don’t find a free template with the image or border that has a good fit with your message, create one of your own in Word.
Find a Free Holiday Letter Template
A free holiday letterhead template gives you dual benefits: saves money and time. Free templates have graphics that kindle the cheer of the joyous season. Whereas some templates have borders, others have borders and images. Santa Claus, Christmas tree, snow man, stockings, gift boxes, holly leaves and bells are among the images you’ll find in the free holiday letterhead templates.
The websites that offer the free templates give you the option to modify. Be sure to read and comply with their terms of use before your letters hit the mailbox.
The two of the download formats for these free templates are DOC and PDF. Open and edit the DOC template in Word. If you opt for the PDF file, you may have to use Adobe Acrobat to edit the template.
Some templates have dummy text like the name and address. Just delete the default content and type your own text. Other templates have empty boxes to create the matter. The template you download may have no text placeholders at all. In such cases, create your own text boxes for the content.
TIP: To ensure your letter prints the way it looks, first preview it. In Word, click File > Print Preview. Double-click the letter to magnify it. Click Esc to return to the editing mode.
Make sure you use an envelope that has a good match with the holiday letterhead template. Can’t find an envelope you need? Create your own envelope with a Word template .
Where can you find a holiday letterhead template for free? Here are some of the websites that offer free templates:
www.freeletterheadtemplates.net
www.1-computer-stationery.com/stationery _template_papers/holiday_stationery_papers/christmas/christmas_stationery_papers.htm
printfreecards.net/holiday/2008christmasletterhead1.php
printstationary.net/christmas/CrisLetterhead_index1.php
Image Credit: sxc.hu/Adam0s
How to Create Your Own Holiday Letterhead Template in Word
The steps below outline one way of creating a holiday letterhead template in Word:
1. Start Word.
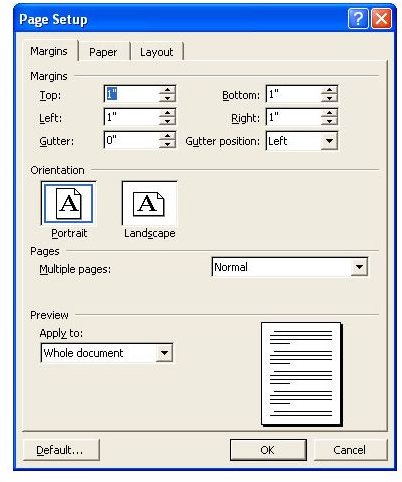
2. Set the margins: Click File > Page Setup. Click the Margins tab (if not already selected). Set the Top, Bottom, Left and Right margins to one inch.
Set the paper size: Click the Paper tab. Click the down-arrow in the “Paper size” frame. Select Letter. Click OK.
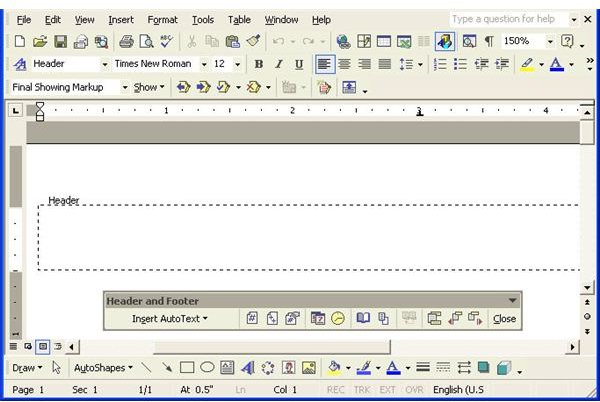
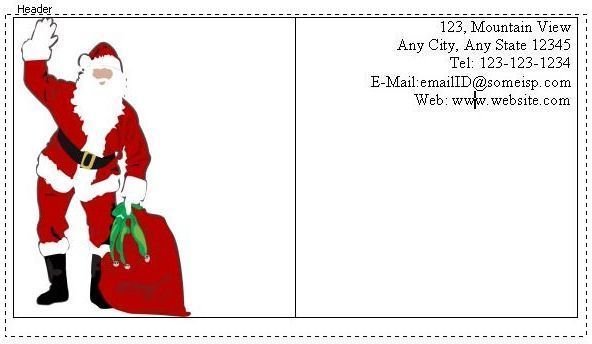
3. Create the header with an image and your address: Click View > Header and Footer. The header box appears. The Header and Footer toolbar also appears.
4. Create a 1 X 2 table inside the header box: Click inside the header. Click the Insert Table icon on the Standard toolbar. Without releasing the mouse, highlight the first two cells across. Release the mouse. Word creates the table. It helps to align the elements in the header precisely.
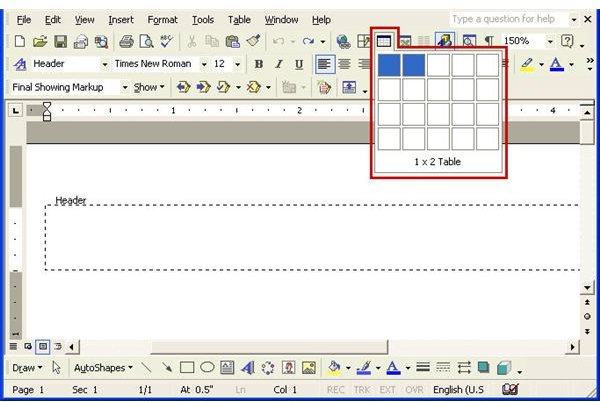
NOTE: If the border of the table extends beyond the header boundaries, drag the table borders to the left or right so the table fits inside the header.
5. Insert an image in the first cell of the table: Click Insert > Picture > From File. The Insert Picture dialog appears. Select an image and click Insert.
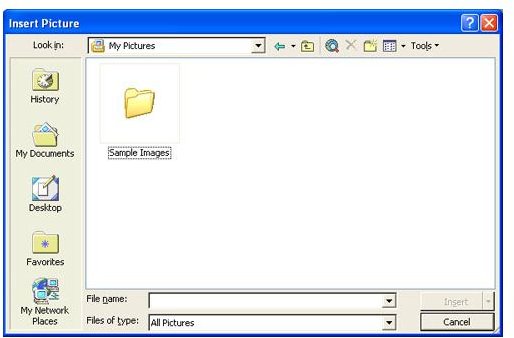
TIP: Checkout sites that offer free images to find pictures for your template.
6. Type your address, telephone number and other in the second cell.
7. Align the above content to the top-right of the cell: Right-click on an empty space in the cell. From the menu, select Cell Alignment. Click the third option across.
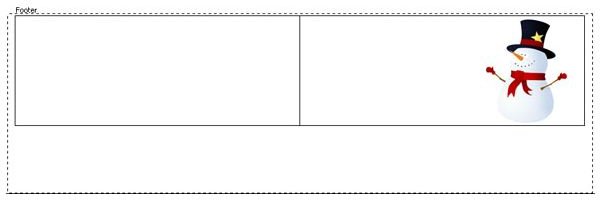
8. Create the footer with an image: Click the Switch Between Header and Footer button on the Header and Footer toolbar.

9. Create a 1 X 2 table inside the footer.
10. Insert an image in the second cell of the table. Leave the first cell blank.
11. Align the image to the bottom-right of the cell: Right-click on an empty space in the cell. From the menu, select Cell Alignment. Click the last option.
12. Click Close on the Header and Footer toolbar to return to the normal mode. The cursor appears below the header.
13. Create a 1 X 1 table for your letter content.
Type your letter: Click inside the table and type your content.
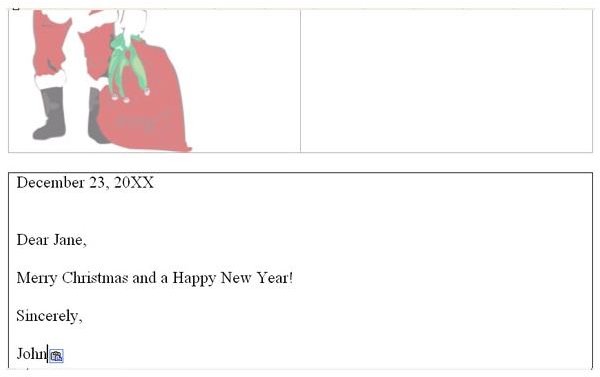
14. Turn off the borders of all the tables: Right-click inside a table cell. Select Borders and Shading. In the Setting frame, click None. Repeat these steps for each of the table.
15. Preview your letter: Before you print it, make sure the letter looks the way you want it to. Click File > Print Preview.

Image Credit: Santa sxc.hu/May17 ; Snowman sxc.hu/ Winblows


