Unleash your creative power using the GIMP open source image editing program. In this GIMP tutorial you will learn how to create a cartoon in GIMP. Simple step by step instructions illustrated with screen shots will help you add this new technique to your creative arsenal.
Editor’s Note: This article was originally written in 2010 and was written for GIMP 2.6.11. It may not work with newer editions of GIMP. The article has been placed in our archive for reference purposes.
Getting GIMP
Before getting started with thie GIMP tutorial, make sure that you have the latest version of GIMP installed. GIMP is an open source image editing program that is available for free so, go ahead and install or update your computer if necessary.
Be sure to download the version of GIMP that works with your operating system. This GIMP tutorial is based on GIMP 2.6.11 running in Windows 7 Ultimate, but you should be able to follow along with other versions and operating systems.
Getting Started
We will be showing you how to create a cartoon in GIMP . The cartoon effect is easily achieved by going through just a few simple
steps, so open up GIMP on your computer and get started.
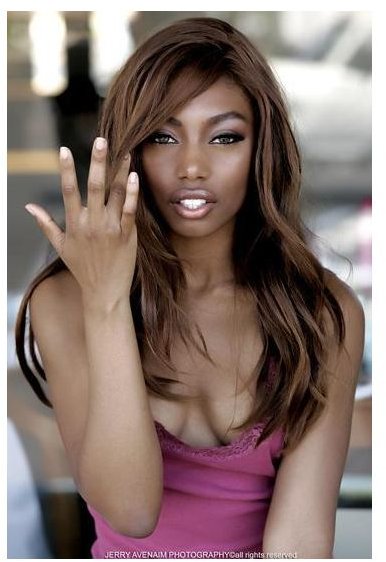
To get started we need an image to convert to a cartoon. We will use this one found at Wikimedia commons. This model will become a cartoon by taking just a few steps in GIMP.
Image Credit: Wikimedia Commons/Optimale
Creating a Cartoon in GIMP
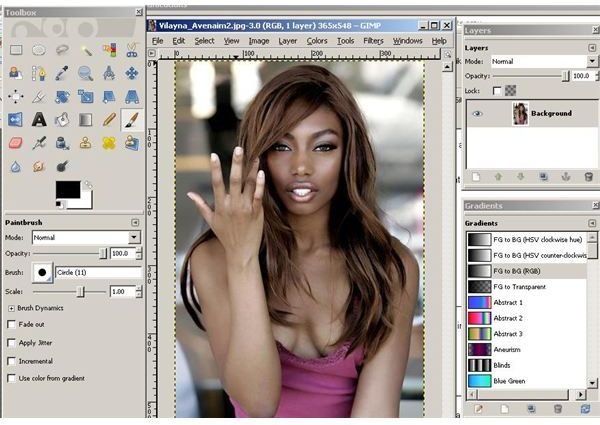
Open your image. The first step in showing you how to create a cartoon in GIMP requires that you load your image into the program. Do this by clicking “File” and then “Open.” Browse to your image and then click the “Open” button.
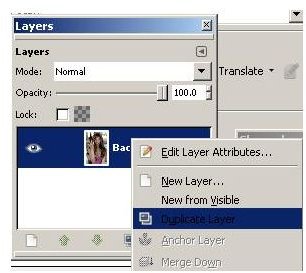
Next, duplicate this layer by going to the “Layers” window. Right click on the layer that contains you image and select “Duplicate Layer” from the context menu.
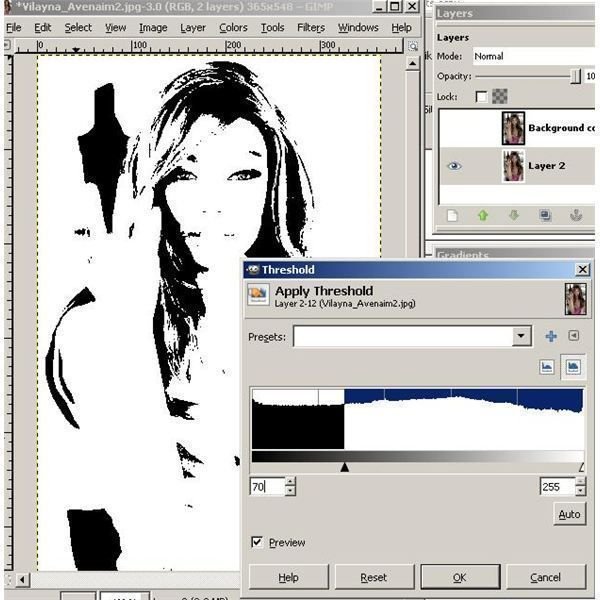
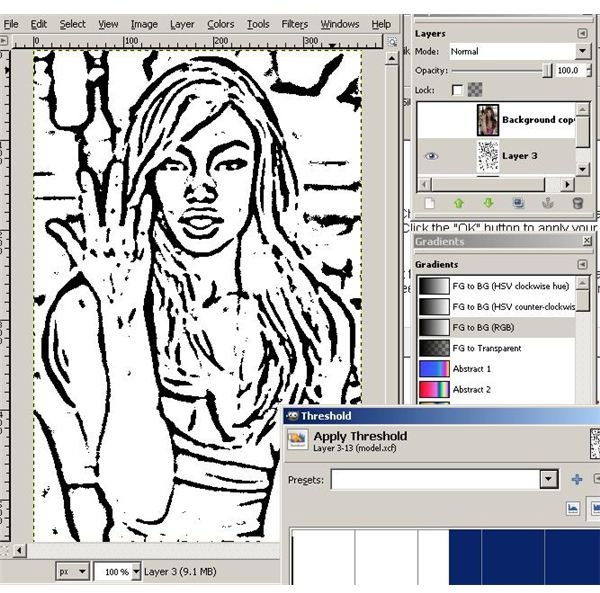
Now, disable visibility of your first level and then choose click “Colors” on the main menu and then click “Threshold.” Vary your threshold to find a look that appeals to you. When you go through this tutorial again, you may want to try different values so you can understand how this affects your final product.
Next, make this layer visible, reactivate the original layer and create another duplicate. Now, go to the “Filters” menu and then click “Edge Detect” and then choose “Difference of Gaussians.”
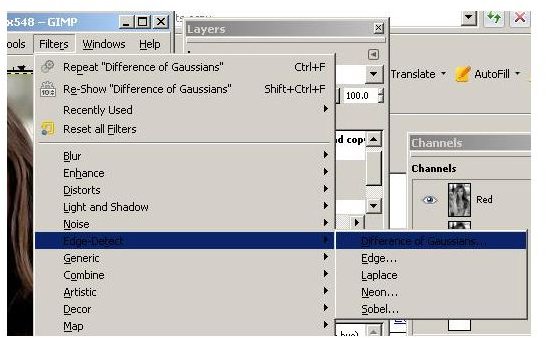
Now you can see an outline of the image in the “DoG Edge Detect” box. Change the two radii until you find a good look for your lines. Here we use “10” for the “Radius 1” field and “5” for the “Radius 2” field. Click the “OK” button to apply your changes. Save your image in GIMP format now to make sure you don’t lose your work.
Next, click “Colors” on the main menu followed by “Threshold” and adjust this layer as you did the second layer. As you move the slider to the right you will see more lines. Move it to the left and you will see fewer lines. Click the “OK” button when you are done.
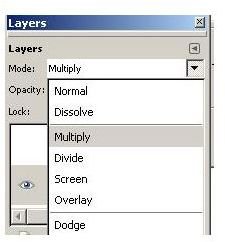
Now, set the mode for this layer to the “Multiply” setting by using the combo box at the top of the “Layers” window.
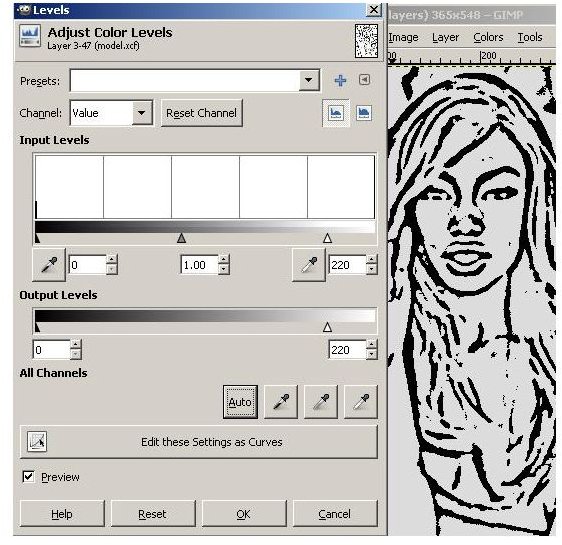
Now, make all your layers visible and then click “Layers” on the menu followed by “Merge Down.” You should then click “Colors” followed by “Levels” and set the level to about 220.
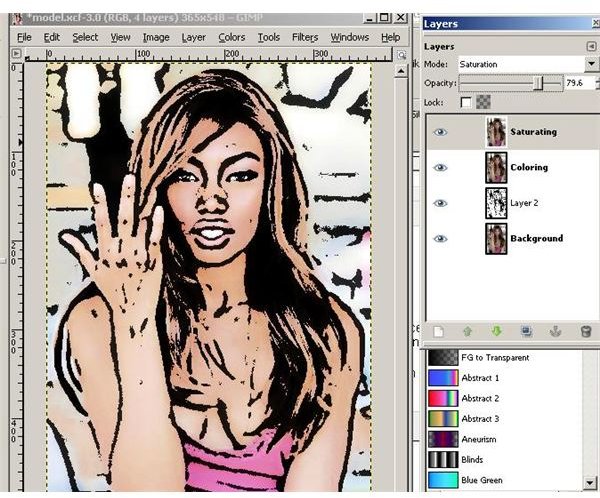
Now, to add more color to your cartoon, duplicate your original layer twice and bring them to the top. The first will be for color and the other will be for saturation. Set the Layer mode for “Color” and “Saturation” respectively.
You can now adjust the settings for each layer until you have a cartoon in GIMP.
The Cartoon Effect Filter and Wrap Up
An alternative to this process is the “Cartoon” effect filter found under the “Artistic” option under the “Filters” menu. We didn’t use that here because generally the built-in cartoon effect does not produce the same high quality results as those achieved in this GIMP tutorial.
In this GIMP tutorial, you have learned the step by step process used for creating a cartoon in GIMP from a photo. This clever effect can help you take your art to a new level (you could start your own cartoon product) or to accent your current repertoire of skills. Although GIMP is open source and free, it is still one of the most powerful image editors that are available.
Get started now, finding ways to use your new skill.
Image Credits: Screen shots taken by Bruce Tyson
This article has been placed in our archives.


