So, you’re looking for a new way to add some class to your otherwise bland logo, but drop shadows are so played out, glows come across as flashy, and don’t even think about doing anything animated. You should do a reflection in Photoshop, they look stunning. This tutorial is exactly what you need!
Have you seen those neat little web reflections in all your favorite websites? They generally make things look as though they’re sitting on a piece of shiny glass, and tend to look a lot more professional than the alternative of glowy, flashy logos. So if you’re going for tasteful, subtle, yet still attractive, this tutorial can teach you how to create a web 2.0 reflection in Photoshop. This tutorial uses Adobe Photoshop CS4, but happily enough it’ll work just the same for all versions from CS and up.
Related Knowledge
Start by designing your logo. I’m not going to help you on this part, but I can point you in the direction of an article that will help explain the elements of design, which will give you some important things to think about. I’d also like to point out that a color scheme is very important, and I can offer up an article on a few different color pallet creating programs.
Element’s of design: Harmony & Consistency
Getting Started
Here you can see I’ve created a logo. Sure, it isn’t anything fantastic, but it’ll work for our purposes. Hopefully you’ve come up with something a little more spectacular than this. (For the record, the Happy Puffin doesn’t exist, I really did make him up just for this tutorial!)
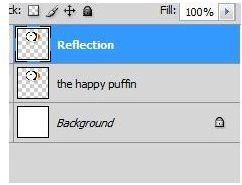
The first step is to make sure that every part of your logo is on the same layer. For me, that includes the text layer. After you do that, duplicate your layer. If you’re worried that you’ll get confused, feel free to rename the duplication layer something like “Reflection.”
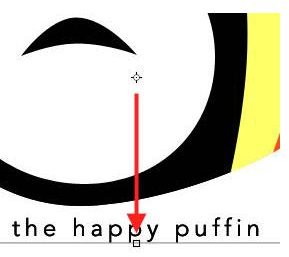
Now, press CTRL+T (Mac users: CMD+D) to bring up the free transform box. Grab the cross-hair in the center of the image and pull it down to the bottom center box on the free transform line. See the picture below for a helpful example.
Now, simply rotate your image 180 degrees. (By the way, you can do this by right clicking on the image and selecting “Rotate 180 degrees.”)
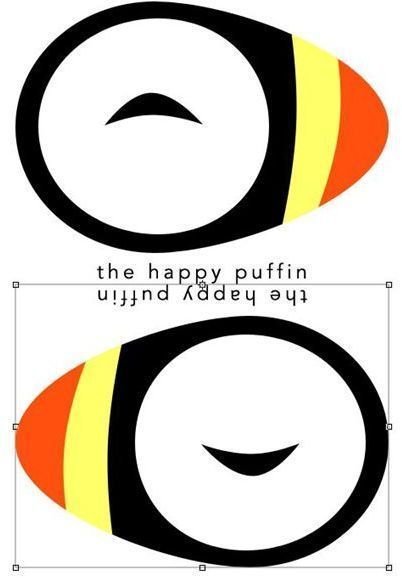
Oh no! He’s backwards! That’s easily enough fixed, though. Now just right click and select “Flip Horizontal.”
Half way there!
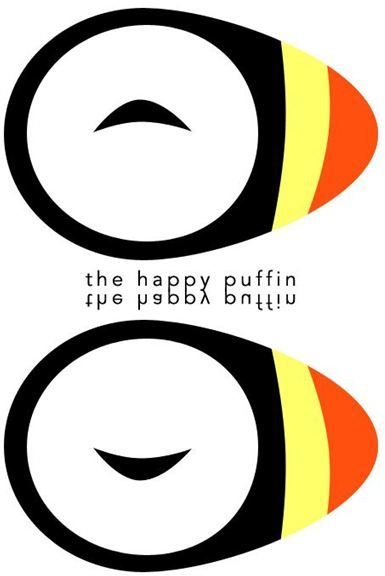
Now you have a non-faded reflection of your logo! Simple enough, right? Feel free to move your reflection up or down to get the right distance. I moved mine a few pixels upwards so the tails of the Ys were touching. Now, feel free to save your progress so far and get yourself a cup of coffee, the next part can be slightly tricky!
Get your cup of coffee? Good! Now, we’re going to do a crash-course in Layer Masks. I actually have written an article called “Using the Masking Tool ” that teaches you a little about masking, so it’s probably a good idea to read up on that first. If you are proficient in Photoshop and just want a basic explanation here’s what layer masking is about:
Layer Masking: A Crash Course
Layer masking allows you to create a new layer that can easily be hidden or shown by either adding the color black or white to the canvas. The more black on the canvas, the less of the effect you’ll get. The more white, the more of the effect. The most useful thing this can be used for is simple recoloring, as well as quick opacity changes. Confused? Don’t worry, you’ll get it once you see how this plays out!
Fading out Your Reflection in Photoshop
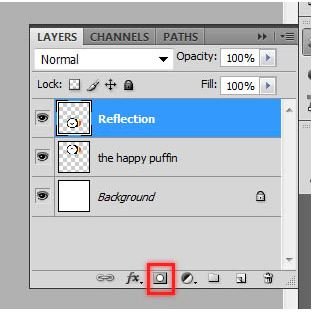
Make sure that your reflection layer is selected, and in your layer panel, click the “add layer mask” button. See the image below to see what it looks like:
After you click it, you’ll see something like this:

Now grab your gradient tool, and set it to white-to-black linear gradient.

Now, starting at the very top of your reflection, drag your gradient line straight down to the very bottom of it. It’ll look something like this!
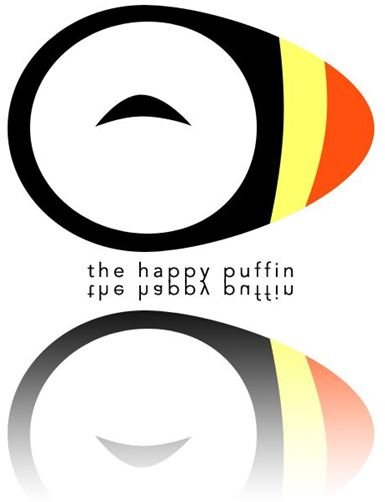
I personally think that is still a bit too much, so I like to turn down the layer opacity to about 30%, but this will largely depend on what size your logo is. Play around with it to see what you can come up with! Here’s the finished result: