“Ma, what’s in this picture?” Without captions, readers are left guessing, so if you don’t know how to add a caption in Publisher 2010, you may be doing your readers a disservice. Learn how 6to add captions in MS Publisher 2010 through a simple step-by-step illustrated process.
Laying the Foundation with Microsoft Publisher 2010
Publisher 2010 is the latest release of the popular Microsoft desktop publishing platform. Although many designers still prefer more sophisticated software for their work, more professionals are adopting the program as it evolves into a full featured solution.
To follow along with this Microsoft Publisher 2010 tutorial, you will need a computer that meets the minimum system requirements of Microsoft Publisher. You may be able to follow along with an older version of the software, but you may notice that the user experience has changed somewhat within the new version. Also the ability to add captions and the caption gallery are new to Publisher 2010, so you will probably benefit the most from this article if you have access to the latest version.
If you do not have Microsoft Publisher 2010 , you may download it free from the Microsoft Office Web site . This is an evaluation version that will give you a good way to decide if you want to spend the money to upgrade.
Add a Caption in Publisher 2010
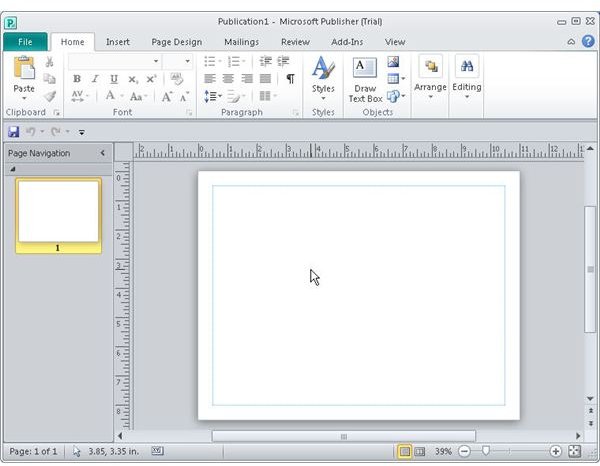
To get started adding captions to images in Microsoft Publisher, open the program and create a blank document.
That was easy, wasn’t it? Now, let’s add an image to the layout. Click “Insert” on the main menu to get the “Insert” ribbon. Next, find the “Illustrations” section.
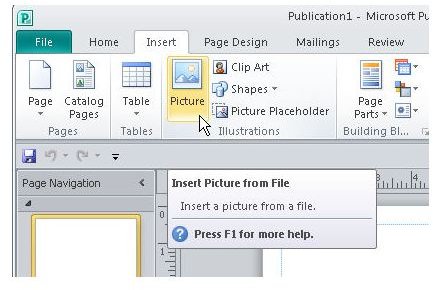
Here you can add a placeholder, a shape, a clip art image, or a picture. Click “Picture.” You will see the “Insert Picture” window open. Browse to the location where you have a picture to insert and then click the “Insert” button.

Now you will see that your image has been placed inside your publication. A new section of the ribbon, “Picture Tools,” has also opened automatically.
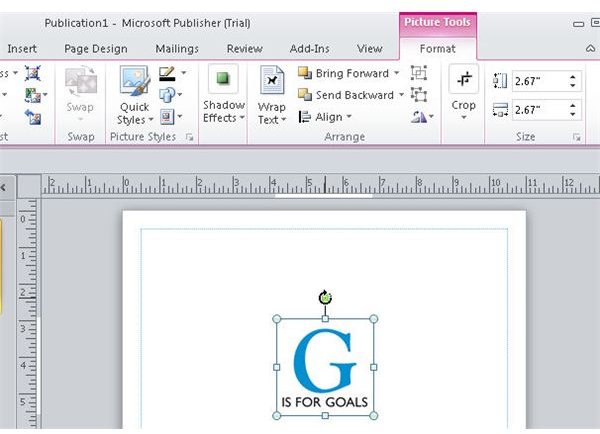
Now, look for the section called “Picture styles.” You can mouse over the control at the lower right corner of the section to open the “Format Shape” dialog to get a lot more options visible at once, but you don’t have to do that now. What you want to do is mouseover the “caption” option. As you move your mouse over the icons in this section, a flag will come out to identify it for you (as seen in the image below).
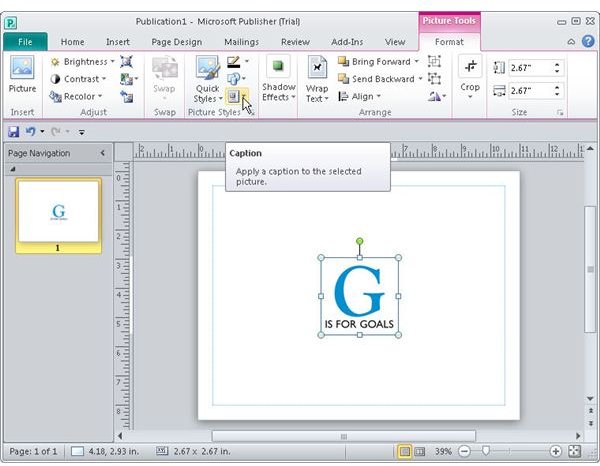
Next, Click the “Captions” icon. You will see the caption gallery break out, showing you options such as “No Caption,” “Formatted,” “Overlay,” and “Simple.”
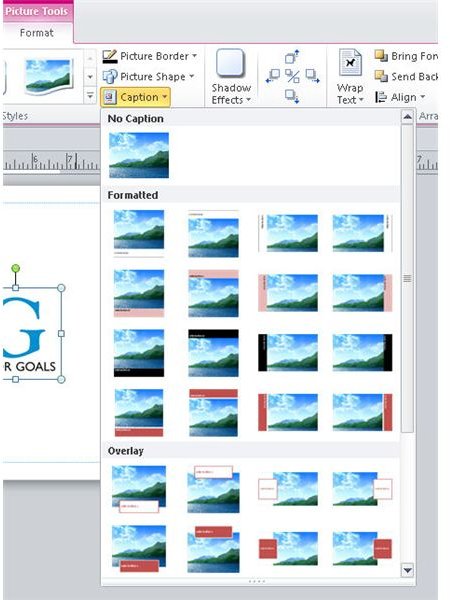
For this Publisher 2010 tutorial , we chose the Overlay “Box - Layout 1” caption format by clicking on its thumbnail. You can choose the one that you like best.
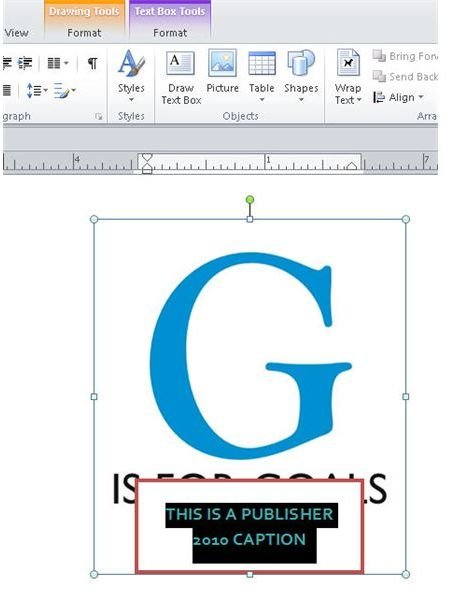
You can format the text and use the “Text Box Tools” and “Drawing Tools” to customize your caption as you see fit.
Wrapping It Up
Now that you know add a caption in Publisher 2010, make sure you try all the options so you know how they all work. For example, in this tutorial, the “Overlay” option may not have been the best caption to choose since it obscures some text that is in the image.
Image Credits: Screen shots taken by Bruce Tyson
Image Credit: Wikimedia Commons/ Kfuot001


