Inkscape patterns make it easy to use a creative fill in a variety of scenarios as you use Inkscape for your creative design. Learn about designing Inkscape patterns here and how to apply them as fill or as seamless backgrounds.
Getting Started with Inkscape Patterns
This Inkscape tutorial uses the inkscape version 0.48. You can download the latest version by going to the Inkscape website . Although this tutorial uses the Windows version of Inkscape, users of the Macintosh version of the software should be able to follow along.
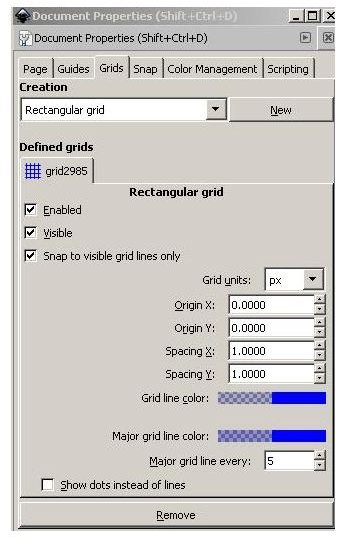
Although you are not required to use the latest version of Inkscape, it is important to note that the ability to use stock patterns is available only in Inkscape version 0.46 and above.
Designing Inkscape Patterns for Backgrounds
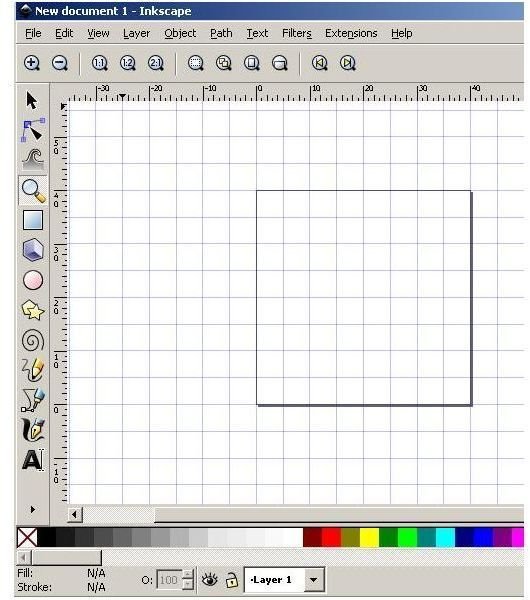
To design Inkscape patterns for backgrounds, open Inkscape and create a new 40 x 40 canvas. You can change the size of your document by pressing
You should now have a nice 40 x 40 square area to use for your pattern.
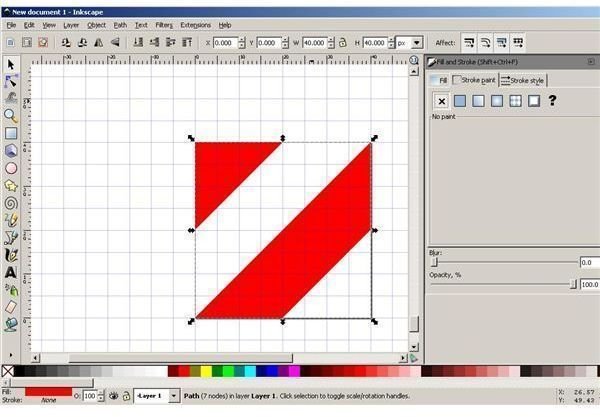
Grab the pen (Bezier) tool and draw your pattern. For this particular pattern, start by drawing a triangle originating from the top left corner (coordinates 0,40) and 20 pixels down and twenty pixels to the right.
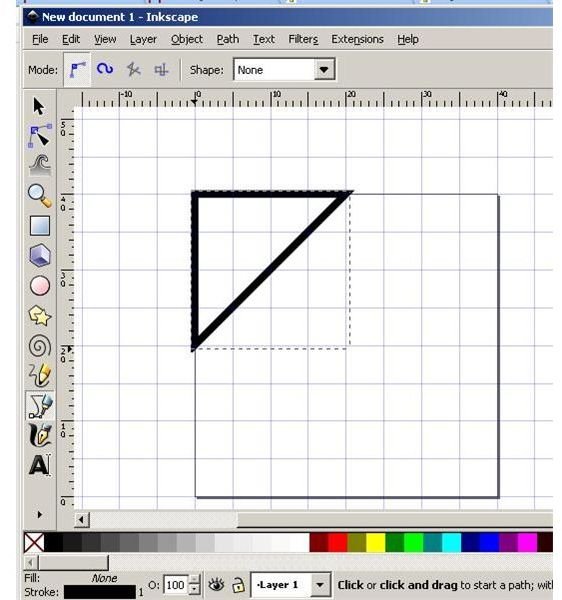
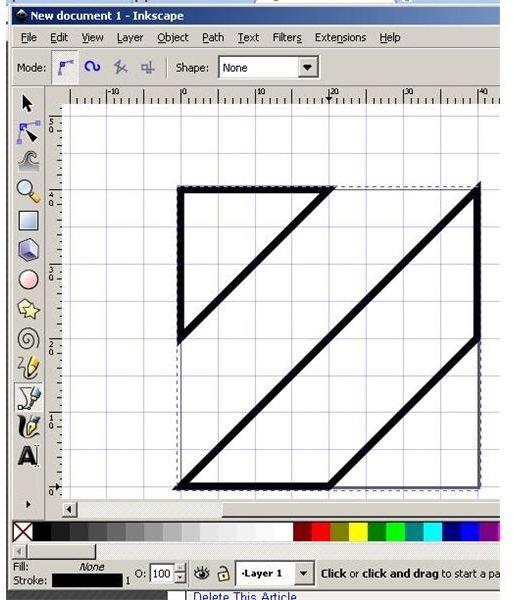
Go to the bottom right corner, move to the left 20 pixels and draw a diagonal from there to 0 pixels up the right side of your image. Bring your pen all the way to the upper right corner, back down to the lower right corner and then close the path at the point of origin. Your pattern should now look like the next image.
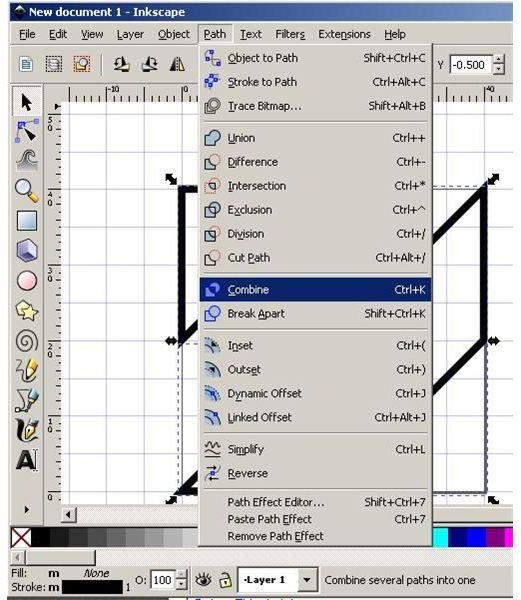
Select both of the shapes you just made by holding the Shift key down while clicking each with the selection tool. Combine them by clicking Path on the main menu and then choosing the Combine option.
Add color to your pattern. Select the object and click Object on the main menu, followed by Fill and Stroke. You may have to resize your window once the Fill and Stroke window opens.
Choose your fill color on the Fill tab and then turn off the stroke on the Stroke tab.
Save your work, because you have just created your first of many Inkscape patterns.
Using Inkscape Patterns for Fill
You probably know that a bug used to make creating your own stock patterns a tricky proposal unless your image was surrounded by white. With the latest and greatest 0.48 version of Inkscape, you will see that the problem is gone, so let’s make this background pattern a fill pattern right now.
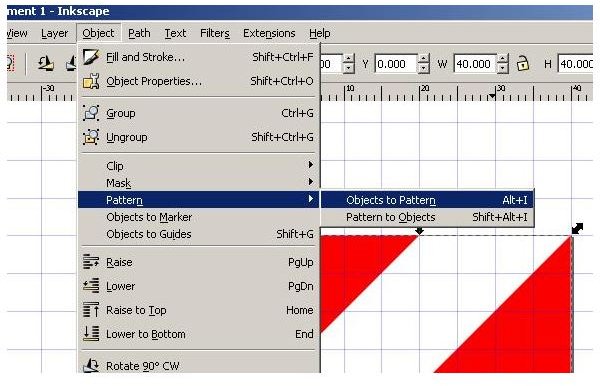
Click Object on the main menu and then choose Pattern and then Object to Pattern from your menu options.
You can now use your pattern to fill other objects by selecting the Pattern option on the Fill tab.
Image Credits: Screen shots taken by Bruce Tyson


