If you are attempting to print a publication you created using MS Publisher but are experiencing problems, you are not alone. Learn ways to correct common Microsoft Publisher printing issues, such as printing bleeds or the inability to print multiple pages.
Is Your Publisher Document Not Printing Right?
If you are experiencing problems when trying to print a publication from MS Publisher, there are a number of possible causes. Fortunately, the fixes for common Microsoft Publisher printer issues are typically simple. Troubleshooting will help you determine the problem and solution.
Check Your Printer
Troubleshooting your printer before you begin to look at your Publisher settings and selections is advisable. Check to be sure all of the printer’s connections are secure. Try to print a test page. Click Start and select Printers and Faxes or Devices and Printers. Right-click the printer on which you are trying to print and select Printer Properties. Click the Print Test Page on the General tab. If it prints, you can assume the problem is within Microsoft Publisher. If the test page does not print, continue to troubleshoot your printer .
Printing Bleeds
When the colors or graphics of your publication spread to the edges of the page, leaving no margin around it, this is called the page bleed . If your bleeds do not print and you are using Publisher 2003 or 2007, make sure you have set it to allow bleeds. Go to the File menu and select Print. Click Advanced Print Settings and go to the Page Settings tab. Select Allow Bleed Marks under Bleeds and click OK. If your bleeds still do not print, go to the File menu and select Page Setup. Go to the Layout tab and check the page size. Go to the Printer and Paper tab of the Page Setup dialog box. Click the printer driver you want to use. Select a paper size in the Size list that is larger than the size shown on the Layout tab. Make sure the proper page orientation is selected and click OK.
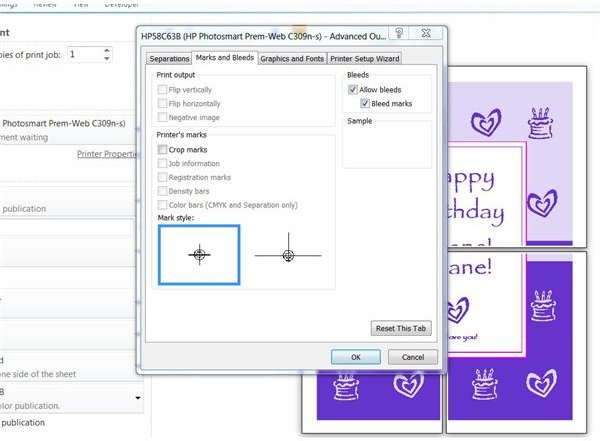
If you are using Publisher 2010 and your bleeds do not print, make sure you have set it to allow bleeds. Go to the File tab and click Print. Click the Printer dropdown and select Advanced Output Settings at the bottom of the printer list. Go to the Marks and Bleeds tab. Select Allow Bleeds and Bleed Marks. Click OK. If your bleeds still do not print, go to the Page Design tab and click the dialog launcher in the lower right corner of the Page Setup group. Note the height and width of the page size and close the dialog box. Go to the File tab and click Print. Make sure the printer you want to use is selected. Make sure the paper size is larger than the size on the Page Setup dialog. If it is not, select a larger page size.
Printing Multiple Pages and Copies
If you want to print several copies of the same page or pages in Publisher 2003 or 2007, go to the File menu and click Print. Change the number in the Number of Copies box to the number of copies of each page you wish to print. In Publisher 2010, go to the File tab, click Print and change the number in the Copies of Print Job box.
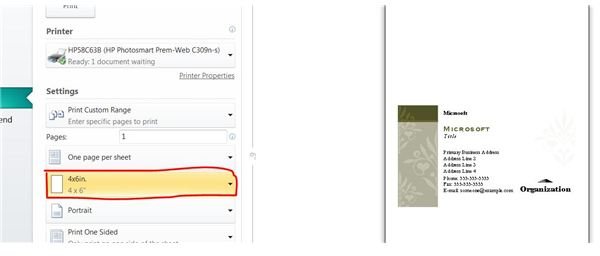
For certain types of publications, Publisher displays a single copy on your screen but prints multiple copies per page. For instance, if you are creating business cards, you will only have to design and edit a single card. Yet when you print the publication you should have a page filled with several of the cards.
If multiple copies of the item are not printing in Publisher 2003 or 2007, go to the File menu and select Print. Go to the Publication and Paper Settings tab and select Multiple copies per sheet. In Publisher 2010, go to the File tab and click Print. Select Multiple Copies per Sheet under Pages.
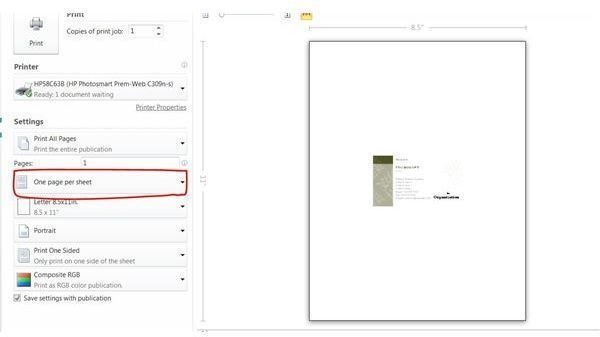
If you only want a single copy to print, simply select One Page per Sheet. This will give you a single object centered on the page.
Printing on the Correct Paper Size
If your publication is not printing properly on the page, you may need to change the paper size selected.
In Publisher 2003, go to the File menu and select Page Setup. Go to the Printer and Paper tab. Change the size in the Size box under Paper to the correct paper size.
In Publisher 2007, go to the File menu and select Print Setup. Change the size in the Size box under Paper to the correct paper size.
In Publisher 2010, go to the File tab and click Print. Select the correct paper size in the Usable Paper Sizes list under Pages.
The page sizes listed will vary depending on your printer’s abilities.


