This Adobe InDesign tutorial shows you how to desaturate images in InDesign by taking you through a step-by-step demonstration illustrated by screenshots. The ability to desaturate images in InDesign is one more powerful reason that Adobe InDesign is the preferred publishing platform on the market.
Getting Started
This Adobe InDesign tutorial presents how to desaturate images in InDesign using Adobe InDesign CS4 running on Windows 7 Ultimate (32 bit). Although you may have a different version of either the program or operating systems, you should be able to follow along as long as your computer meets the minimum system requirements for Adobe InDesign.
The removal of color information from an image is called desaturation. When desaturated, an image may be black and white, or if the image is partially desaturated to reduce the prominence of certain colors. Adobe Photoshop has built-in desaturation functions, but Adobe InDesign does not. Still, you can desaturate images in InDesign without requiring Photoshop. Here is how to do it
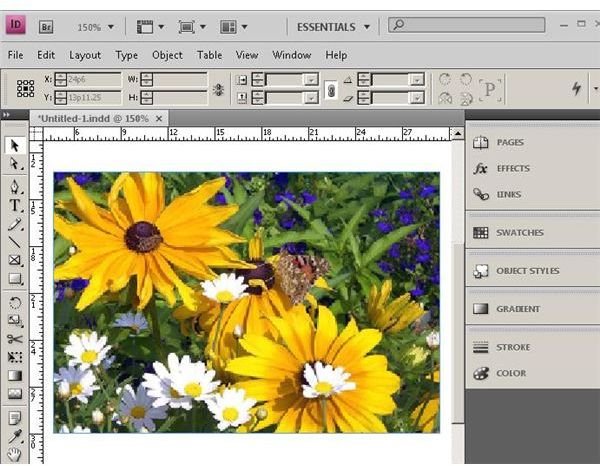
Create a new Adobe InDesign layout and place an image. This will be used as a demonstration of how to desaturate images in InDesign.
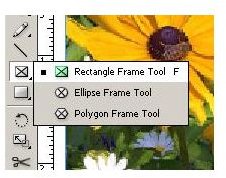
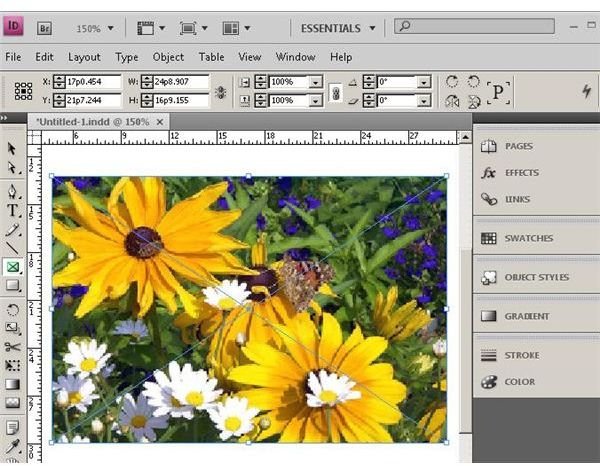
Next, grab the “Rectangular Frame Tool” from the toolbox and then draw a frame over the image and of the same size as the image.
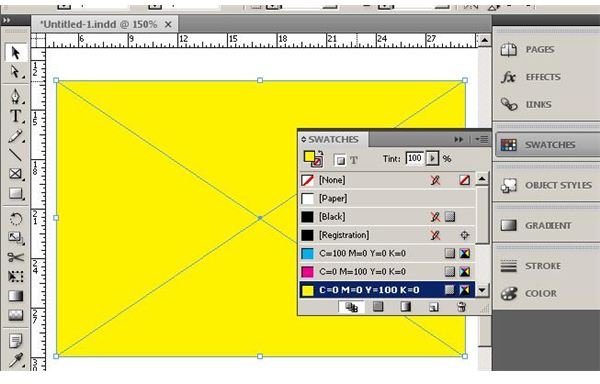
The next step you need to do in order to desaturate images in InDesign is to fill the frame with a solid color. This seems to work best when you use the “Swatch” panel to do this.
With the solid colored frame above the image selected, open the the “Effects” window and set the blending for the frame to “Hue.”
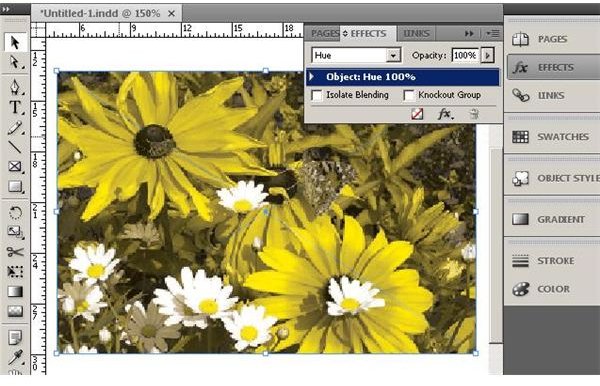
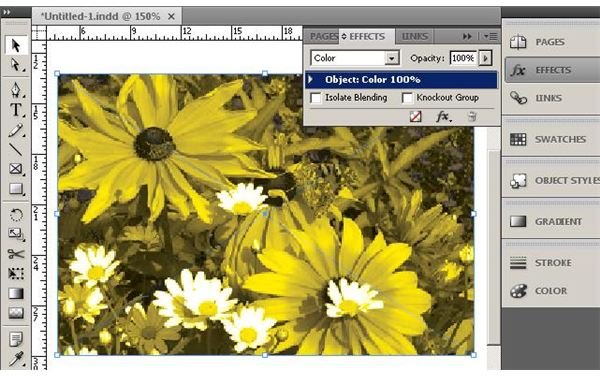
The “Hue” blending retains the original luminosity and saturation from the placed image, so you will notice that the most affected areas in the frame are the ones that have the most color. You can change the blending mode to “Color” for a more uniform effect. This setting keeps the luminosity of the original only because the “Color” blend affects both hue and saturation.
Moving along, you now should change the blending mode to “Saturate.” Depending on your choice of blending color, this might not look much different from the original.

Finally, return to the “Swatches” panel and adjust the tint. You will see that you are now in full control as you desaturate images in InDesign. Just select the level of desaturation you want. In this example, the image is completely desaturated.
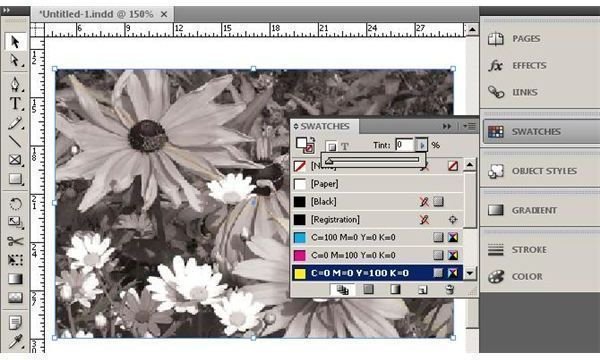
Image Credit: Wikimedia Commons/Uwe H. Friese
Image Credits: Screenshots taken by Bruce Tyson
Wrap-up: Desaturate Images in InDesign
This Adobe InDesign tutorial showed you how to change the saturation of an image in Adobe InDesign. Even though the program does not provide a filter effect for this as Photoshop does, you have learned that you do not have to change programs to desaturate images in InDesign. This not only saves you the time and hassle of opening your images in Photoshop; it gives you complete control over the process.


