This Inkscape tutorial shows users of the premier open source vector graphics program how to use the bezier tool (also known as the “pen” tool) to create bezier curves in support of a variety of art forms. Follow the instructions and reference the screenshots and you will be drawing bezier curves.
What is a Bezier Curve?
A bezier curve is a curved path that can be infinitely scaled and still appear smooth. Rather than a construction that relies on end point derivations, bezier curves depend on control points for their definition. This type of curve was brought into the field of computer graphics by Pierre Bezier, a French engineer.
Because of the scalability, bezier curves are preferred for drawing in vector graphics programs such as Adobe Illustrator and Inkscape . This tutorial discusses Inkscape bezier curve capabilities.
Getting Started
This tutorial requires that you have Inkscape installed on your computer (preferably the latest version). The demonstration found here was performed with Inkscape version 0.47 running on Windows 7 Ultimate (32 bit). Users with other versions of Inkscape should be able to follow along with the steps presented here, even if using a different operating system.
Users who do not have Inkscape installed may download it for free by visiting Inkscape.org . Versions of this program are available for Linus, OSX (Mac), and Windows.
In Inkscape, drawing bezier curve artwork is a powerful capability that allows users to create scalable graphics with a tool that is deceptively simple.
Drawing a Bezier Curve in Inkscape
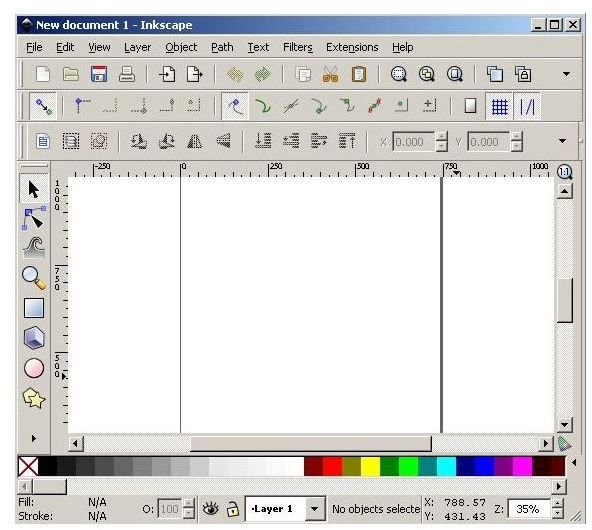
Begin by opening Inkscape and creating a new document. (Click any image for a larger view.)
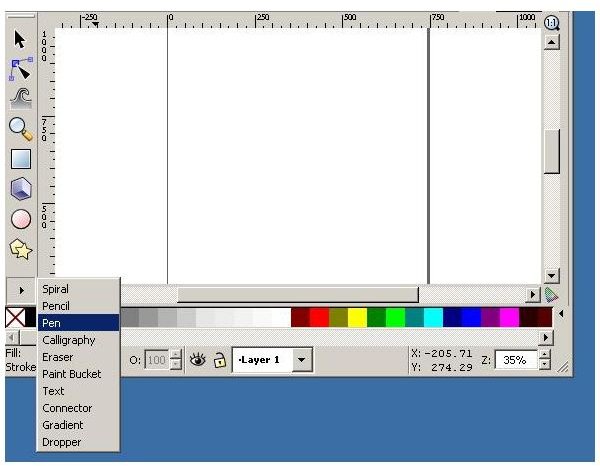
In the toolbox area, click on the “Pen” tool. If you do not see the “Pen” tool, click the flyout arrow at the bottom of the panel.
In the top left corner of the workspace, you will see the “Pen” tool modes: from left to right the options are “Create regular Bezier path,” “Create spiro path,” “Create a sequence of straight line segments,” “Create a sequence of paraxial line segments.”

Select the “Create regular Bezier path” option (usually, this is the default selection).
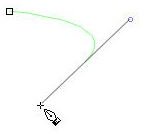
In the Inkscape workspace, click with the left mouse button. This creates the first point of your Bezier curve.
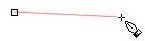
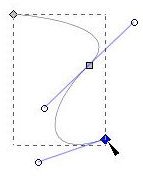
Now, move the cursor to the location of your next endpoint and left-click-and-hold. You will see the curve control point appear. Before releasing the mouse, set this part of the curve the way you want it to look.
Now, place the cursor at your final end point on the Inkspace workspace. Wjhen you click, be sure to hold the cursor down so you can set your curve.
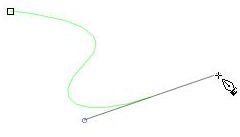
Press the enter key when you are done in Inkscape drawing bezier curves.
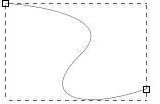
To edit your curve, select the “Select and transform objects” tool (it looks like an arrow) from the toolbox. Mouse over your curve until you get a four-arrow cursor.
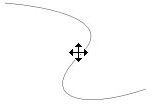
Now, double click your curve and you will have controls to adjust both of your curves. You will see a narrow arrow cursor that you can use to click-hold-and-drag the ends of the controls to modify your curves as necessary.
You now know how to draw a bezier curve in Inkscape. This technique is powerful, yet fairly straightforward.
Image Credits: Screenshots taken by Bruce Tyson.


